System Settings — Part 5
General Page (cont’d.)
Welcome back!
Last time we started to look at the General Page of System Settings. Today, we continue from where we left off.
Support Coverage
This section has a single row titled AppleCare & Warranty. It shows all devices connected to your Apple ID and selected Bluetooth-paired devices (such as earbuds). It is divided into This Device and More Devices. There is a chevron next to each product that can be tapped to access support options for the selected device.
If you, like me, bought your Mac as an Educational device, but waited to register your AppleCare+ until after receiving the Mac, know that macOS cannot know your EDU status. When trying to purchase AppleCare+, it will propose you the ordinary price. I had to call support, which bounced me to three different advisors before finally being able to book a call with an Italian expert from Dublin (AppleCare HQ for Europe). He was able to manage everything in a breeze, and it was among the best customer service experiences I have ever had. During the call, he also explained that, after the initial 3 years of coverage, I will be able to extend it for another 2 years—opinion on this varied wildly until then.
Localisation
Language & Region
The first row of this section is called Language & Region and allows you to set up a list of Preferred Languages alongside managing regional units. I set up the Gregorian calendar, temperature to Celsius (°C), and the measurement system to Metric. My preferred first day of the week is Monday, but macOS gives the possibility to have any of them. I changed the date format to DD.MM.YYYY.
Below this is the outstanding feature called Live Text, which allows you to select text in images to copy or to perform other actions with it. It was already ON by default.
It is possible to set specific languages for certain applications. This may prove very useful.
The Tranlation Languages… button allows to download certain languages on the device to speed up translation. Sadly, most translations which do not have English as the destination language are poor in quality, something that I hope they will soon improve.
Date & Time
On this second page, I left everything as I found it.

I was surprised not to find any option for showing seconds in the menu bar. It will be found in the Control Centre page.
File management
Sharing
For now, I’ve kept all this page switched off. As the saying goes: if you don’t know what it does, then you don’t need it. Since learning and sharing is why I do everything I do, let’s dig further into what this is all about. There are three main categories: Content & Media, Accessories & Internet, and Advanced. In the first category we find:
- File Sharing allows other users to access shared folders on this computer and allows administrators to access all volumes. With the advent of AirDrop, I’ve never found the need to share files on the network, possibly also because of how little I trust my network provider(s).
- Media Sharing basically transforms your Mac into a media hub for your household. Now that I think of it, I could put my whole music library locally on the old Mac and use it as a streaming source.
- Screen Sharing allows users of other computers to remotely view and control this computer. This is something to read carefully again because turning this ON lets others control your Mac. Sure, you can set up a password and set anyone to ask permissions, but please be careful with what you do.
- Content Caching reduces bandwidth usage and speeds up installation on supported devices by storing software updates, applications and other content on this computer. This is great if you have several Macs that all need to be updated to the same macOS version. Be sure to turn this ON on a Mac that has plenty of free storage. Behind the Options… button, you can set the maximum size of the content cache.
The second category contains:
- Bluetooth Sharing allows you to set up your computer to share files with other Bluetooth-enabled computers and devices. I am not sure whether I understand this, since I use AirDrop for everything Bluetooth sharing. The macOS User Guide is not helpful, since pressing the Question Mark button brings you to this page, which doesn’t seem helpful.
- Printer Sharing would be useful with ethernet or USB printers, but I’ve been using AirPrint ones for about a decade.
- Internet Sharing allows you to share your connection, but I wonder who would use it, given how few people have access to a good connection nowadays.
The third category, Advanced, contains:
- Remote Management allows other users to access this computer using Apple Remote Desktop. It’s similar in concept to Screen Sharing, just more complete.
- Remote Login lets users of other computers access this computer using SSH and SFTP. I have no idea what all this means, and I prefer to live in ignorance.
- Remote Application Scripting allows Apple events sent from other computers to control applications on this Mac. I would love to learn more about scripting, and I have added it to the list of to-learn skills. All in due course.
Time Machine
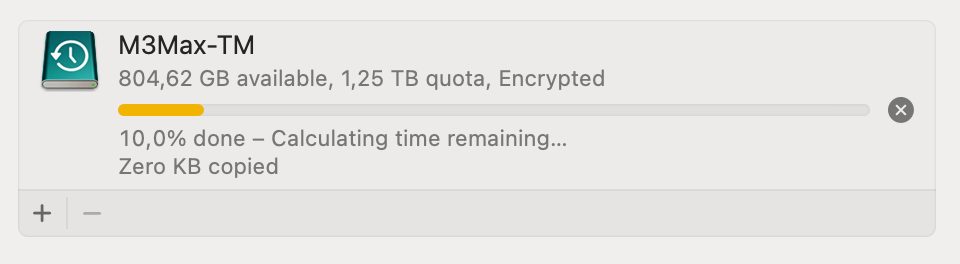
I didn’t perform a single backup until I finished configuring this new Mac, also because I didn’t have a spare drive to use. Having a 2 TB internal drive needs at least an equivalent drive for the backup, and it took me a while to get my hands on one. I then set it up with the Encrypted version and left the “Back up on battery power” option switched ON. With such a gorgeous battery and energy management of this Apple Silicon beast, it sounded good enough. There is only one problem: you cannot prevent your Mac from going to sleep when it is running on battery and its screen is turning off to save energy. Still don’t see the issue? I encourage you to try this out yourself, since macOS is advanced enough to avoid any harm coming to the backup, but let’s say you connected your backup disk and Time Machine started to perform its work. You walked away from the Mac, the display went off, and the Mac went to sleep. Upon waking it up, you would see something like this:

Or like this:

Or another one I didn’t screen grab, that was stuck to “175.086 changes found” for hours, even a whole night. Trying to eject the disk in the nice (and polite) way didn’t work, not even from Disk Utility. Trying to restart the Mac would make it stuck into a black screen, obliging me to turn it off forcefully. The good news is that, upon turning back on, there was no trace of any error, no warning of improperly ejecting the backup drive. Browsing the backup disk’s content found no trace of the attempted backup, not even in the hidden files.
Launching the backup again and preventing the Mac from sleeping completed the process in less than five minutes, with no issue whatsoever. So, my suggestion is to either perform backup only when plugged in to mains power, or to stay active at the Mac while Time Machine is running.
Transfer or Reset
This page has only two actions, both crucial: Migration Assistant and Erase All Content and Settings…. The first one is used when you want to set a new Mac up, and you want it to look and behave as similar as possible to the Mac you are using as source. Given how often I update my working machine, I have never used it. If you plan to make use of it, please read some serious guides about how it works because there are some delicate steps that can make your experience blissful or miserable. The only time I believe this could be useful to me is in case I had to restore the Data volume of this Mac. In such case, I would use a Time Machine backup to restore the Data Volume to its last available state.
The Erase All Content and Settings feature (also known as EACAS) is perfect for when you need to sell, recycle, or give away your Mac. It logs you out of all services and erases the content of the Data volume completely. The only thing you need to do then is to remove the device from the list of your devices.
Startup Disk
Last but not least is the Startup Disk, which lets you select the system you want to use to start up your computer. In most cases, it will contain only the internal drive, but if you’ve created external bootable drives, they may appear here. A word of caution: if your internal drive is dead, there is no external solution for you. Even if one chooses to boot from another source, Apple Silicon Macs always start from the internal drive and then transition the boot process to the chosen startup disk.
Bottom Line
In the next episode, we will continue our exploration of System Settings with the Appearance page. Stay tuned!
If you are interested in music notation and editorial design, please consider joining my mailing list here, I would deeply appreciate it.
I hope you found it useful. If you did, please leave a like, share it, subscribe to be notified of upcoming articles! Please share your experience setting up your Mac down in the comments, and have a great day!

One thought on “My upgrading path to Apple Silicon — Part 11”