
System Settings — Part 7
Welcome back!
Last time we quickly covered the Appearance Page of System Settings. In this episode, we will engage the Accessibility Page, which is full of options sure to make your macOS experience jump to a whole new level.
Quite a few episodes will be needed to cover everything macOS had to offer here, so brace up, we are getting started!
Accessibility Page — Part 1
When you first tap on it in the Sidebar, it presents itself as such:
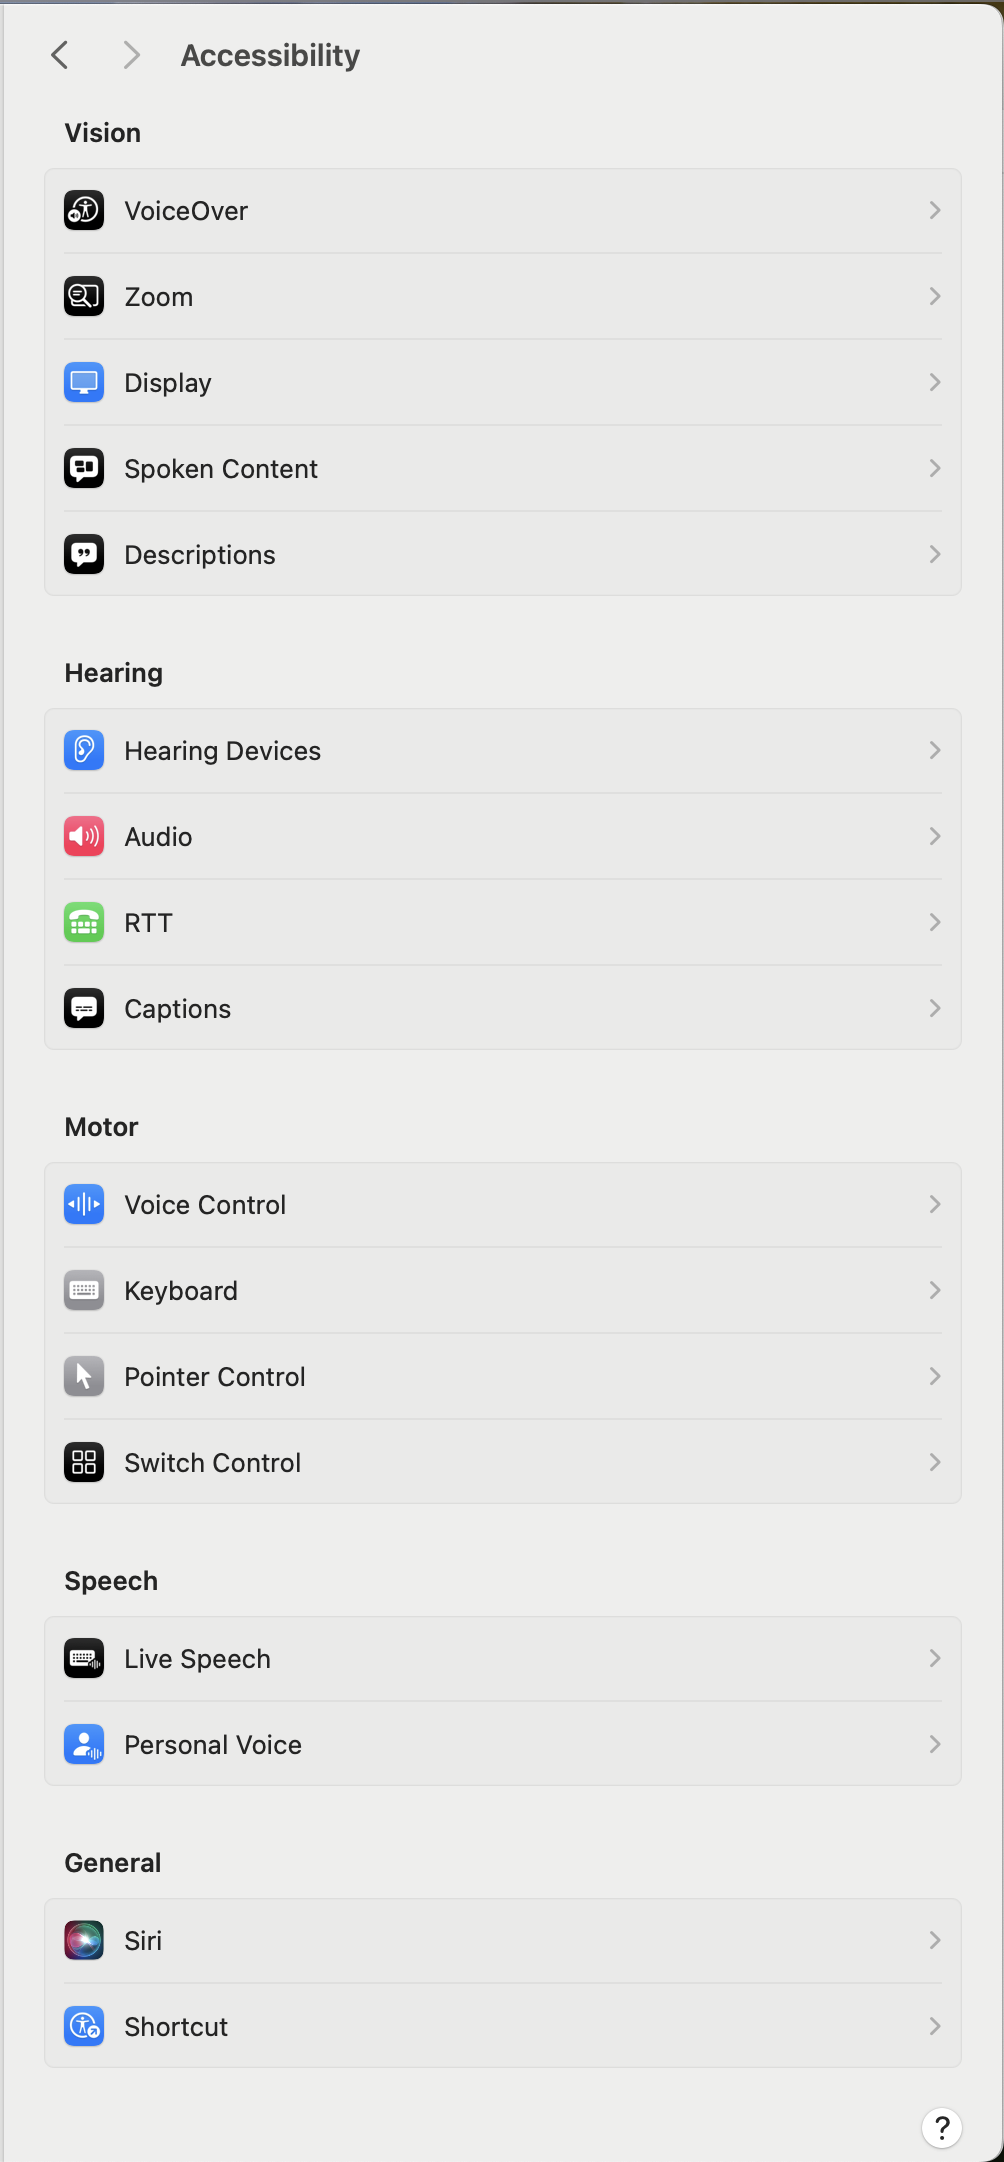
As you can see, the list is impressive, and I will split this episode into easier to read and come-back-to articles to make sure you get the most out of it.
If you recall from an earlier episode, macOS gave us the chance to set most of these options up during the global set-up of the Mac when we first turned it on. In case you tried something out and wanted to change it, or if you missed an option, here is the place to come back to.
Vision — Part 1: VoiceOver and Zoom
The first section is dedicated to everything visual, from how you perceive your screen to what is available to you if you are visually impaired. It should be said that Apple is possibly the software company that focuses most on accessibility for their users. They also recommend that every app developed by third-party entities are made fully accessible by following their Accessibility guidelines.
VoiceOver

The goal of VoiceOver is that of providing spoken and Brailled (this is new to me!) descriptions of what is happening on your computer’s screen. It then gives the user options to control the computer through the keyboard.
The switch at the top activates VoiceOver, and one can toggle it ON and OFF by holding down the Command key and quickly pressing the Touch ID button three times. For Macs without a Touch ID, it is suggested that Accessibility Shortcuts be used instead. To access them, press Fn-Option-Command-F5:
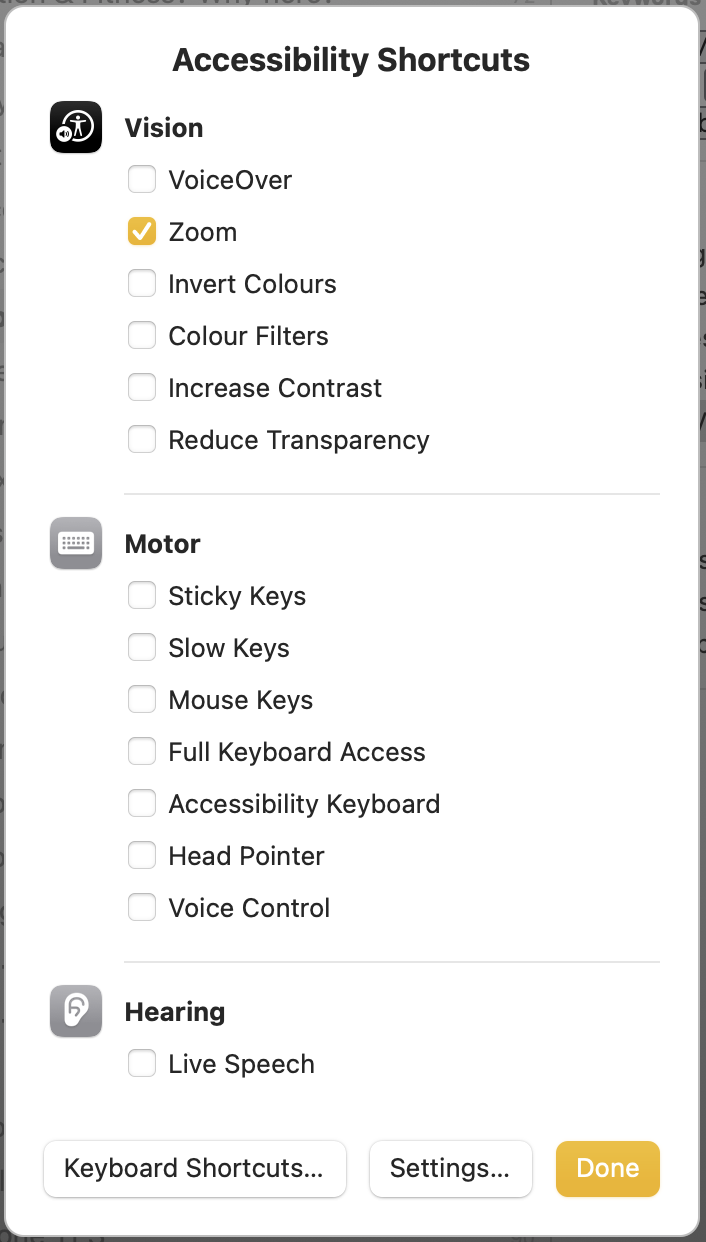
You can navigate them with the arrows and activate an option with the Spacebar.
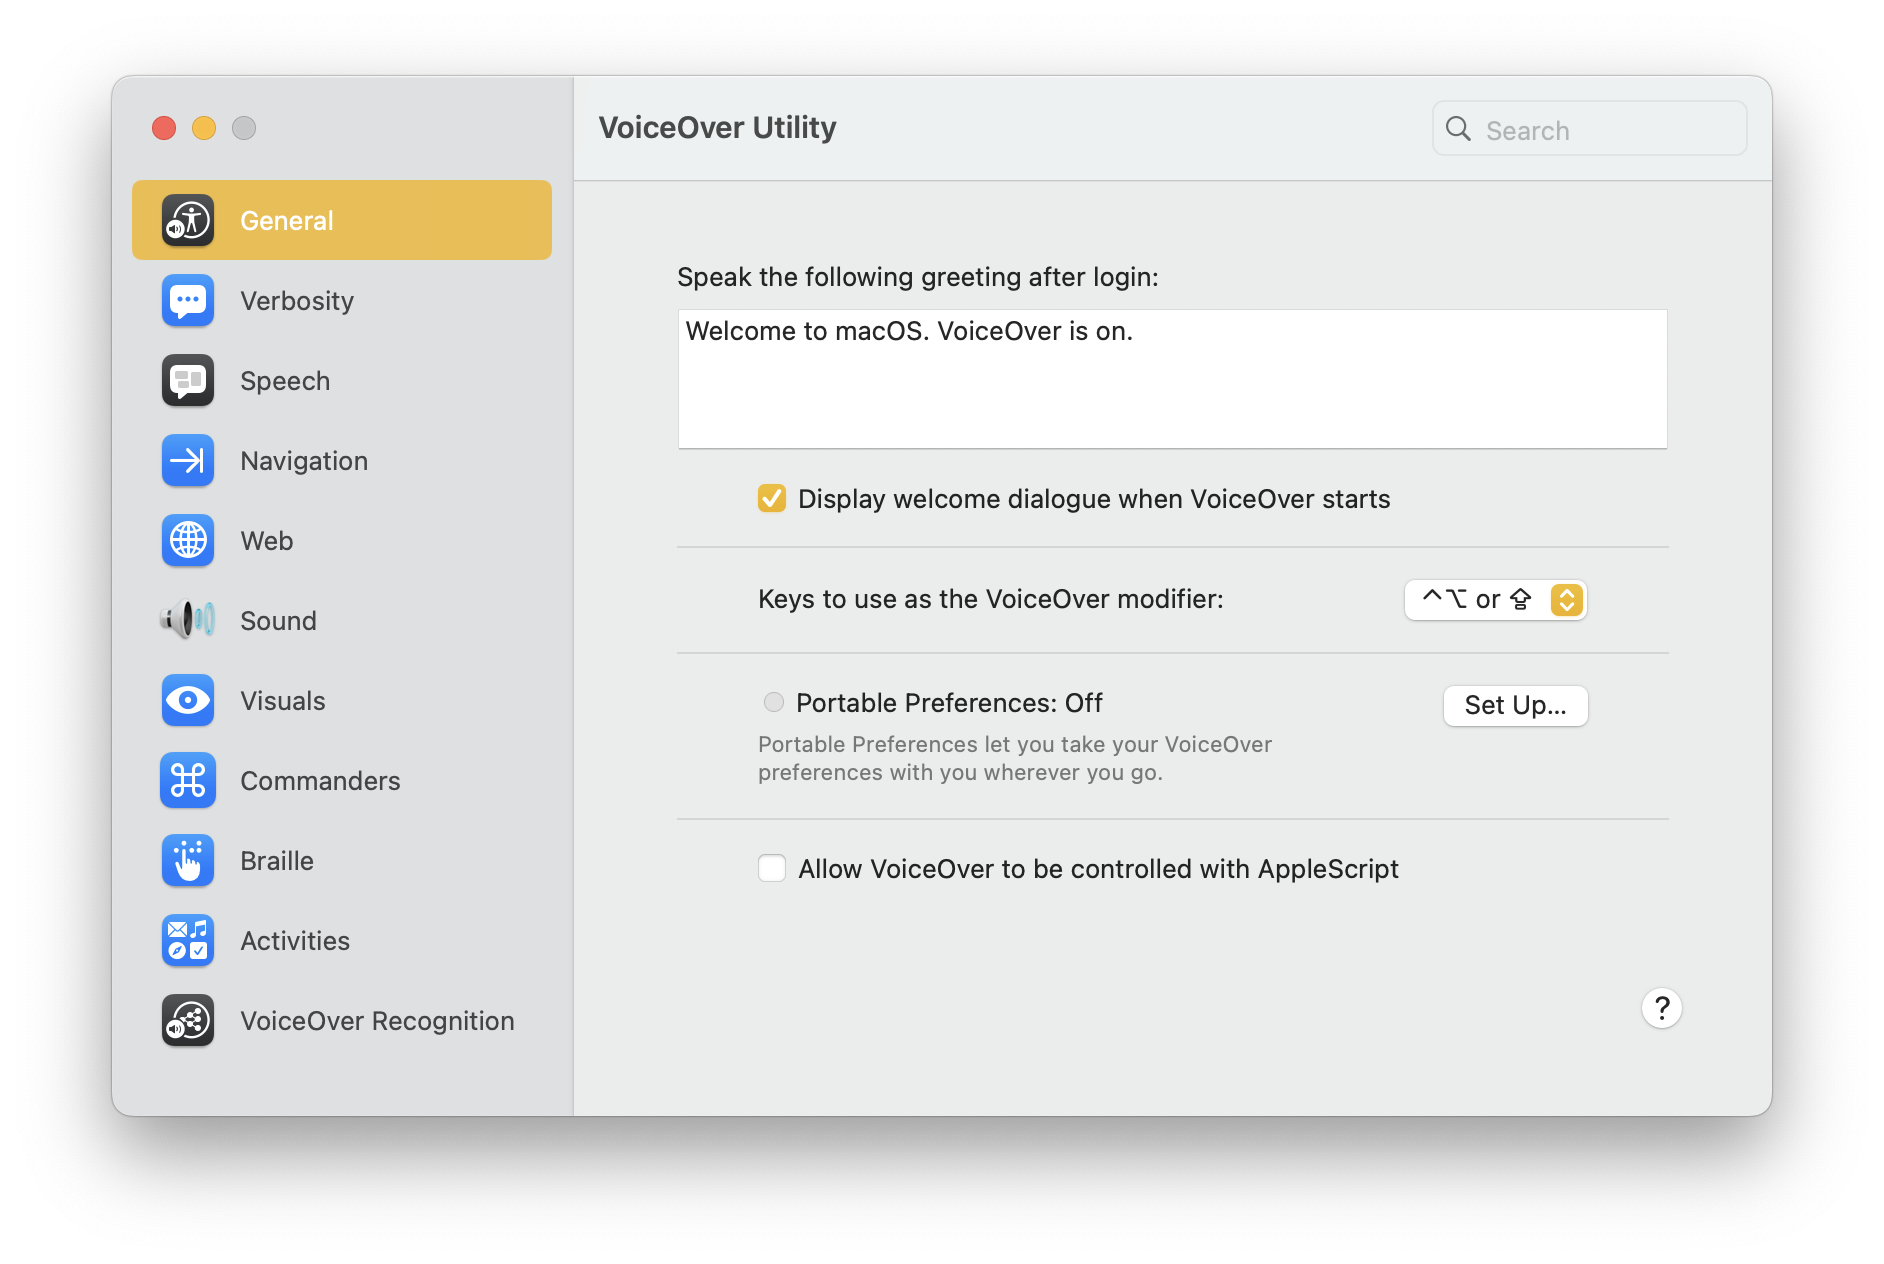
Now, please tap on the button to the right, the one saying Open VoiceOver Utility…, and spend a few moments observing in awe the details of this interface. The care spent in programming this is just mind-blowing, and knowing that it was created to help less fortunate people can only be pushing us to do better.
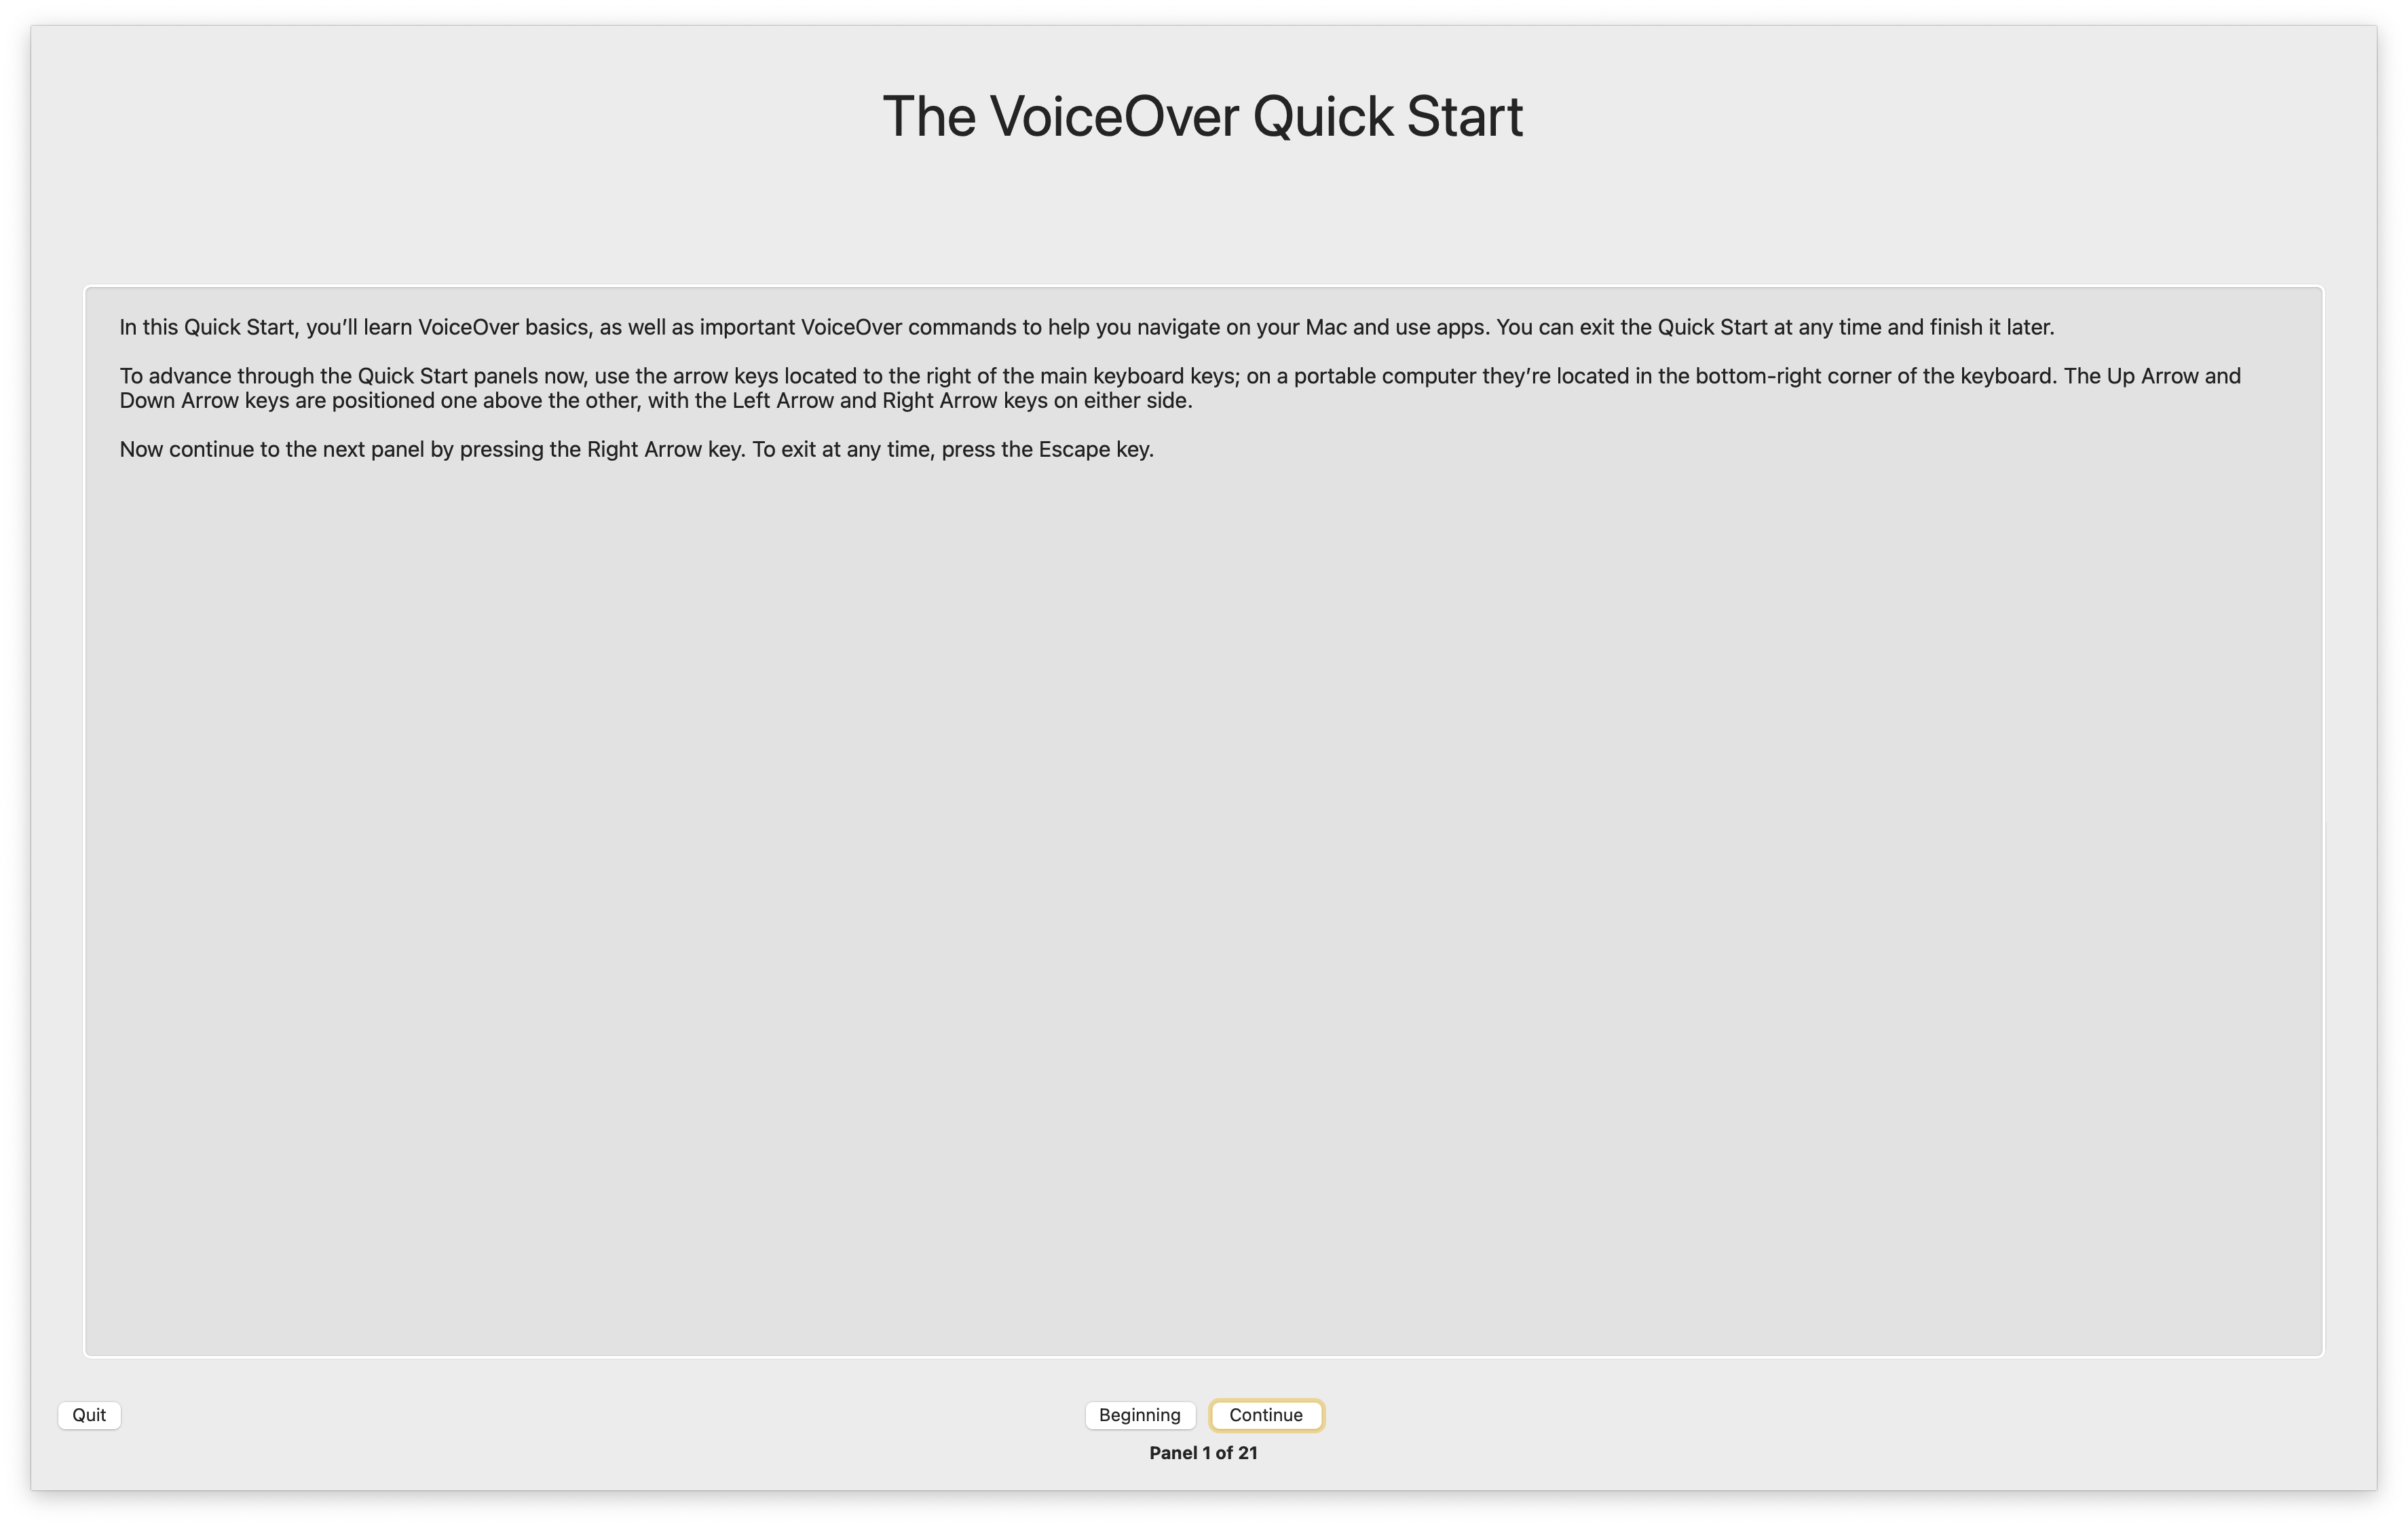
I believe this is out of scope for this article, but should you want me to do a deep dive article on VoiceOver, please let me know down in the comments and I will gladly do that. If you want to have a feeling of what it is to be sight impaired and of how great what Apple did here is, just tap on the other button that says Open VoiceOver Training…, close your eyes—or, in my case, just remove your glasses!—, and follow the instructions.
Zoom
These settings serve the purpose of making everything on the screen larger or to enlarge just the area where the pointer is located.
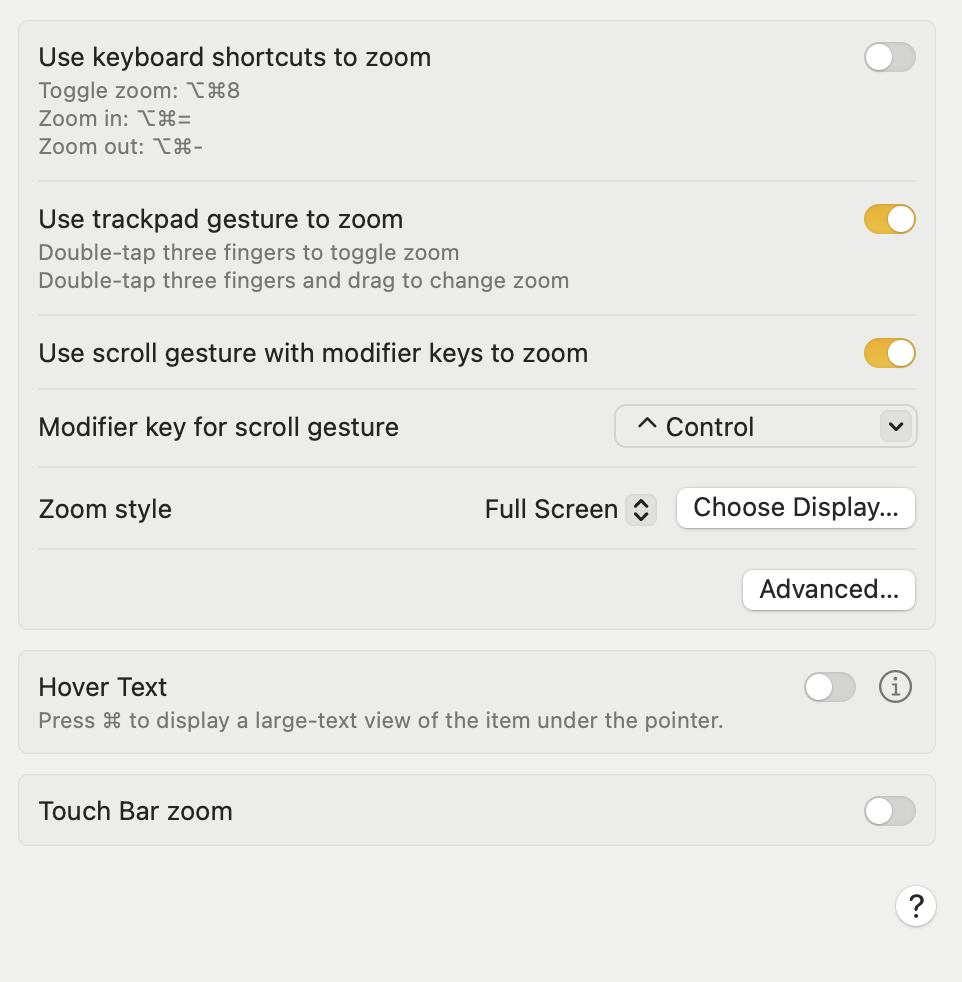
The top option is a toggle to Use keyboard shortcuts to zoom. I, personally, have too many shortcuts already to remember to add this one for a feature that I very seldom use. The next option, though, is fantastic if, like me, you use a trackpad. Let me read it for you to let you digest its awesomeness:
- Double-tap three fingers to toggle zoom
- Double-tap three fingers and drag to change zoom
The first option will immediately zoom to the area where your pointer currently is. In the picture just below, I have three-finger double-tapped where I was writing:
The second option, Use trackpad gesture to zoom, requires you to keep your fingers on the trackpad after the three-finger double-tap. Then, just move your fingers up and down the trackpad to adjust the zoom. It just feels great!
When I first configured this Mac, I had unchecked this option in favour of the one just below, Use scroll gesture with modifier keys to zoom, but while I am writing this, the first one feels so much more natural that it has now become a no-brainer choice to me. If you still want to go for the scroll gesture with modifier key, just use the dropdown menu next to Modifier key for scroll gesture to choose your key.
Just below that there is an option for Zoom style; the dropdown menu lets you decide between Full Screen, Split Screen, and Picture-in-Picture. For the Full Screen option, the button to the right reads Choose Display…, allowing you to pick a secondary display where to show the zoom onto if you have one. If you don’t, it will show on the main display. The Split Screen option changes the button to Size and Location… and, upon clicking on it, you get a preview of where the zoom will happen with a big OK button in the middle. You get a choice of top, bottom, left, and right, and you can drag the area to resize it. Finally, the Picture-in-Picture mode’s button allows you to set up the rectangle area that will be zoomed and its size. For now, I have stayed with the Full Screen, but my second choice would certainly be the Picture-in-Picture one.
Just below that, you have the Advanced… button. Click on it and be ready for what’s coming next:

The number of options here is just unreal! There are five main areas: Appearance, Controls, Follow Focus, Shortcuts, and Modifiers for Temporary Actions. The Appearance section allows you to govern how the zoomed image moves—whether following the pointer or when the pointer reaches the edge of the area; to restore the zoom factor on macOS startup (default OFF); to smooth images (default ON), to flash screen when you are zooming and a notification appears outside the zoom area (default OFF); to disable Universal Control—the feature allowing to control more Apple devices with the same keyboard and mouse/trackpad) while zoomed in (default OFF); and to zoom each display independently (default ON).
The Controls section contains fine-tuning settings that allow you to use keyboard shortcuts to adjust the zoom window when in split screen or picture-in-picture mode (default OFF).

Just below are two sliders for setting the range for rapid zooming in and out.
The next section, Follow Focus, determines whether the zoom follows where the user is currently typing, with options for Never, Always, and When typing. For now, I have left it to “Never” because I do not use the Zoom feature often enough. Next is an option to move the screen image when the item in focus is either near the screen edge (the default), or off-centre, or on the screen edge.
Should the focus item be out of view, the next option lets you choose how much to move the screen image: so that the focus item is centred or just enough to make the focus item visible. Just below that, there is a cute turtle to bunny slider to manage the zoom window’s movement speed (defaults to maximum).
The following options allow you to use a keyboard shortcut to manage specific conditions:
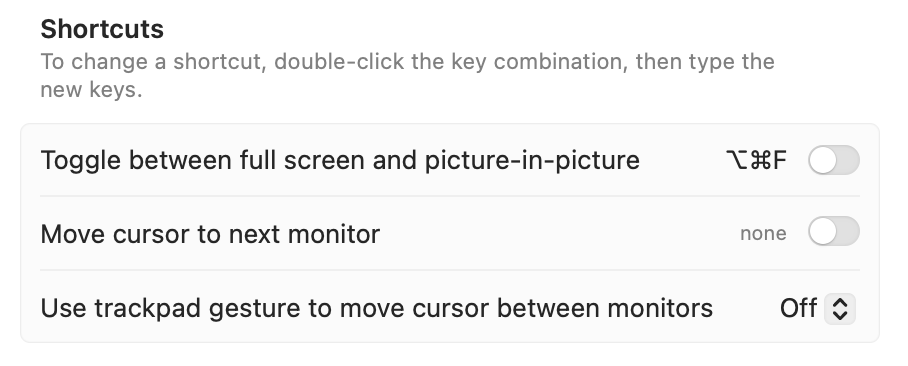
The options for trackpad gestures are a swipe with three, four, or five fingers.
Finally, one can use modifiers for temporary actions such as:
- toggling zoom with Ctrl-Option;
- detaching the zoom view from the pointer with Ctrl-Command;
- disabling panning (unset by default)
A button titled Restore shortcuts and modifiers just below allows you to come back to the defaults.
The last two options for the Zoom sub-page are Hover Text and Touch Bar zoom. This last option is doomed to disappear in future macOS versions, as soon as the M2 13-inch MacBook Pro is no longer supported by the macOS (at least 5 years from now, if not more?). Basically, it displays a zoomed version of the Touch Bar on the Mac’s display.
The Hover Text option displays a large-text view of the item under the pointer when you hover over it and keep the Cmd key held down. Upon first configuration I had switched this ON, but it seems more addressed to people using few to no third-party apps, since it doesn’t always integrate well with other applications’ shortcuts. The ‘info’ button next to the toggle lets you manage all possible options, including changing the activation modifier and getting the chance to triple-press the modifier to set it to active or inactive. Cool!

Bottom Line
The Vision section has already proven much longer and detailed than what I expected, so I am pausing here, shortly after the 1500 words mark. I will resume from here the next time.
Thank you for reading this—at least for me—fascinating episode. In the next one, we will continue our exploration of the Vision section in the Accessibility page of macOS’s System Settings. I am having a ludicrous amount of fun learning about these things and writing about them, and I hope this is proving enjoyable for you too.
If you are interested in music notation and editorial design, please consider joining my mailing list here, or browse my website to see what I do in general. I would deeply appreciate it.
I hope you found it useful. If you did, please leave a like, share it, subscribe to be notified of upcoming articles! Please share your experience setting up your Mac down in the comments, and have a great day!

One thought on “My upgrading path to Apple Silicon — Part 13”