
System Settings — Part 9
Welcome back!
Last time we ventured deeper into the Accessibility Page of System Settings, completing the Vision section. Today, we are moving forward to the Hearing section, which contains four pages: Hearing Devices, Audio, RTT, and Captions.
Let’s get started.
Accessibility Page — Part 3
Hearing

Hearing Devices
This page serves as a launching pad for pairing Made for iPhone (MFi) hearing aid devices or other sound processors with the Mac and for adjusting their settings. I do not have an Intel Mac capable of running Sonoma and Sequoia with me now, but it appears that these hearing devices can only be paired with select Mac computers with the M1 chip (that is, not all of them), and all Macs with the M2 / M3 chips. From this link, it is possible to check what devices are compatible. The base M1 chip appears to be excluded from the list.
In my case, I do not have a hearing device to test, and so the page has a continuous spinning activity indicator showing that the Mac is scanning with its Bluetooth receiver for nearby devices.

Were I to pair such a device, I would see many more options, all of which are thoroughly described in this Support article.
Audio

The Audio page has two controls at the top and an extra section called Background Sounds below. The two controls, both OFF by default, make the screen flash when you receive an alert and make your Mac play stereo audio tracks as mono audio.
The macOS User Guide states that there should be an extra option below called Spatial audio follows head movements. My guess is that, since I do not have AirPods connected to the Mac, this option just doesn’t appear. In fact, there is a small note at the end:
This option is available only on Mac computers with Apple Silicon. Spatial Audio is available with AirPods (3rd generation), AirPods Pro (all generations) and AirPods Max.
Since I do not own any of them, I can ignore this. For those who do, though, I encourage you to read the Your AirPods or other compatible headphones section in this Support article. My old Powerbeats Pro only cause a “Tone volume” slider to appear. They are really overdue a replacement, but any AirPods just refuse to stay in my ear, even with memory foam tips, and AirPods Max … well … do we need to talk about them?
The Background sounds section begins with a toggle (OFF by default) which, when switched ON, activates the desired sound. You make your choice in the following row by tapping on the Choose… button. These are your options:

The slider just beneath allows management of the background sounds volume in general. You can still mute sounds and control the overall volume from the usual controls on the keyboard or in the Control Centre, but this slider governs the volume of the audio patch itself.
The toggle below lets you decide whether you would like to turn off background sounds when your Mac is not in use or not.
The final row has a single Sound Settings… button that brings you back to the Sound page of System Settings.
RTT
Real-Time Text (RTT), according to the macOS User Guide:
…combines voice and typed text during phone calls without needing special devices; this is especially useful if you have difficulties hearing or speaking. With RTT, you can type text during a phone call and your recipients can read your text immediately. You can make and receive RTT calls on your iPhone and other Apple devices (this feature isn’t available in all countries or regions or supported by all network providers).

By switching the toggle ON, RTT is enabled so that when you make a phone call on your Mac, you can choose to use audio, RTT or RTT relay for the call. The Send immediately option is toggled ON so that characters are sent while they are typed. I would need to see this in action to understand more. Finally, one can enter their RTT relay number to use that to start relay calls instead. If a number isn’t specified, your carrier’s default relay service is used.
Captions
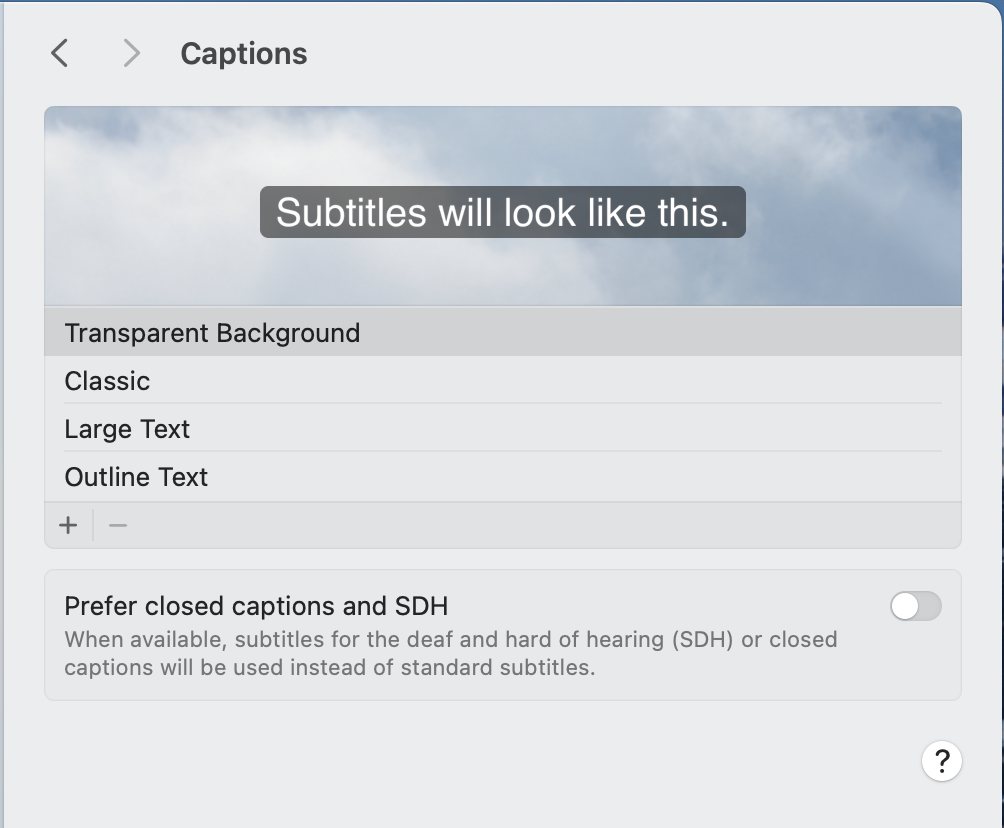
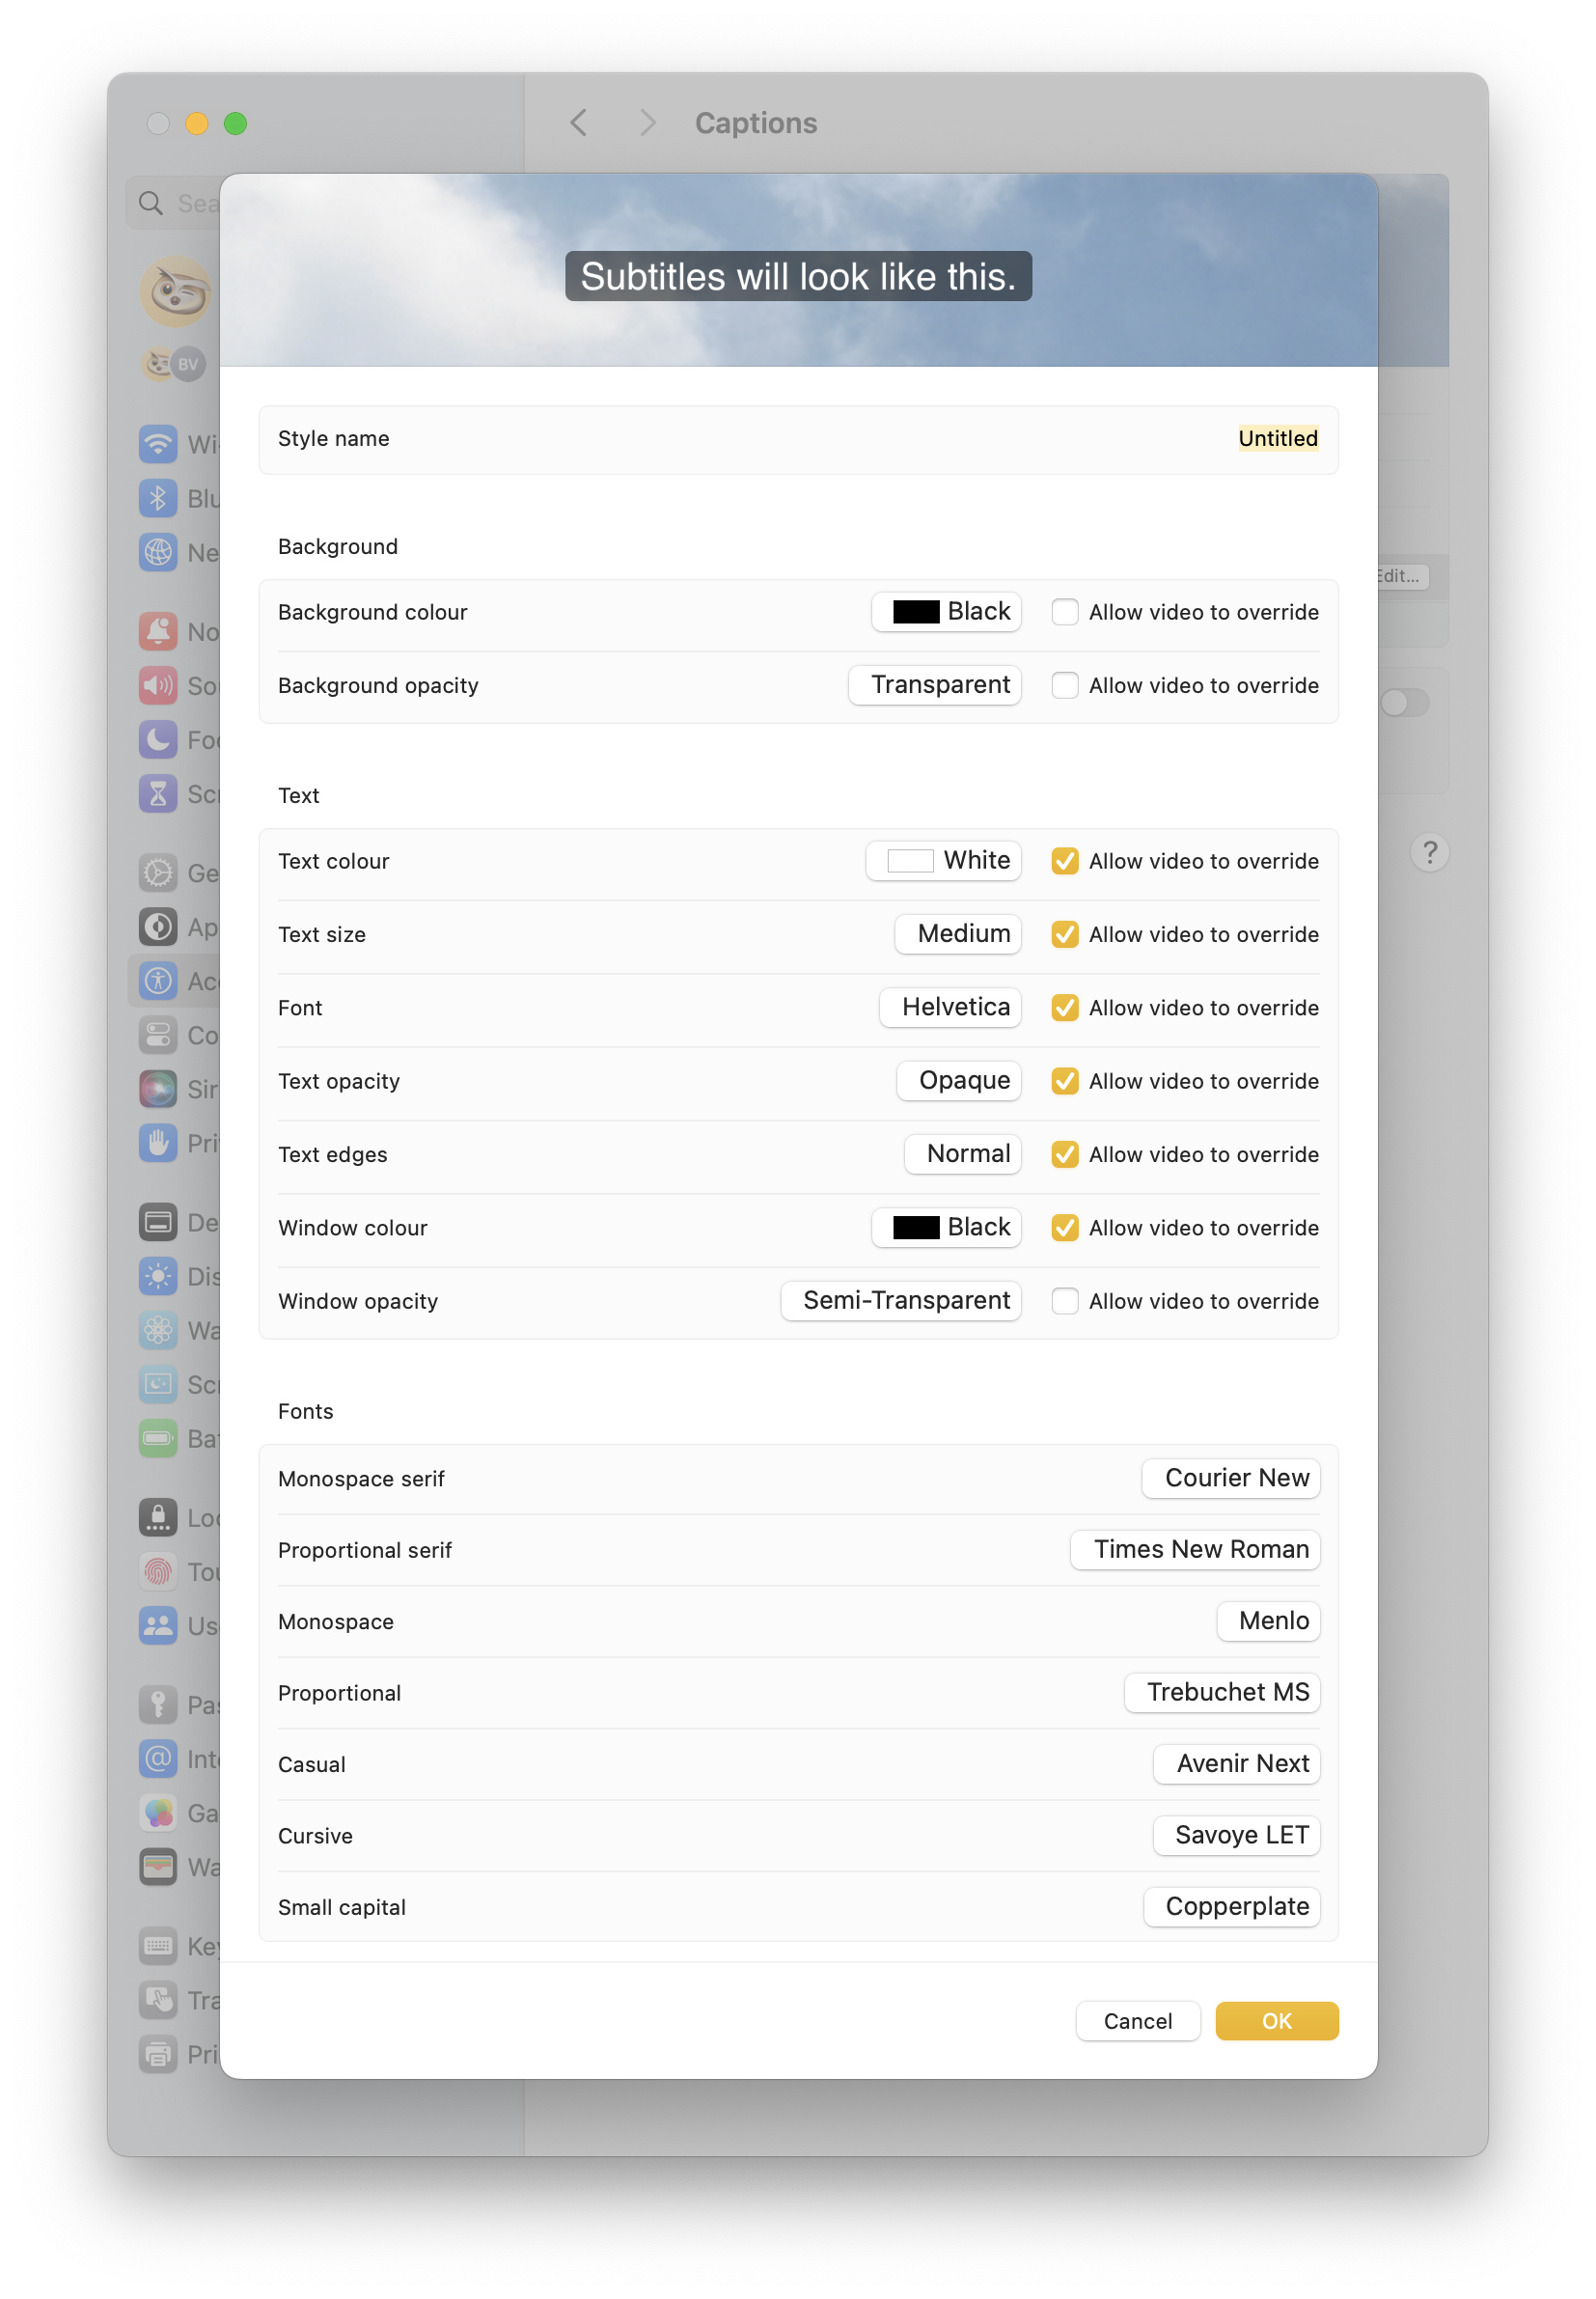
The top table allows you to decide between four different presets for captions in videos. If you press the + button, you get to create your own preset, with just a few options to choose from:
The last option lets you toggle your preference for closed captions and SDH (subtitles for deaf and hard-of-hearing).
Bottom Line
There you have it for the Hearing section. I hope you enjoyed it and that you are ready for the next episode on the Motor section. Thank you for reading so far!
If you are interested in music notation and editorial design, please consider joining my mailing list here, or browse my website to see what I do in general. I would deeply appreciate it.
I hope you found it useful. If you did, please leave a like, share it, subscribe to be notified of upcoming articles! Please share your experience setting up your Mac down in the comments, and have a great day!

One thought on “My upgrading path to Apple Silicon — Part 15”