
Pitch and Duration
This article is an expanded, paraphrased and enriched transcription of the excellent video by Anthony Hughes. Go watch it, then come back for a recap, or follow along while watching.
This video covers five main areas, which are:
- Inputting durations
- Dotted notes
- Note grouping options
- Tonality, accidentals, and enharmonic spellings
- Pitch Before Duration input method
Before proceeding, I would like to suggest you read the previous article on Inputting Music Using the Mouse or Keyboard which covers everything considered to be a requirement for today’s lesson.
Specify duration rather than specific notes
Building upon the strong foundations laid out last time, we are now ready to witness the power of the Dorico note-writing engine. If you are coming from another music notation software, you will know that, to input a tied note, you need to input the first, add a tie to it, then input the second. All this process leaves behind three independent objects, with all their undesired consequences.
Dorico’s intelligence, instead, has been programmed to express the duration of notes following modern music notation rules and conventions. This means that you do not need to worry about which note values should be used in particular contexts, but rather just how long their duration should be.
Let’s start from an elementary example. From a new, empty project:
- Add a time signature of 4/4 (that’s Shift-M like “meter”, then type “4/4” and press Return)
- Activate the caret
- Move it forward by one quarter note
- Insert a half-note (minim)
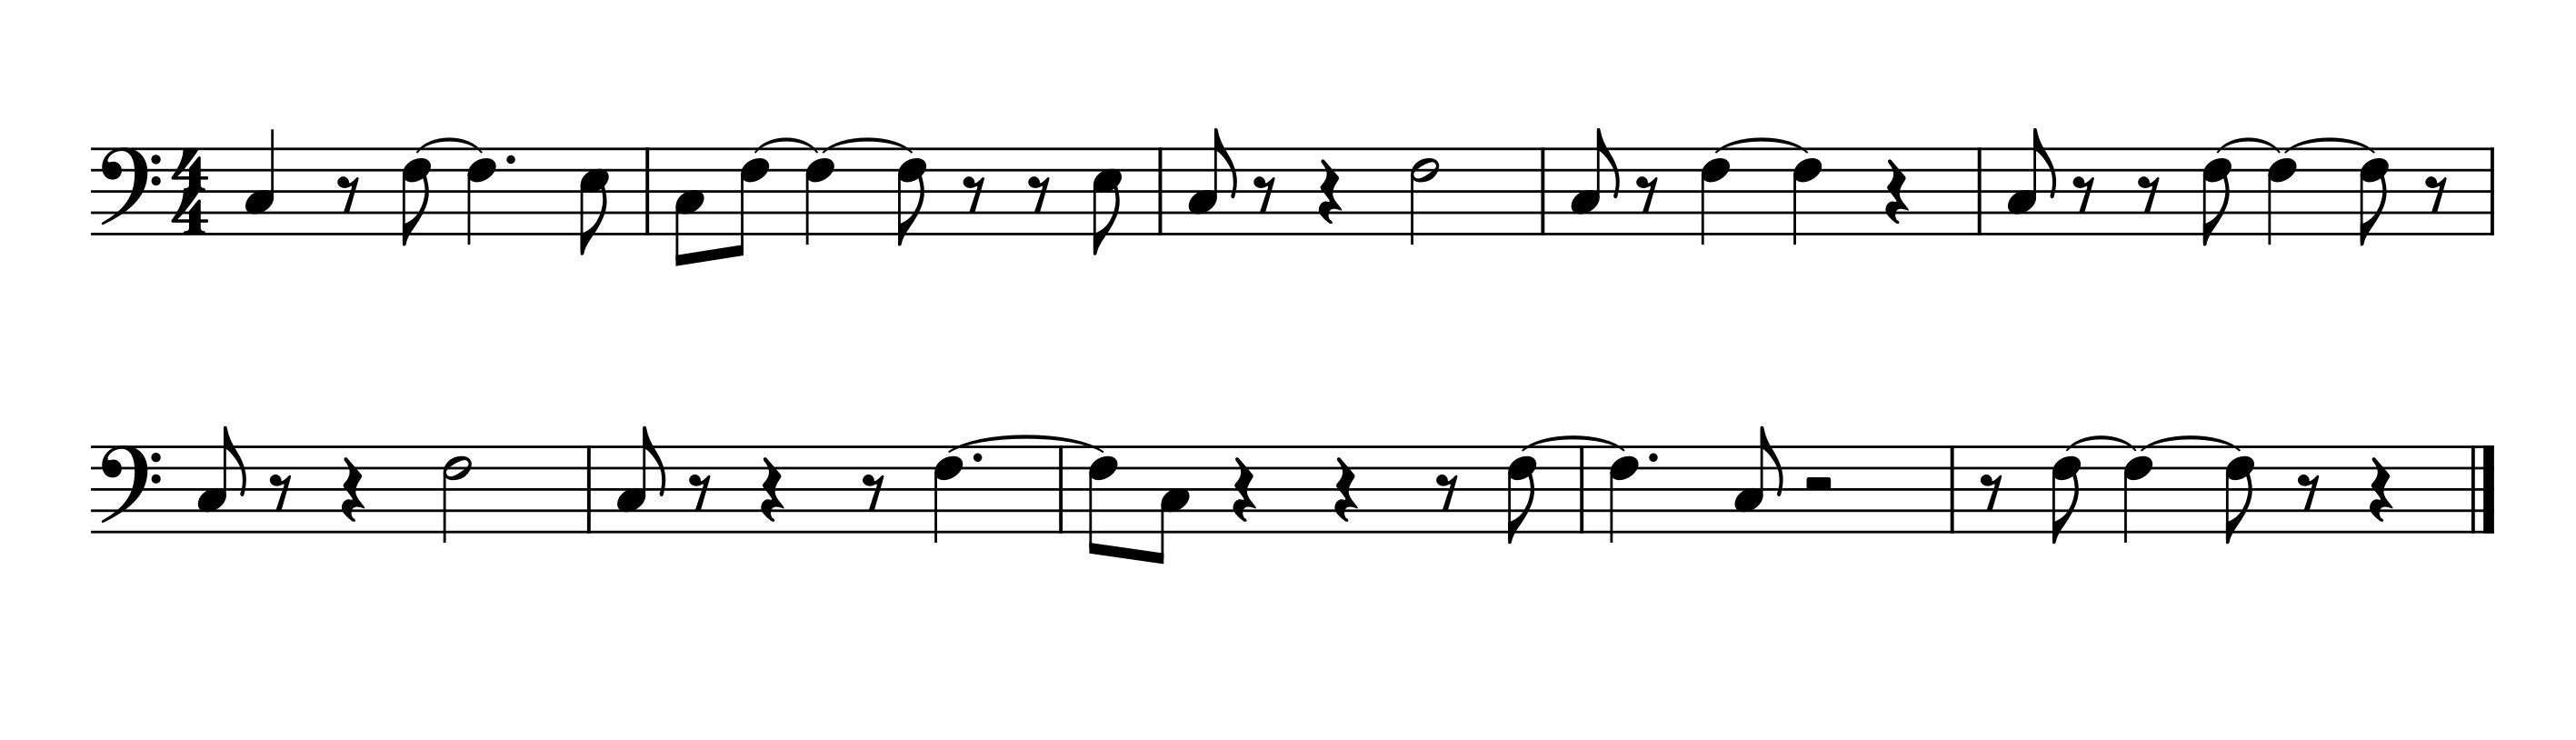
Dorico knows of the importance of showing the half-bar point for even time signatures, and so notates this duration as two quarter notes tied together.

I have already spoiled how to add Time Signatures, so I will limit myself to telling you that there is an option to have a half-note written in full.
The main advantage of this approach is that you are now free to move this note to another rhythmic position, be it preceding or successive. I encourage you to try it yourself, witnessing Dorico renotate your half-note while still following the rules.
You can also input a duration greater than a whole bar, and Dorico will distribute it for you. This is something that could be done also in Sibelius but, after that, any moving performed on that note object would not be re-interpreted by the program. Notice how Dorico’s behaviour changes when the time signature changes. For example, here is what inserting a whole-note on the second beat looks like in 4/4 time and in 9/8 time.

I suggest you play as much as possible with this until you get comfortable to have absorbed its working because we are now going to step up our game.
Dotted note input
To input dotted notes, you need to select a note duration first, then click on the dotted note button in the Notes panel to the left. You can also use the “period” key (.) on your keyboard to activate it.

The rhythm dot will remain active until you either turn it off or choose another duration. When using the key commands or the onscreen keyboard, the rhythm dot function works also outside of Note Input Mode, allowing you to reshape the duration of an existing note.
Surprises are not over, though: I invite you to press-and-hold the dotted note button, and a dropdown menu will appear from which you will be able to select an additional rhythm dot configuration (up to 4 dots).
The same can be achieved via key commands by holding down the Option/Alt key and then using the “period” key (.) to cycle through the different options. Be mindful of the fact that dotted notes may be rendered by Dorico’s brain as tied notes, according to any rule that may apply in a specific scenario.
Note grouping options
The rules upon which Dorico’s intelligence is trained are grouped into several areas, for the simple reason that some of them may contradict each other, as they belong to different genres and styles of music. For what concerns note grouping, the place to go is the Notation Options dialogue, accessible either from the Library menu or by using the key command Cmd/Ctrl-Shift-N. Please note that this dialogue is not available in Dorico SE.
Once in there, select the Note Grouping page and take your time to familiarise with the different options in each group, also thanks to the abundance of illustrations:
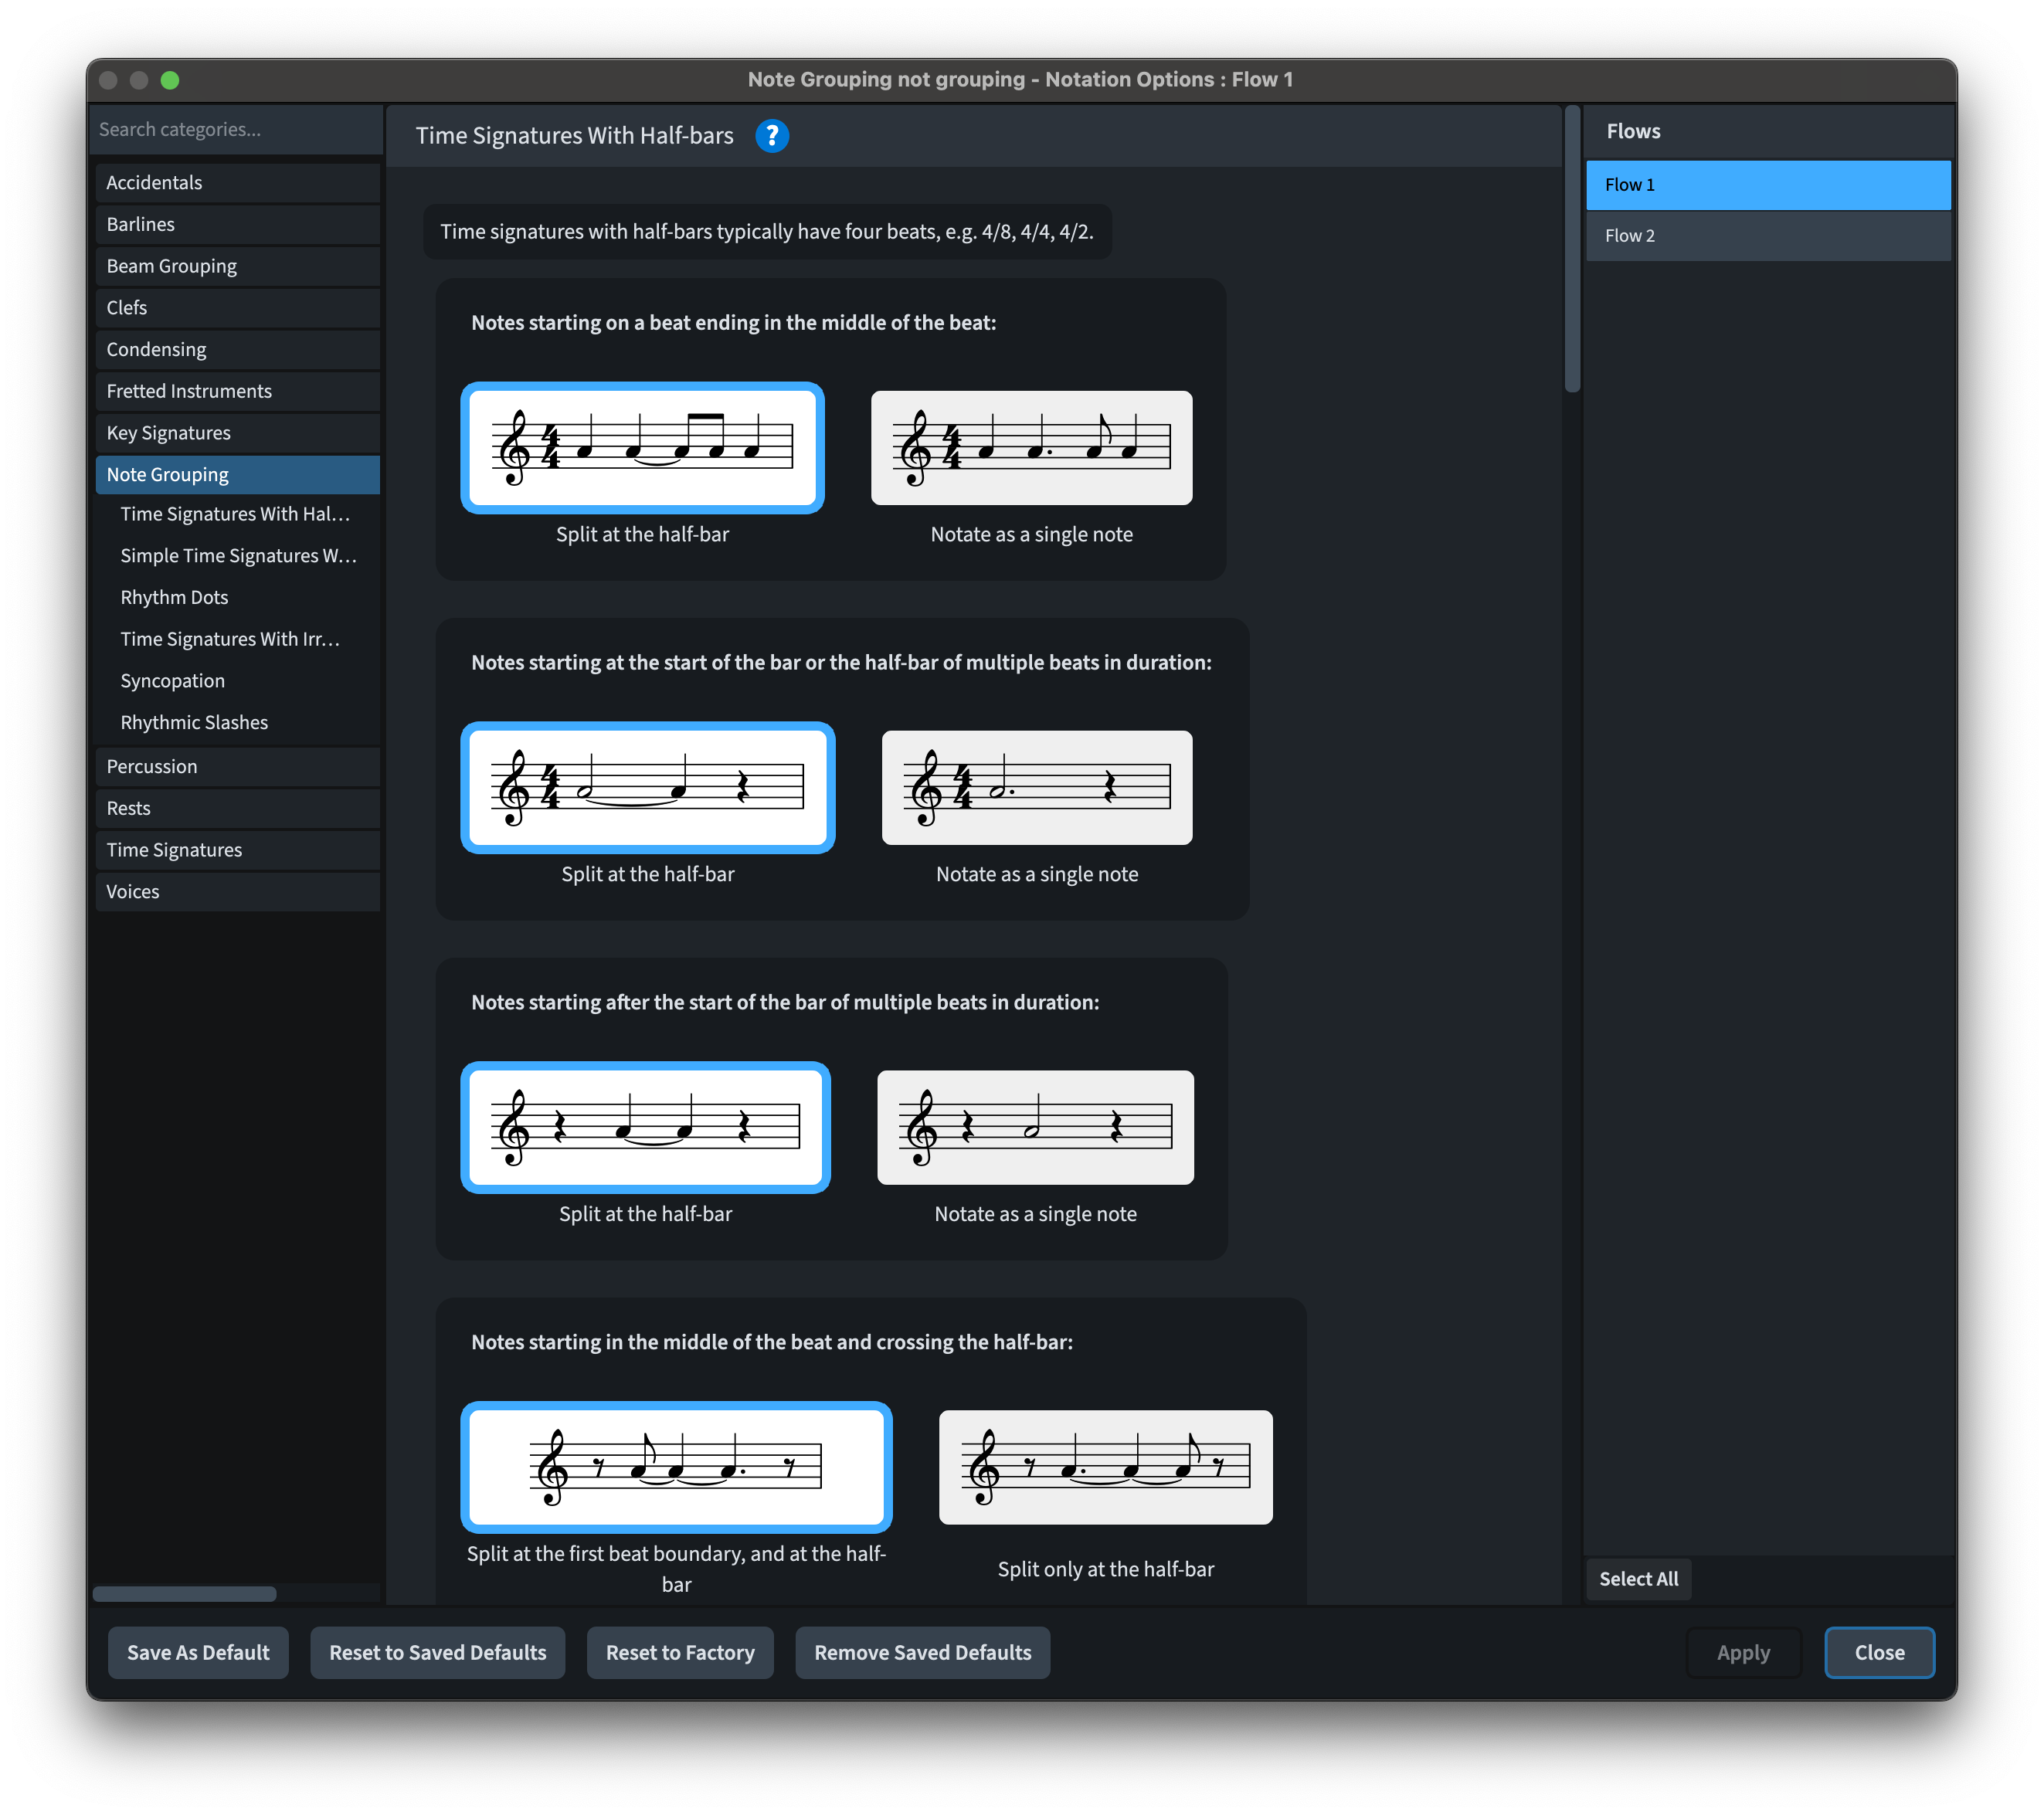
One fundamental aspect to remember about the Notation Options dialogue is that it affects only specific flows. You can select which flow you would like to interact with from the list on the right or press the Select All button at the bottom of the list.
These options are there to satisfy most types of music notation so, if you are not seeing what you would expect on screen, there is a great chance that a notation option will take care of that.
Tonality, accidentals, and enharmonic spellings
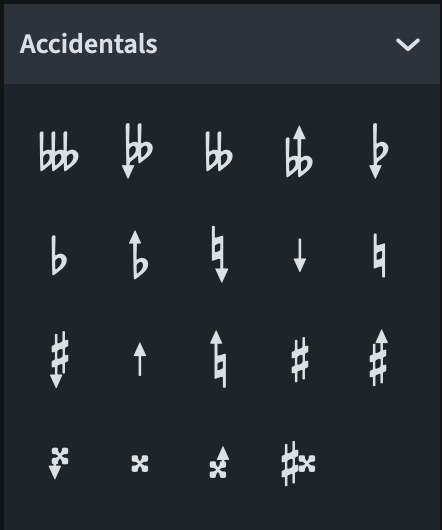
We have already covered how to access standard accidentals (flat, natural, and sharp). Double or triple sharps and flats, instead, do not have a dedicated key command attached to them. Instead, you need to look for them in the Key Signature panel, where the full set of accidentals included in the current tonality system lives.

That’s right, if you are using a non-12-EDO (Equal Divisions of the Octave) system, you will find microtonal accidentals here.
We will dedicate a separate episode on defining your own tonality system. For now, remember that, when inputting notes using a MIDI keyboard, Dorico uses the current key signature and immediate context to drive its enharmonic spelling decisions. Do not be surprised if you see a note initially written as an A-sharp gets respelled as a B-flat after you have input a few more notes.
Should you not be happy with the way Dorico has respelled notes, select any of them, hold down Option/Alt and press either the – to get the note below (e.g., changing an A-flat to G-sharp) or the + key to get the note above (e.g., changing said A-flat to a B-triple flat). They are the same keys used to specify ordinary accidentals1. You can also use the dedicated buttons found in the keyboard panel:

Pitch Before Duration input method
All what we have covered in these first five episodes assumed that you were using Dorico in its default state, that is, choosing a note duration first, then entering a pitch. If you are a composer or arranger, though, you may want to hear the notes before committing to them. To switch to this behaviour, activate Pitch Before Duration from the left-side palette or press the letter K.
This works in such a way that when Note Input Mode is active and Pitch Before Duration enabled, anything between typing pitches with A to G, clicking with the mouse or playing a note on your MIDI keyboard will just draw a grey note at the caret’s position. This note can be changed by simply selecting another one, and your verdict will be inserted in the score only when you pick a specific duration. Personally, I find this method much slower in what I do but, since there are hordes of users ready to go on a crusade for it, it clearly is a necessary and welcomed addition to the program.
Lastly, go to the Note Input and Editing page of Preferences (Cmd/Ctrl-comma) and see if you would like to change any option in there. I will gladly dedicate a whole episode to it if there is enough interest.
In a recent update (5.1.60), new features were added in Dorico to help users that are familiar with the Speedy Entry input method from the now retired Finale music notation software. Specifically, it is now possible to rework the key commands to allow the Up and Down arrow keys to modify the intended pitch when using Pitch Before Duration. For a more detailed overview of these changes, please consider watching this video.
Bonus material
This video doesn’t cover it yet, but I believe it is important to offer an emergency exit already now. Should you not like how Dorico is rendering your rhythm, and should there not be a specific setting in Notation Options that does what you are looking for, you can always activate Force Duration by pressing the letter O once, or by pressing this button in the interface.

This will force Dorico to input the chosen duration exactly as you set it, unless it crosses a barline, of course. We will get back to this in a future episode, but this is dedicated to all those who want to keep full control of what they do.
iPad check
Inputting durations and dotted notes
Assuming you have a keyboard connected to your iPad, everything should work in the same way as it does on the desktop. Dorico will rewrite durations according to metre just as reliably. If you don’t have a keyboard, you may use the piano keyboard panel to access durations, and tap your way around on the screen.
Note Grouping options
The Note Grouping options page in Notation Options contains the same settings available in the full, desktop version of Dorico and is accessed via the key command Cmd-Shift-N or by going to the “hamburger” menu in the top right of the interface and selecting “Notation Options”.
Tonality, accidentals, and enharmonic spellings
With a keyboard, everything works the same. Without one, you need to rely on the key signature panel in the right-hand side palette for everything concerning key signatures and accidentals. Notice that, in Dorico for iPad, you cannot create non-12-EDO tonality systems. For enharmonic spelling, use the buttons in the piano keyboard panel (bottom-left corner button, then second button from the left).
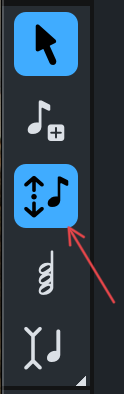
Pitch Before Duration input method
Press the letter K to activate it or press the dedicated icon in the left-hand side palette (an 8th-note with, to its left, a dot and two arrows pointing up and down).
Bottom Line
That’s it for today!
If you enjoyed it, please like this article, subscribe to get notifications about upcoming articles, and don’t forget to do the same for Anthony’s video and for the Dorico YouTube channel.
Should you be interested in my other activities, please visit my website and consider joining my mailing list, where you will be able to follow my journey through music notation and independent music publishing!
Thank you for your time, and see you here in the next episode!
- On the Italian keyboard the keys to be pressed are 1 and 2 in combination with the Option/Alt modifier. I can only guess that this is because pressing Option-‘ or Option-ì gives specific characters: ¡ and ˆ. ↩
