
System Settings — Part 11
Welcome back!
Last time we started to look at the Motor section of the Accessibility Page of System Settings. Today, we complete it with the last two pages: Pointer Control and Switch Control.
Accessibility Page — Part 5
Motor — Part 2
Pointer Control
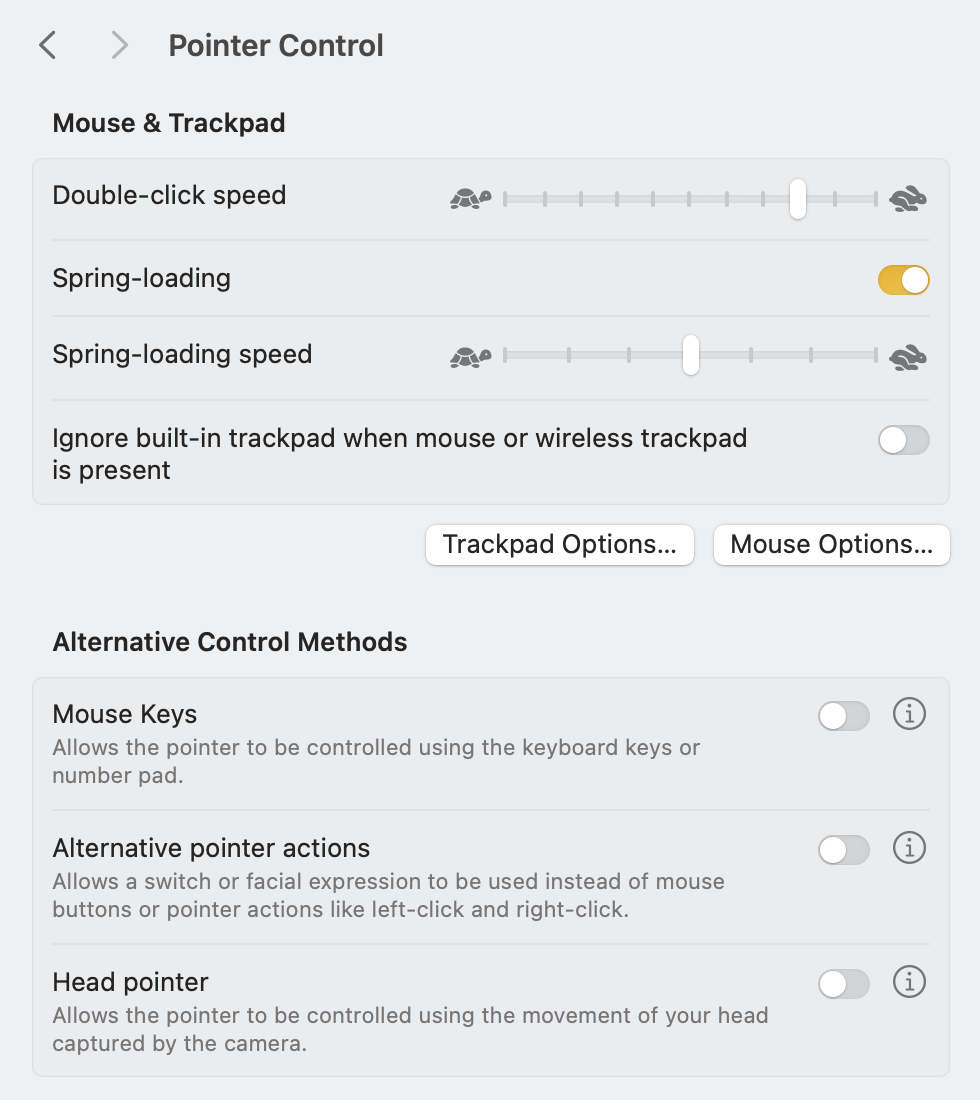
The first section of this page is dedicated to regulating the speed of your mouse and trackpad, using the usual Apple slider from turtle to hare. The double-click speed slider adjusts the mouse or trackpad’s reaction time when you double-click an item. The Spring-loading option, ON by default, is something that I have just been used to it being there without ever knowing there was a dedicated option. It works such that, when dragging and dropping, holding the item over a folder opens the folder itself. Again, macOS magic at its best! The spring-loading speed slider does just what you expect it to. The final option, OFF by default, gives a Mac laptop user the option to ignore the built-in trackpad when a mouse or a wireless trackpad is present. I agree with the default, and I believe you should normally leave this OFF.
The two buttons below, Trackpad Options… and Mouse Options…, are surprisingly not bringing you to the bottom of System Settings, giving instead a few sets of additional options.

The last two options are, at least for me, the most important ones when I configure a new Mac. I honestly could not imagine myself doing anything on a Mac without the three-finger drag gesture!
The Mouse Options… window, instead, contains a single slider that governs the scrolling speed.
The Alternative Control Methods section contains three rows: Mouse Keys, Alternative pointer actions, and Head pointer. The first option, Mouse Keys, allows you to move the pointer and press the mouse button using the keyboard or a numeric keypad. Be careful that, when Mouse Keys is on, you can’t use the keyboard or numeric keypad to enter text. A full description of the feature can be found here. When you switch that ON, you are greeted by the following alert:

The info button, instead, shows you these basic controls and the option to toggle the feature ON/OFF by pressing the Option key five times in a row.

When you turn this ON, you can control the pointer’s position in the following ways, either with just the alphanumerical keyboard or with the numeric keypad:

To simulate the click of a mouse button, press 5 on the keypad or I on the keyboard. To press and hold a mouse button, press 0 on the keypad or M on the keyboard. Use then the full stop (period) . key in either positions to release the button.
Alternative Pointer Actions allow performing a left-, right-, double-click and a drag-and-drop action using keyboard keys, assistive switches or facial expressions (such as smiling or opening your mouth). Clicking the Info button reveals what keys have already been set and allows editing them:

To change the name or action assigned to a key, switch or facial expression, double-click the item in the list. Clicking on Camera Options brings a pop-up menu which allows you to choose a camera if you have more than one and to customise the level of expressiveness the camera needs to detect for an action to be taken. You get to pick between Slight, Default or Exaggerated.
Remember that a left-click, right-click or double-click action takes effect as soon as you use the specified switch. A drag-and-drop action, instead, requires you to use a switch twice: once to drag, then again to drop.
Finally, Head pointer allows the pointer to be controlled by the movement of your head as captured by the camera. Tapping on the Info Button one gets a wealth of options:

The main options are to decide whether one would like the pointer to move only when your gaze reaches the edge of the screen or to follow your head precisely (default option). The general speed of the pointer is reduced to 50%. A couple of switches at the bottom allow for recalibration or for a couple of ways out of the mode. For more detailed instructions, please access this Apple Support article.
Switch Control
The last page is dedicated to users who cannot utilise an ordinary mouse and are therefore forced to use items called switches to control the Mac. Turning ON the toggle button next to Switch Control asks for authentication and then starts setup. I do not have any device to test, but it appears to be straightforward. A panel will then appear and remain onscreen for as long as the user actively interacts with the Mac.

It is also possible to create a custom panel by tapping on the Panel Editor… button. The ext sections concern Typing, Switches, and Navigation. Each one manages how the switches you are using will react, and there are just too many options available on the market to effectively cover this area. For more information, please access this Apple Support article.
Bottom Line
There you have it for the Motor section. I hope you enjoyed it and that you are ready for the next episode on the Speech section. Thank you for reading so far!
If you are interested in music notation and editorial design, please consider joining my mailing list here, or browse my website to see what I do in general. I would deeply appreciate it.
I hope you found it useful. If you did, please leave a like, share it, subscribe to be notified of upcoming articles! Please share your experience setting up your Mac down in the comments, and have a great day!

One thought on “An Italian cellist upgrading path to Apple Silicon — Part 17”