
How to create trills with accidentals
Hello everyone and welcome to this new tutorial series about Sibelius, where I will share tips and tricks from my more-than-a-decade long experience with the program. Today we start with a lesson I would have liked to teach during my conference at the TUFTS University in Boston, MA, USA, but for which there was no time: how to create trills with accidentals.
PART 1 — PRINCIPLES OF TRILLS
What is a trill?
Let’s start with a definition: a trill is a rapid alternation between any two notes. In the past, this would indicate only diatonic alternation of notes a tone or a semitone apart, but in modern music—XX century onward—this has evolved to cover also what was usually notated as tremolo.


When analysing performance, both notations (tremolo and trill) are valid and equally accepted, but tradition dictates that trill notation gives more importance to the main note, while a tremolo is more “democratic”.
In the second picture above, you can see that the notation for trills not using the interval of a second is achieved by using a small note in brackets. I will cover how to create this notation properly at the end of this series, since scores I receive from composers try to use the pre-bend note instead, which causes all sort of note-spacing issues.
Whatever you choose, I suggest you do not mix the two notations together: choose one, and stick with it! Coherence is key!
Designing and positioning a trill
The symbol used to indicate the presence of a trill uses a specific glyph which represents a stylised tr syllable in italic typeface. While every music font will be slightly different, here is what it looks like in Sibelius, using the Opus music font:
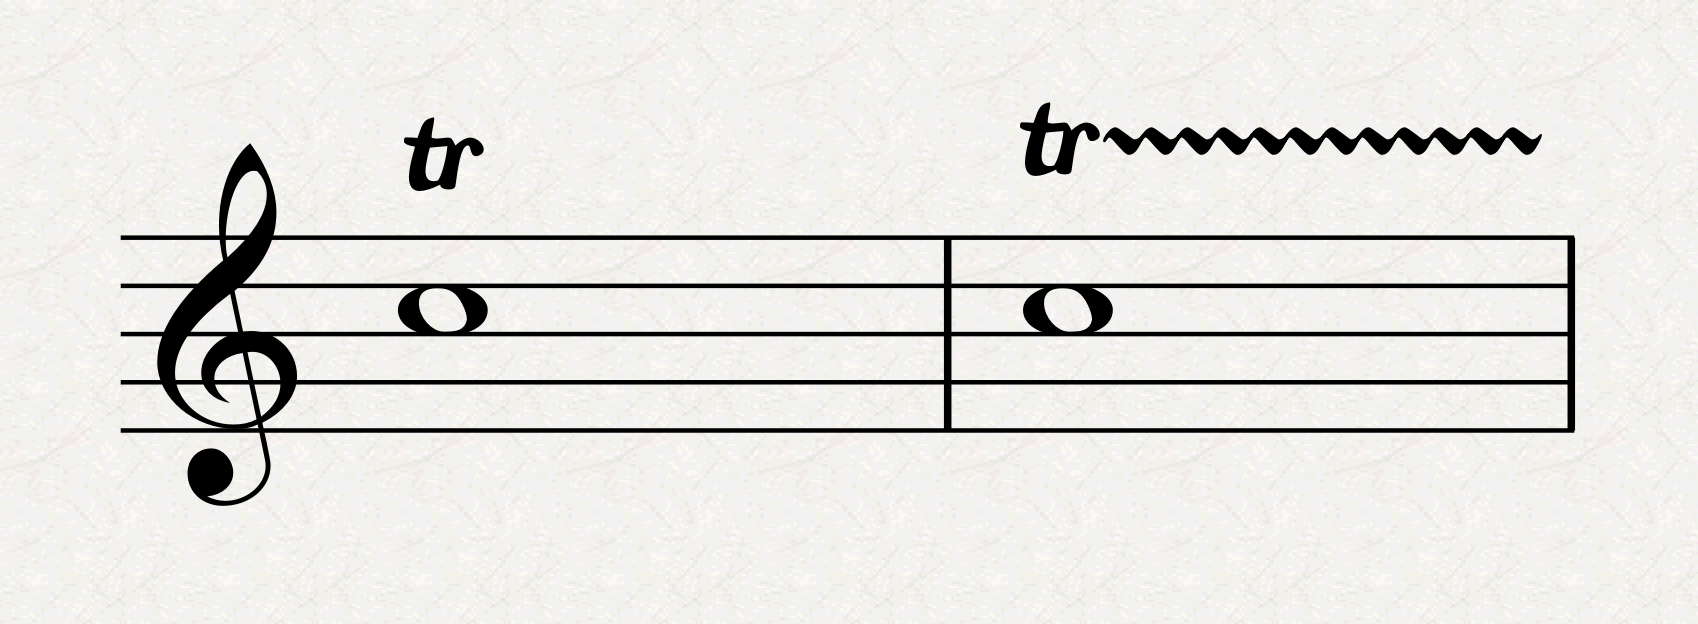
A trill should be placed flush-left with the left-hand edge of the notehead, although in the example above I feel that, when using a whole-note, it would sit better a bit more centred. When other articulations are involved—staccato, accents, …—the trill should be placed further from the note.
In double-stemmed parts, each part should have its trill on its side:

Sibelius does a poor job here: look at how we have two voices but, upon selecting the F-G-C-B flat with Cmd/Ctrl held down, and creating a line via the Lines Library (L), it created all trills in the same voice. Besides, both the G and B-flat trills overflew in the following bar and got all created on the same side of the stave. What should have been a two-clicks operation resulted in at least ten extra unnecessary steps.
In single-stemmed, but chordal, writing, one needs to ascertain what notes are influenced by the trill. It is good practice to still keep each trill on the correct side of the stave if space allows.
The trill line
While a trill line is optional for single notes, it is compulsory when used with tied notes and should last for the whole duration of the note, stopping just before the beginning of the next note (or before its accidental, if present):

This is what Sibelius creates with default values: the first bar shows two options for single-note trills, then the second bar shows how to treat tied notes. You can see that Sibelius’s Magnetic Layout prevents the second trill from being positioned properly, pushing it away from the stave. Changing the relevant setting in Appearance > Design and Position > Default Positions > Lines > Trill > Creating Lines > Horizontal position of right hand end -0.25 spaces right of note to something greater could solve the double-barline crossing but would make the first tied-note one too short, and would still not solve the one that should stop before the accidental. Therefore, a good deal of manual adjustment is needed to reach the final, desired, result:
Should a trill stop before the end of a note, divide it into smaller rhythmical units, and extend the trill line only up to where needed. If the note is the same, but the trill should be rearticulated, remove ties and add extra trill lines.
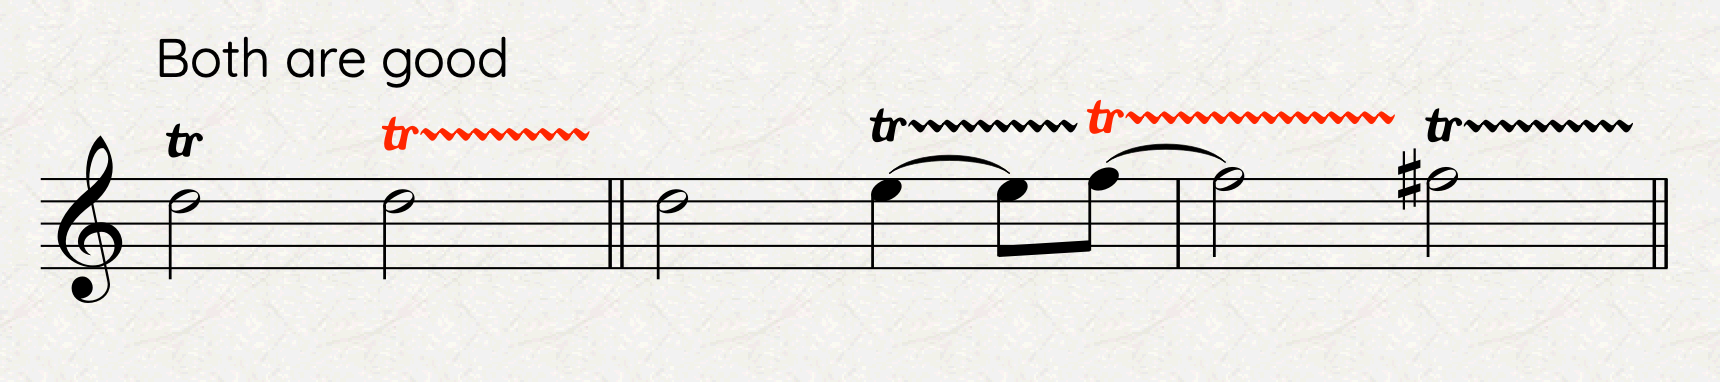
Starting and finishing notes
Basic trill notation as shown above assumes that one starts the trill on the shown note and alternates with the upper, diatonic one. If you want to start on another note, you need to add a grace note before the main one, either as acciaccatura or appoggiatura (I prefer the second one). Typically, one doesn’t need to specify whether the trill has a resolution (I prefer calling it so instead of the English “finishing notes”), but if one needs to do that there are a few ways to do that in Sibelius, which I will cover at the end of this series. Here are a few options, covering the different articulations:

Bottom Line
Thank you for following me so far in this First Introductory Part. Tomorrow we will delve deep into some more practical stuff.
If you like what I do, please consider liking this article, sharing it with your peers and colleagues, and subscribing to this blog to be notified of upcoming articles.
If you use an iPad and would like to improve your Sibelius experience, please give a look at my viewset for MetaGrid Pro here.
I also have a newsletter that follows my publishing journey, check it out if you are interested in cello (and more) and would like to receive special gifts. You can also browse my online catalogue here.
Thank you for your time and continuous support.
See you in the next episode!
Michele

One thought on “Sibelius Tutorials – Episode 1 A”