
Episode 5 – Notational conventions (Part 1)
Now that we have our full score set up, we can move forward and dive deep into what notational conventions should be respected when engraving an opera. By extension, many of these may apply in smaller vocal works.
We have much road to walk together, so fasten your seatbelts and let’s get started!
Staff visibility
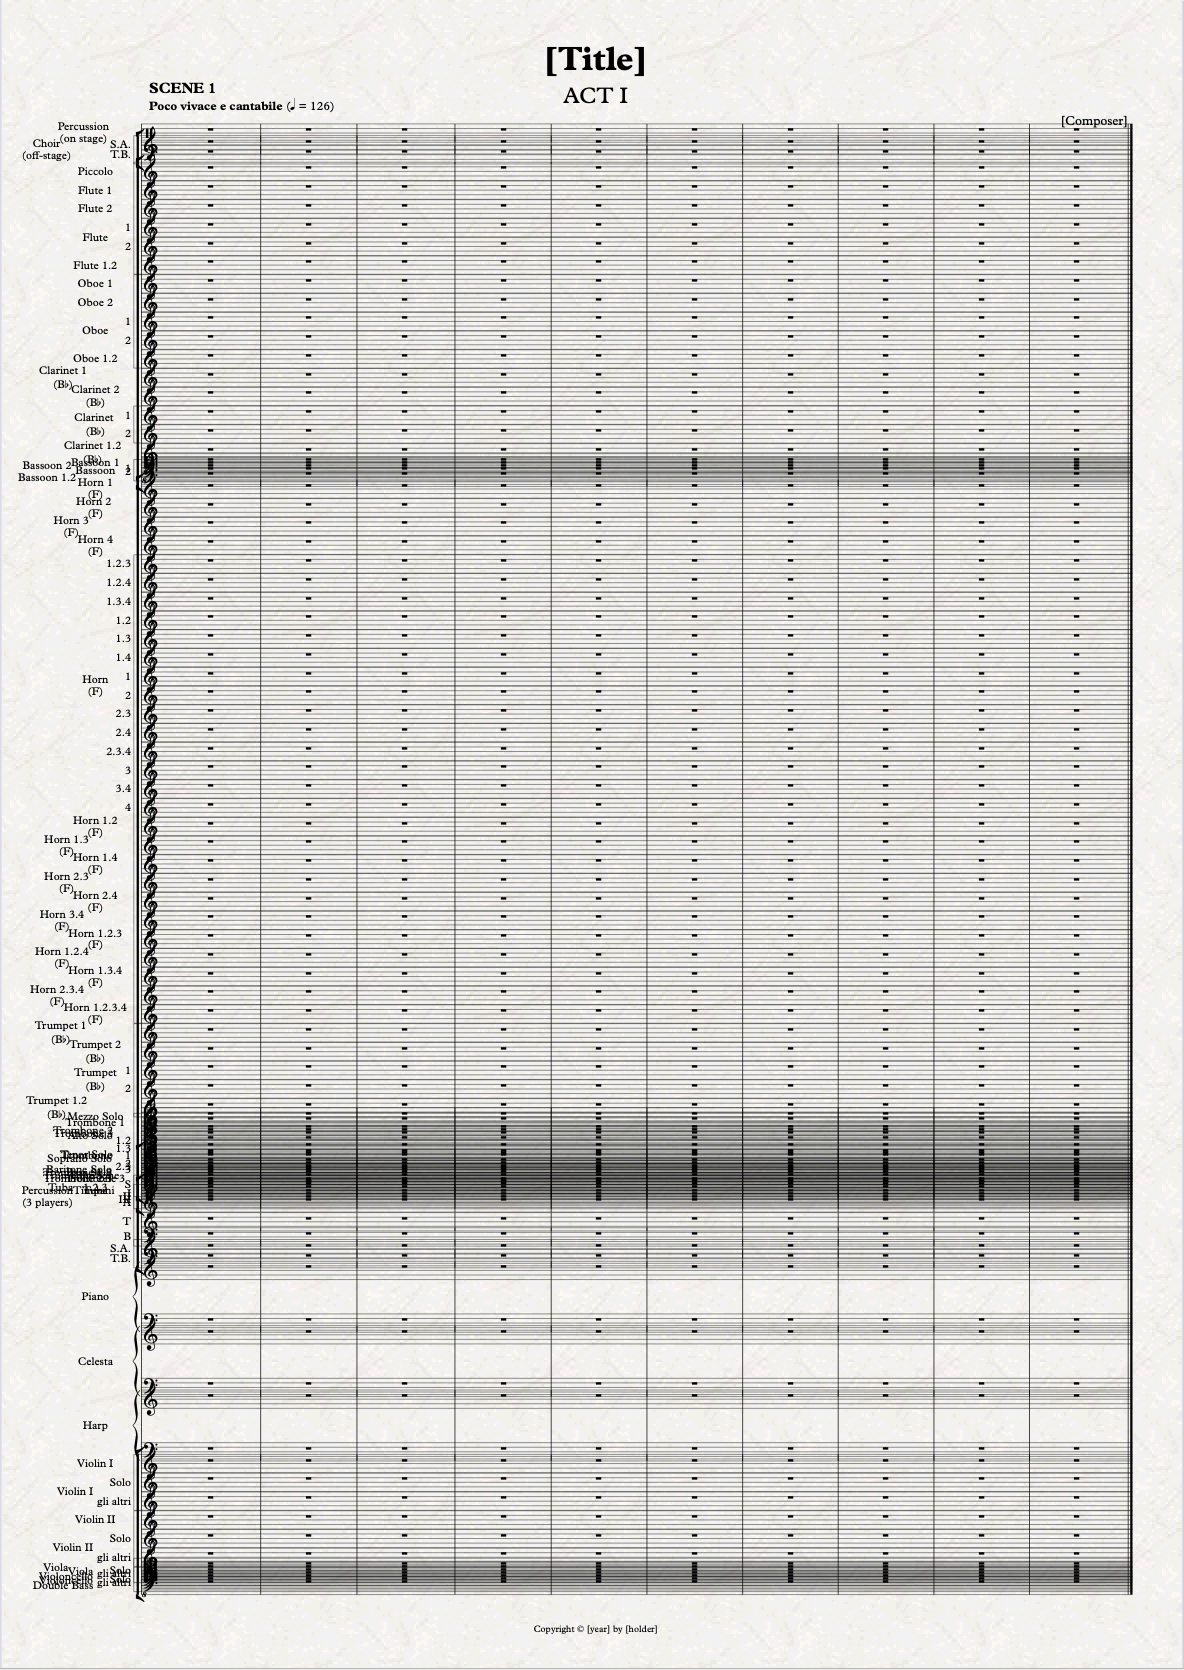
One of the greatest challenges when such a massive instrumental force is involved is how to manage vertical space. If you have all instruments shown at all time, even when they are not playing, things will get out of control pretty quickly. In symphonic works, one usually shows what instruments are playing in a given movement in the first system, and then hides unused ones from the second system onward. In an opera, this is not enough, for two reasons:
- A scene may start in the middle of a page or, as it often happens with Britten, in the middle of a system
- A massive tutti may only come much later in a scene and occupy a lot of space unnecessarily
For this, we need to know what is known as “French Score”. That means, in simple terms, “hide everything that is not playing right now!”
In a previous episode, I advised to write or copy the music in panorama mode, where you are not bothered by system and page breaks, taking full advantage of the Focus on Staves feature to keep things manageable. You could, for example, create a Focus Set including only the instruments that are playing in a given scene. I believe few operas have more than 10 scenes per act, but in case the one you are working on does, replace Set 1 with Set 11 when you are done with the previous scenes. In my Sibelius template, I have already created a few sets, filtered by instrument families: woodwinds, brass, percussion, strings (piano and celesta being present in both groups), voices. Every set will also include the invisible Stage Instructions stave to keep things easy to follow.
Regardless of these settings, you may want your score to look a bit tidier than this in page view already from the beginning:
To achieve that, perform the following steps:
- Triple-click on the first stave that you want to hide. This will select it for its entirety (at this stage, your score should be quite short). If you find this difficult to do in Page View, switch to Panorama (Shift-P) and select them there (or use the Select Staves plug-in).
- Once you are happy with the selection, switch back to Page View and press Cmd/Ctrl-Option/Alt-Shift-H, which is the command found in Layout > Staff Visibility > Hide.1
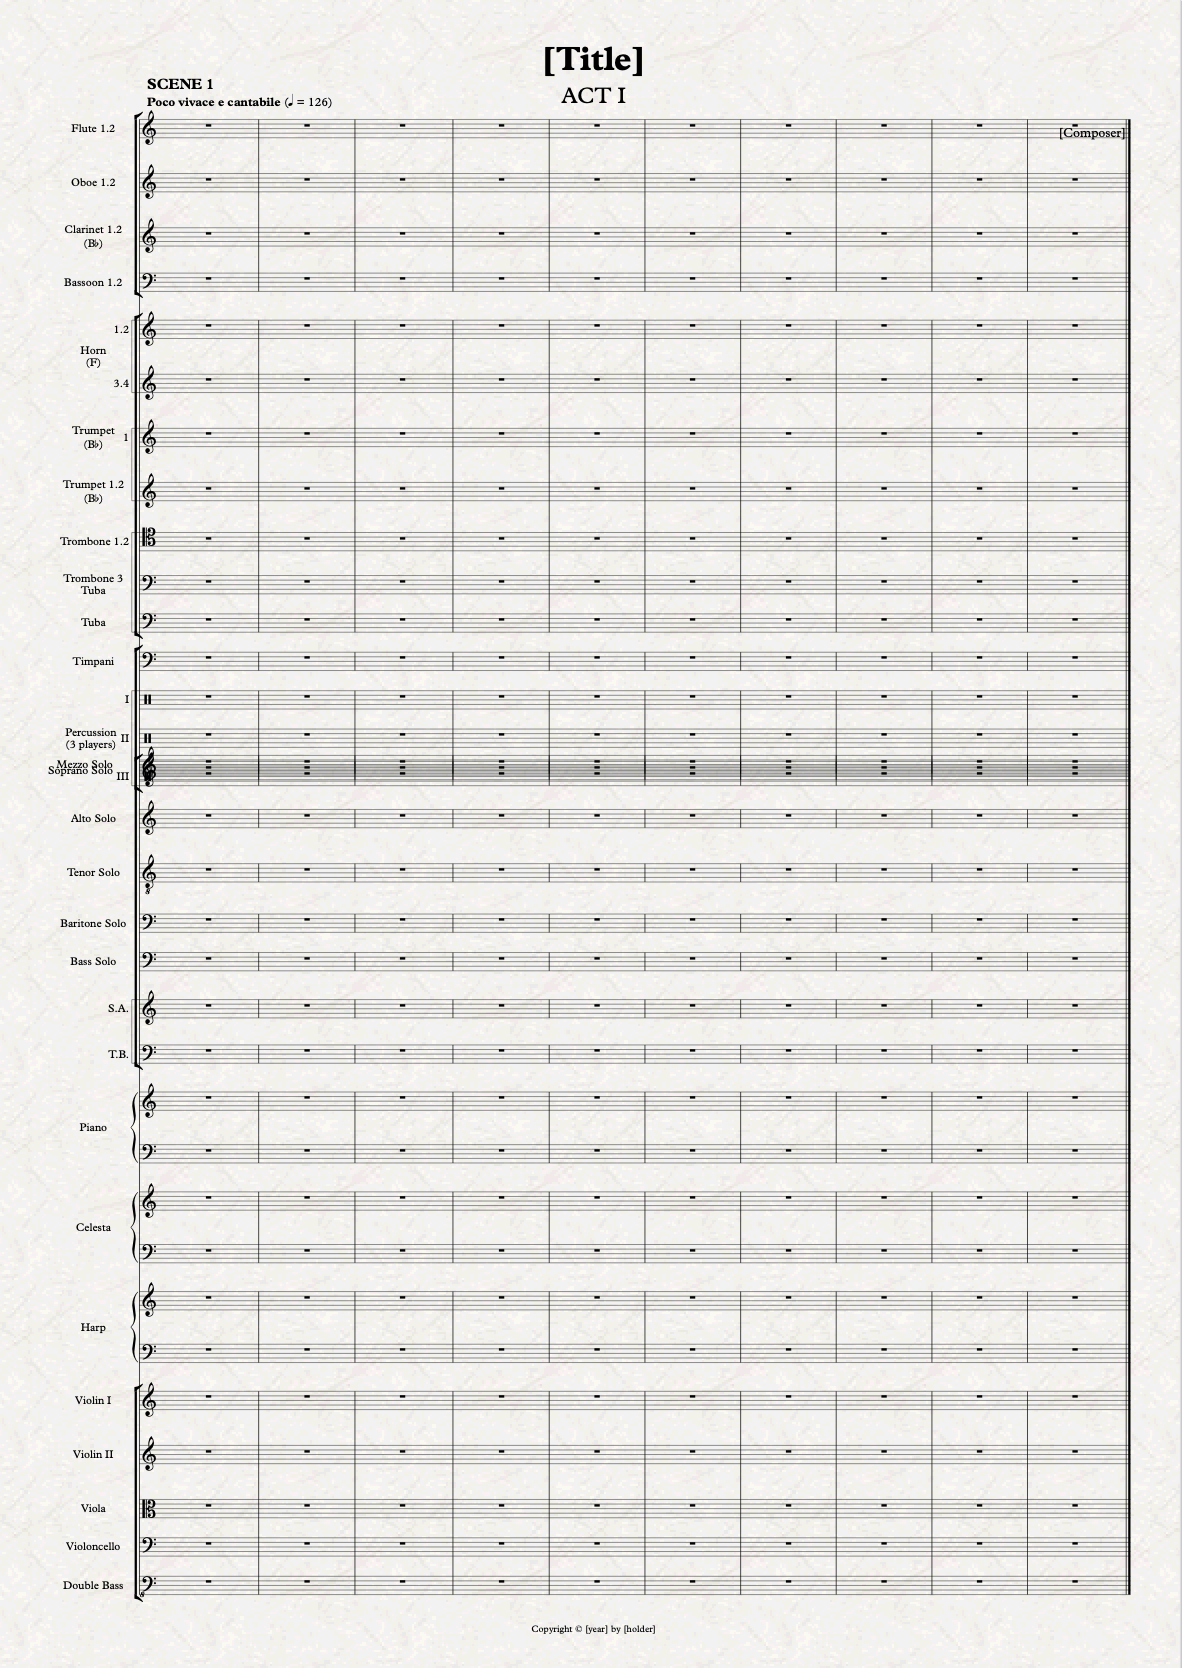
Much better, but we are not done yet:
- Select any bar of any staff in the first system and press Option/Alt-Shift-A, which is the command for Home > Select > System Passage
- Reset staff spacing above and below (Layout > Staff Spacing > Reset Space Above/Below) and then optimise it (Layout > Staff Spacing > Optimise > Selection) if you’re not happy with the result.
Here we go:
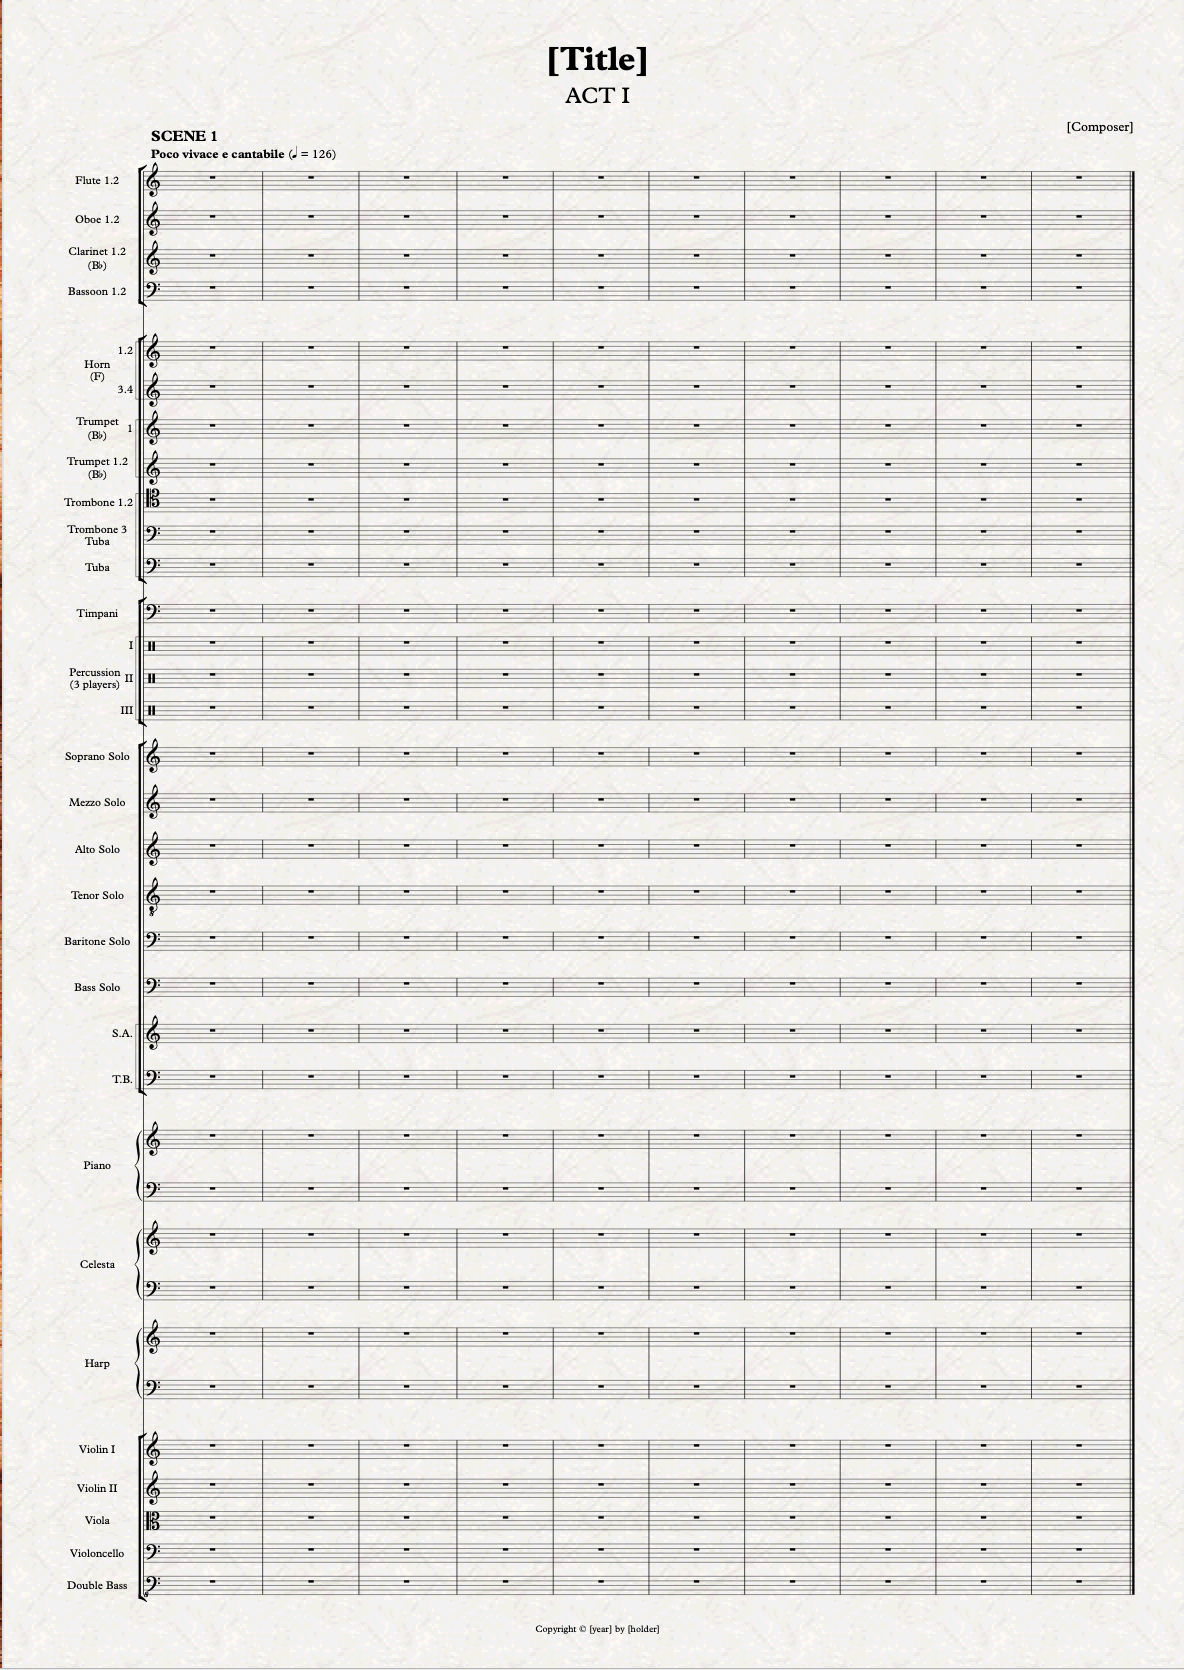
Once done with the writing or copying of the material, it will be much easier because you will simply need to select all and run Hide Empty Staves. There is an exception where conductors prefer to see who is going to play in the next system. In this case, you will need to select the appropriate range of bars, then go to Layout > Staff Visibility > Show (shortcut: Cmd/Ctrl-Option/Alt-Shift-S), and manually select what staves you want to show.
If there is enough space, empty staves for singers or choir that are not singing but are staying on the scene may remain shown, at your discretion.
Stage instructions
We saw earlier how to create a dedicated invisible stave and text style for stage instructions. I would like to add that, if multiple languages are needed, the main one should go in Roman (or Regular) typeface, while the translation should be set in Italic. In the opera I engraved there were three lines: regular, phonetic, and translation. I kept regular and phonetic in Roman typeface, and set the translation in Italic.
If something crucial happens on scene, it may be appropriate to leave some space between one system and the next one, and write it in a bigger typeface, centred on the page, perhaps even in bold weight (Shostakovich, in the Lady Macbeth, writes this in Italic).
At the end of each Act, it is appropriate to let the players know about it by adding an “END OF ACT” warning at the lower right of the Act’s last scene’s page. Consider also adding an empty page between acts in the Full Score.
More remarks about staves
- When two instruments being condensed because they play the same instrument (e.g., Oboe 1.2) suddenly switch to playing two different instruments (e.g., Oboe & English Horn), use two separate staves. We prepared this in Episode 3.
- Condensing: use condensing only when the rhythm between the involved instruments is exactly the same, otherwise keep them separated. This rule is applied in a somewhat stricter way than with symphonic music.
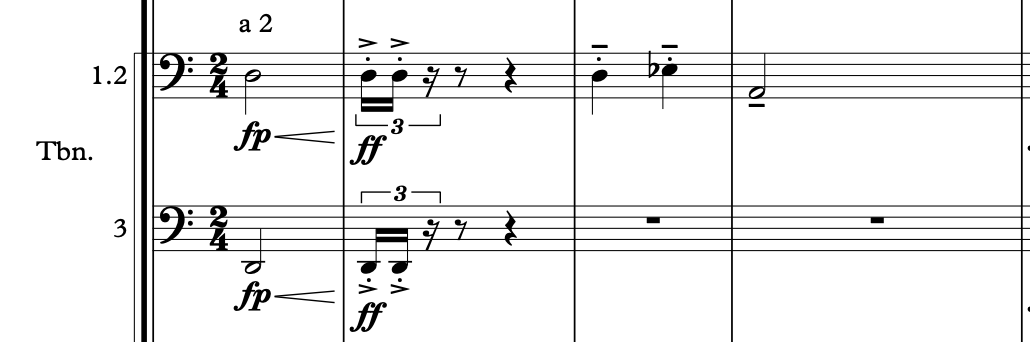
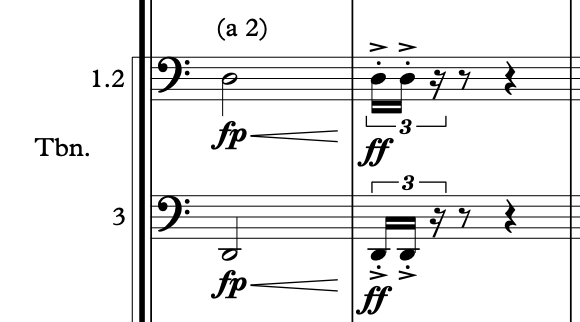
- Divisi: if they are playing “a 2” (or similar), write it above the first rhythmical position where this occurs, in Roman typeface (some editions like these player labels to be smaller, I don’t), and repeat it in parentheses at every new system.
- If only one of the two coupled instruments is playing, either use its dedicated solo stave–if, for example, the solo is longer than one system–, or write the player label (e.g., “1.” or “2.”) above the line. Do not overcrowd the stave with bar rests in a second voice unless this has been requested. If I were a conductor, I would prefer this last solution, since it is visually clearer, but it can cause several staff spacing issues.
- If the cello and double-bass play the same line–obviously sounding one octave apart–, you may use a single joined stave. The process to create this is explained in a previous episode.
Bottom Line
That’s it for today! Our score is getting better by the minute, and you are acquiring all the knowledge needed to properly engrave your opera!
In the next episode, we will face instrument-specific notational conventions! Stay tuned, and thank you for reading so far!
If you enjoy what I do, please consider liking this article, sharing it with your peers and colleagues, and subscribing to this blog to be notified of upcoming articles. If you use an iPad and would like to improve your Sibelius experience, please give a look at my profile for MetaGrid Pro here.
I also have a newsletter that follows my publishing journey, check it out if you are interested in cello (and more) and would like to receive special gifts. You can also browse my online catalogue here.
Thank you for your time and continuous support.
See you in the next episode!
Michele
- You cannot hide staves in Panorama View. ↩

2 thoughts on “How to engrave an Opera (in Sibelius) – Ep. 5”