
Episode 6 – Notational conventions (Part 2)
Last week, we completed all that is needed to know about setting up your opera score’s staves. Today, we delve deep into instrument-specific conventions that may be unique to opera, but may also apply to other big symphonic contexts. Let’s get started.
Key signatures
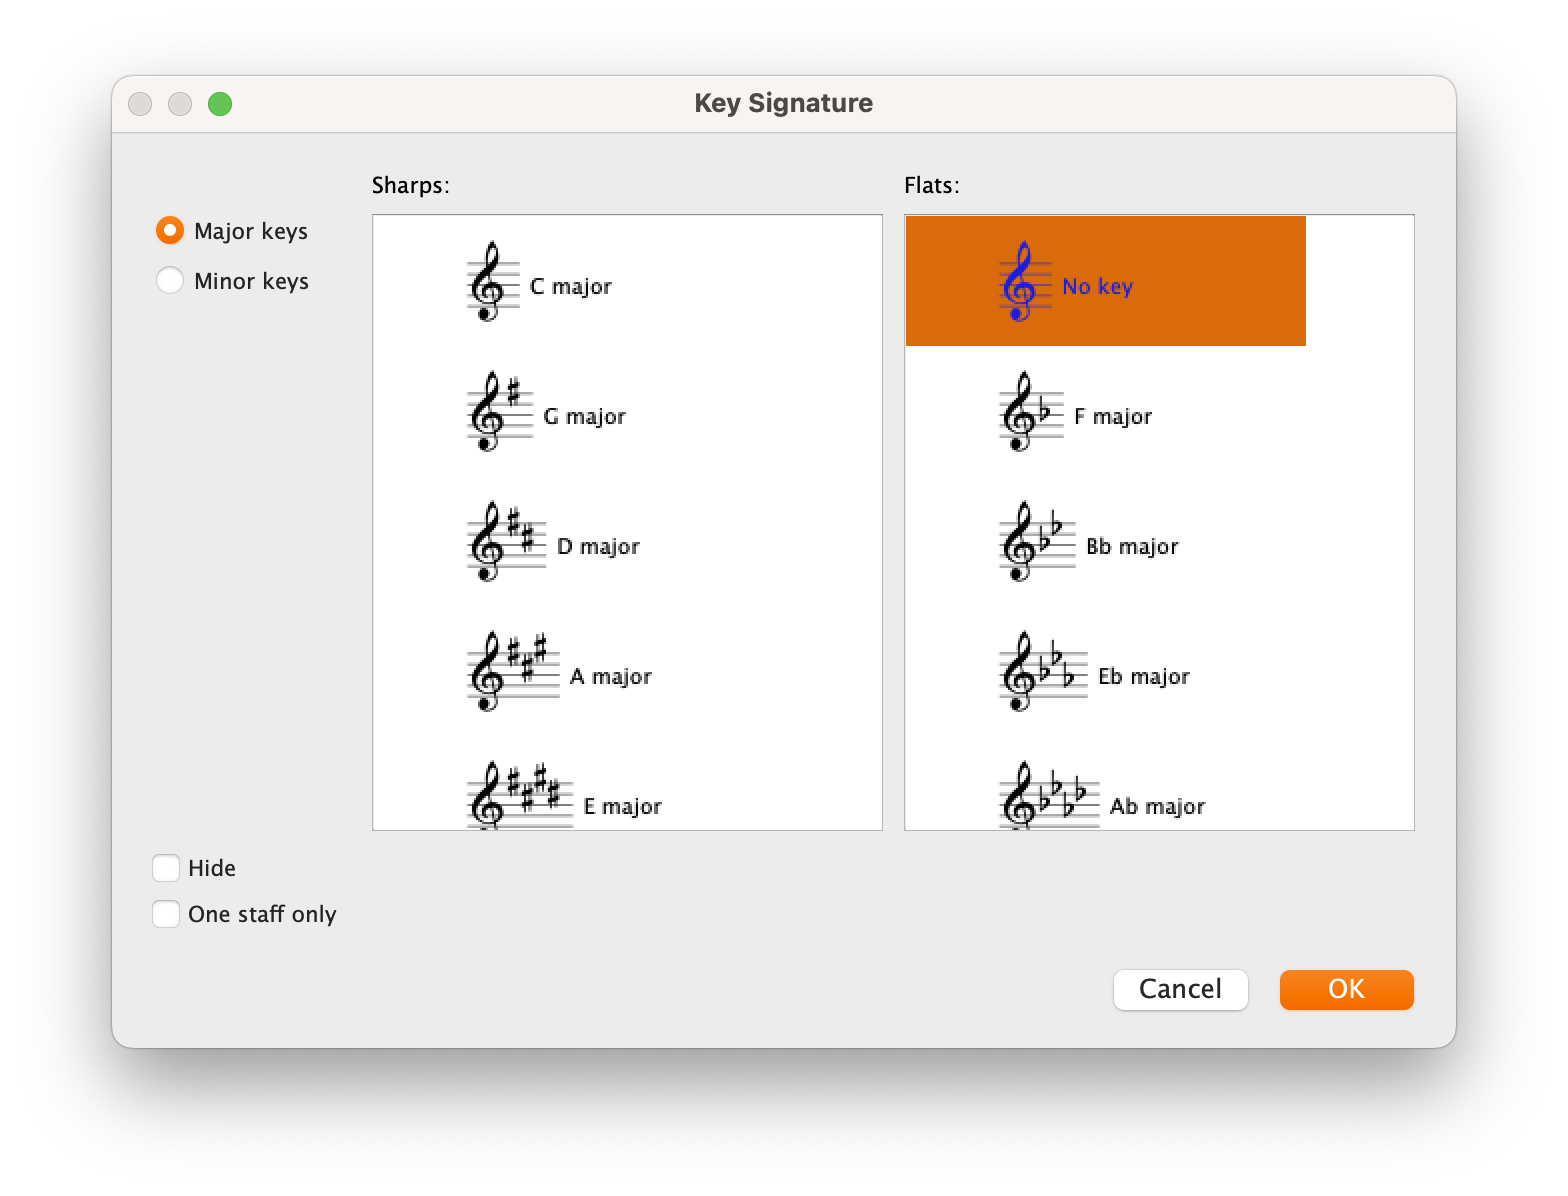
If your score is atonal, or if you would rather not be bothered with key signatures, be sure not to choose “C major” or “A minor”. Instead, choose “No key” which, for some reason, is at the top of the flats’ column:
This will ensure that transposing instruments do not show the transposed key signature. Britten, for example, while writing in a somewhat tonal context, has an awkward treatment of key signatures for brasses. He follows the general—and much appreciate—convention of not showing it for horns, but shows it for everyone else (Trumpets, Trombones, Tuba). This is understandable if one uses Trumpets in C which do not transpose, and Trombones & Tubas which read at pitch anyway.
To achieve this, in the dialogue shown below, pick the desired untransposed key signature and check the “One staff only” option. Ensure that, before opening the Key Signature dialogue, you have nothing selected in the score.
If you are using my template, be careful that some brass instruments such as Horns and Trumpets are using their [no key] variant, which will prevent any key signature from being shown. You will need to plan this in advance, or it will be quite painful to replace all instruments with the other variant at this stage. If you think this to be fundamental, I can create a version of the template with “key-signature-showing” brasses in general.
Bars
When using “l.v.” (laissez-vibrer) for unstopped sounds, one can use the “l.v. up” and “l.v. down” symbols readily available in Sibelius (Symbols > Notes category):

If the resonance extends for several bars, and especially if there are dashed barlines, remember to place a new sign over each barline.

Rehearsal Marks
Rehearsal Marks, in any form, letter or number, should appear above every section and, optionally, below the bottom stave. To achieve this, you need to set up the destination staves for all system-attached objects. You guessed right, this will cause some other items to appear too many times, but there are workarounds. In Sibelius, go to Appearance > System Objects > System Object Positions.

In the dialogue that appears, you can select up to 5 staves (including the compulsory top stave and the optional bottom stave). Here, beyond the “[No instrument (hidden)]” stage instruction stave—which covers also woodwinds—, I chose the top Horn, Timpani, the top solo voice, and Violin 1. As of 2023.6, there is a bug that prevents you from selecting 5 staves, limiting you to 4. In this case, decide one between percussion & singers or omit brass.
Percussion
We already saw what the priorities for percussion staves are at the moment of their creation, but let me reiterate: do not use a single stave per instrument, use one stave per player. I strongly suggest using a 5-line percussion stave, allocating each line and space to an instrument specified in the legend. This is a somewhat modern convention, but a most-welcomed one.
If two players are performing the same part, you may use a condensed stave (not included in my template, but easy enough to create if you followed this series so far):

The same principle for condensed instruments applies here.
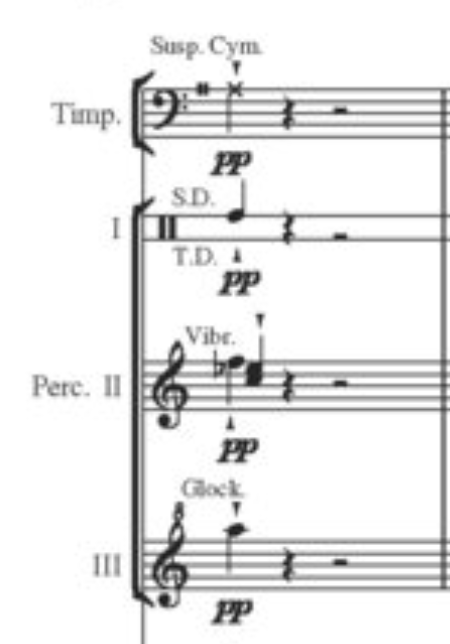
When dealing with Timpani, we saw how they are best given their separate stave instead of grouping them with other Percussion staves. It may happen, though, that the timpanist occasionally needs to help his fellow players. In this case, keep the staff label as “Timp.” and mark the new instrument with a player label directly above the entry.

Notice here how Britten uses the dedicated notehead and staff-line for the Suspended Cymbal, alongside adding a small percussion clef at the beginning of the system. To do this in Sibelius, you would need to create a dedicated composite symbol made up of the bass clef and the percussion clef, and substitute it as the default clef of the instrument. It is sadly not possible (yet) to add custom clefs to the clef library.
While I also use Technique Text for player labels for brevity, it is best to have a dedicated text style for them as well, since this allows you to alter the appearance of all existing labels at once without affecting Technique Text objects. My template contains a pre-made one, just in case.
It is good practice, moreover, to write what instrument a percussionist is playing at the beginning of each system, always using a player label. Before creating parts, then, you may triple-click to select the entire percussion stave, then use the Advanced Filter to selectively isolate the Player Label text style, then use the Inspector to Show in Score only (on Mac, this is Ctrl-H).
Here you can see how the player label is smaller than the technique text, but I prefer it to be bigger and easier to read. With a dedicated text style, you can have it any size you want.
Percussion instruments should be placed ahead of performance to make them most accessible to all players. This is not always possible, though. If the instrument is far from the player, write “<Player> moves to <Instrument>” such as “Timpani moves to Vibraphone” way ahead of the first note to be played on the new instrument. If the instrument is near, instead, simply add a player label above the first note entry or, if you want to be extra kind, add a “take <Instrument>” or “to <Instrument>” after the last note in the previous instrument.
Bottom Line
That’s it for today!
In the next episode, we will continue exploring notational conventions, covering winds and, possibly, strings.
If you enjoy what I do, please consider liking this article, sharing it with your peers and colleagues, and subscribing to this blog to be notified of upcoming articles. If you use an iPad and would like to improve your Sibelius experience, please give a look at my profile for MetaGrid Pro here.
I also have a newsletter that follows my publishing journey, check it out if you are interested in cello (and more) and would like to receive special gifts. You can also browse my online catalogue here.
Thank you for your time and continuous support.
See you in the next episode!
Michele

One thought on “How to engrave an Opera (in Sibelius) – Ep. 6”