
Episode 8 – Notational conventions (Part 4)
Welcome back again!
Today we conclude our journey through the notational conventions that allow you to properly engrave an opera, specifically focused on doing this in Sibelius.
Harp
Please always show both staves of the harp whenever you can. Since both hands can play in both clefs, it may be confusing to show only one. Granted, the conductor may have greater priorities than knowing which hand the harpist is using, but at the very least, never hide staves in parts (unless there is full silence).
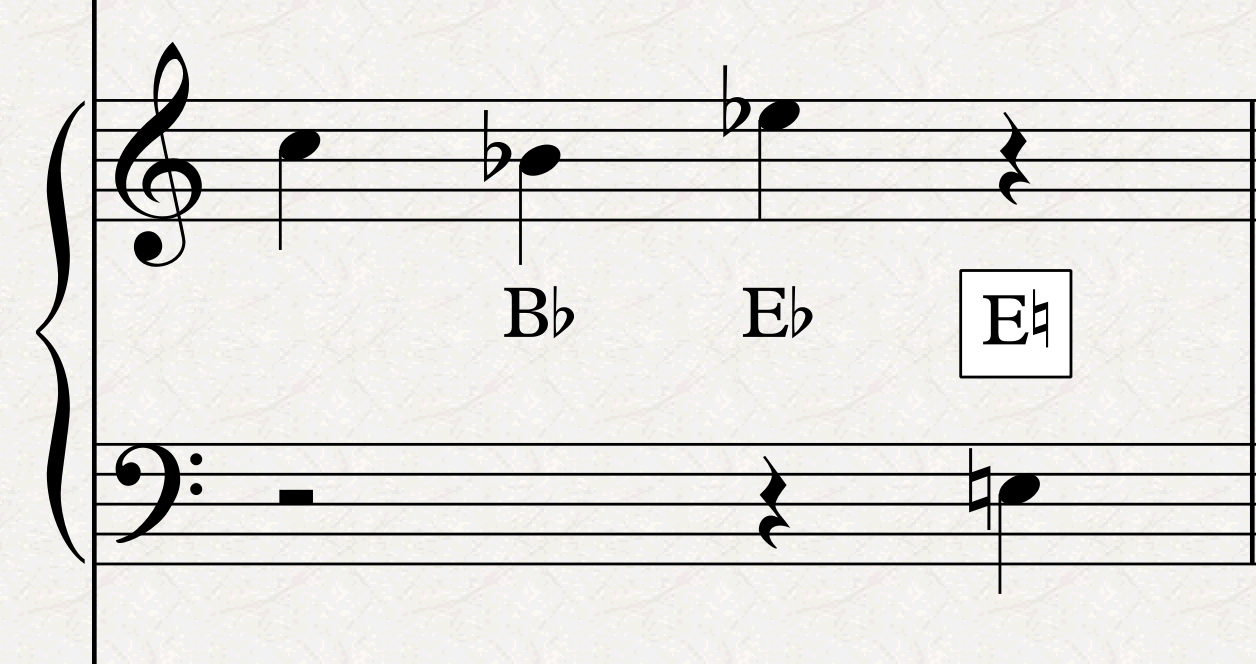
Pedal markings are quite delicate and there are several accepted conventions for where to place them. If there’s enough space, place them in the middle, between the two staves, and do not use boxed text, unless the B pedal is to be operated by the right foot and the E pedal with the left foot.
In general, if there is space, mark the pedal changes in the full score as well, not only in parts.
Some specific playing techniques need to be kept in French, such as ”près de la table”, next to the board.
When full-bar rests are required in multi-staff instruments (harp, piano, celesta, etc…) one often finds them written out only once in the empty space between the two staves.
Voices
Cut-away staves
You may have asked yourself: if we are talking about engraving an opera, why aren’t we talking about voice-specific conventions? Well, here they are!
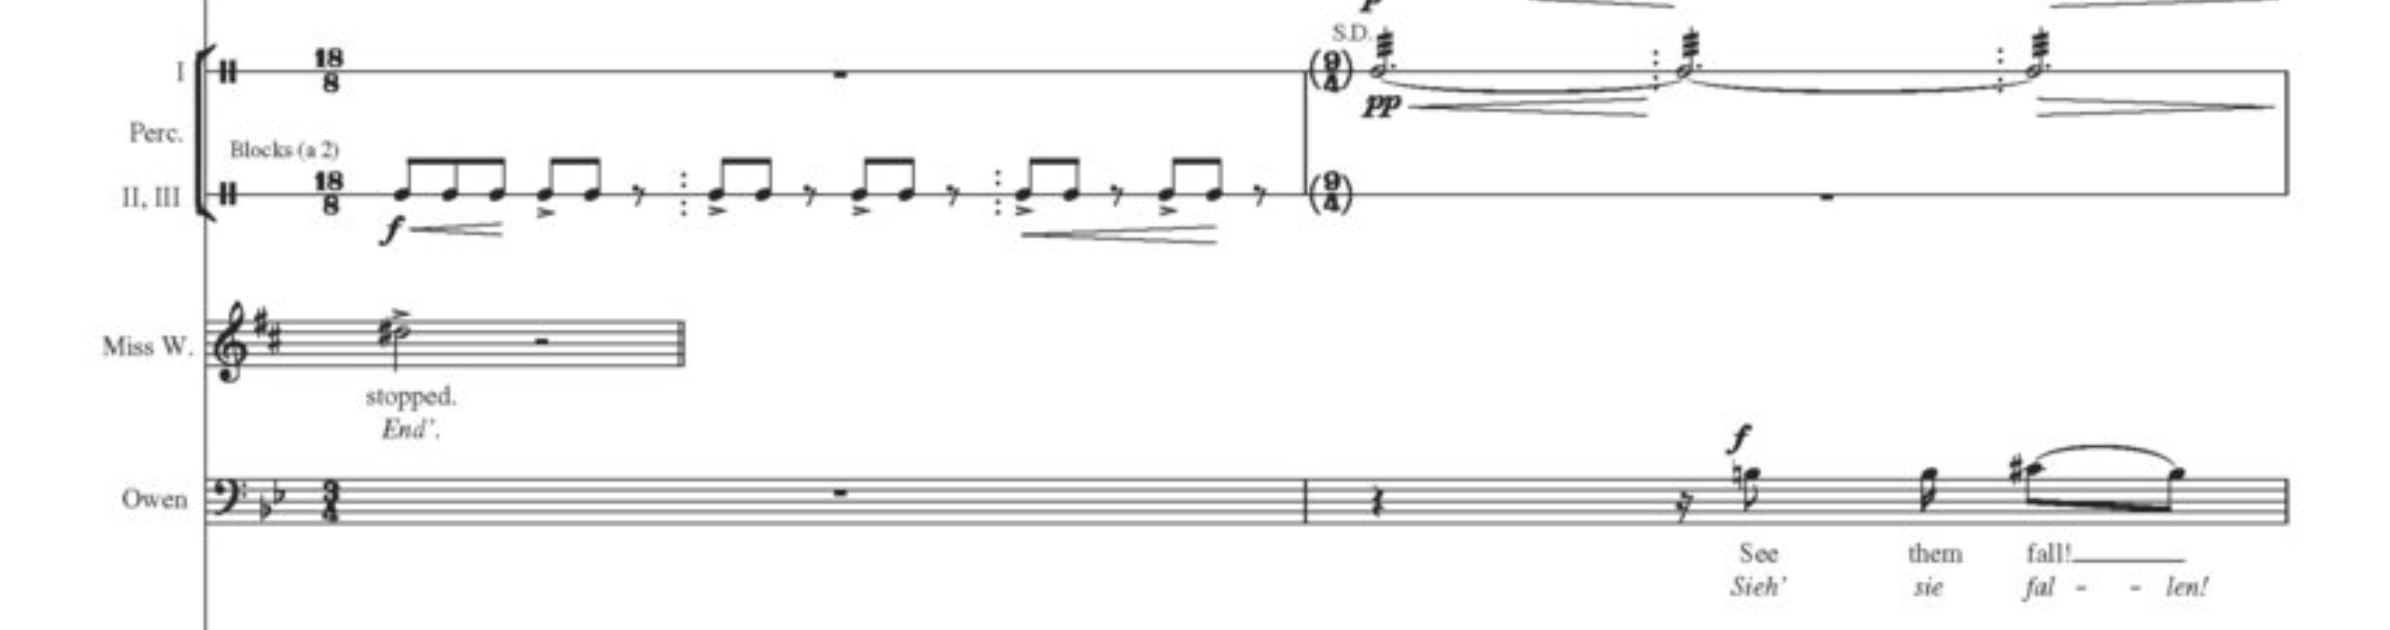
In some more modern scores, it is frequently found that, if a character goes out of stage before the end of the system (rather than simply ending his/her vocal line and waiting there), the stave is cut out mid-system. This gives the conductor a visual cue of what is happening on stage.
To achieve this in Sibelius, select the last rhythmical position of the previous bar, then go to Home > Instruments > Change, and choose the “No instrument (hidden)” instrument from the “Other” category. Be sure to revert this when the singer gets back into play (possibly a few bars before, to avoid issues at the start of a system).
Spoken parts
If a character is speaking, or rhythmically reciting some text, you can use headless notes:
In Sibelius, write the notes as usual, then select them and change the notehead to the “Headless” type from Notations > Noteheads > Type dropdown menu (pick “Headless” or simply press Option/Alt-Shift-7).
Beaming
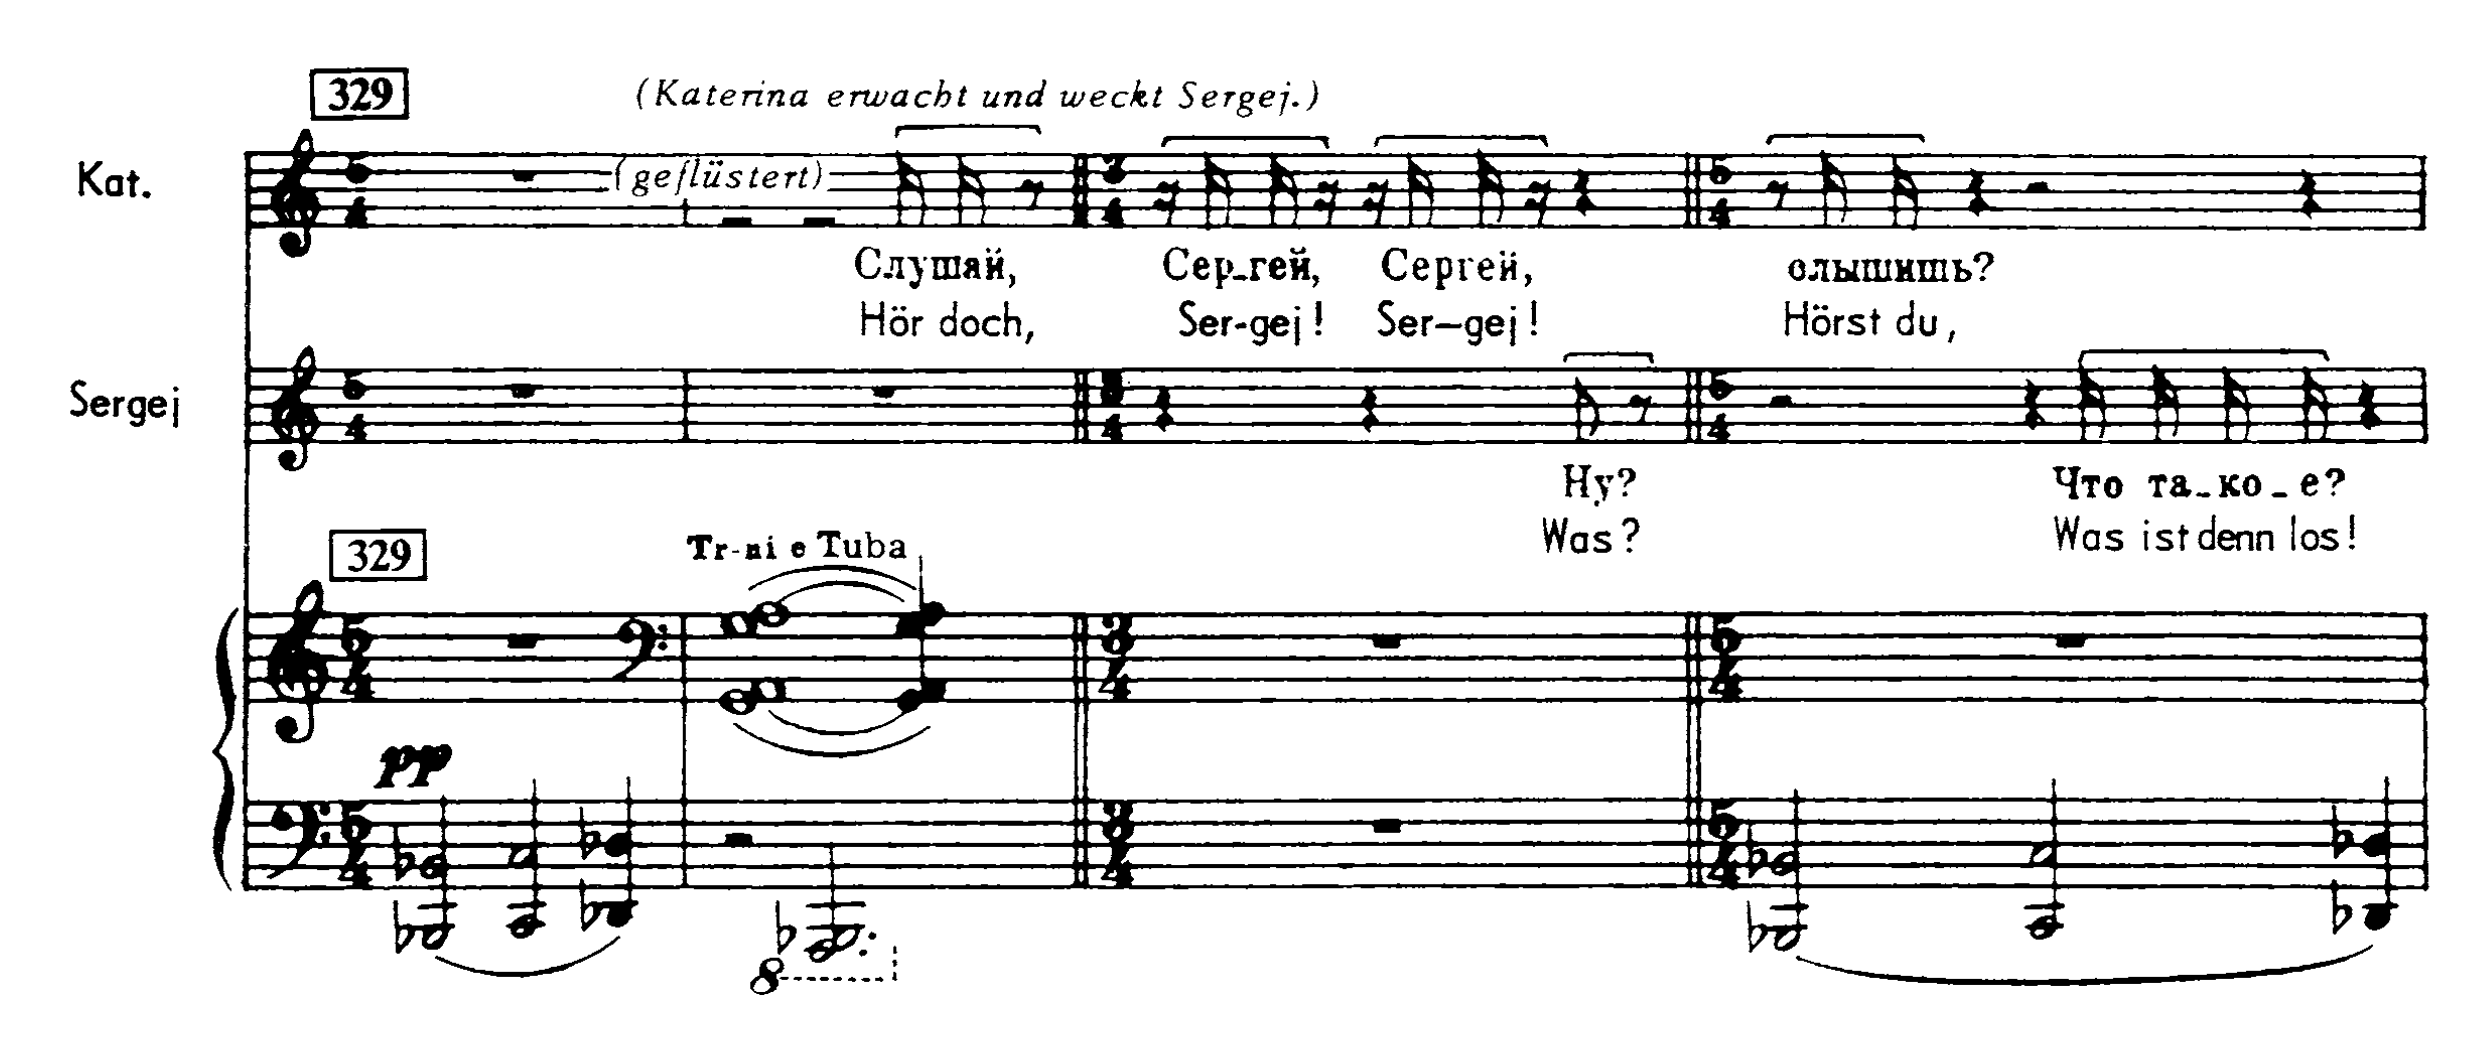
Regarding beaming, from the two examples above we can see that both Šostakovič and Britten use the same, old-style approach of syllabic beaming. That means that notes shorter or equal than an 8th-note shall be beamed together only if they encompass a full syllable, remaining unbeamed otherwise. In modern scores, definitely from the XXI century onward, a newer, streamlined approach has been applied, making voices beam as if they were standard instruments. This may sound overly critical, but I wonder whether this choice was actually a musical one, or dictated by economics, since a software beams in the standard way automatically, while caring for syllabic beaming is more time-consuming. All options for manual beaming can be found in the third page of the keypad.

More general settings—that is, they will affect the whole score, so thread carefully—can be found in Notations > Beams and in the corresponding page of Engraving Options (Cmd/Ctrl-Shift-E).
Lyrics
When dealing with lyrics, use Regular typeface for the line in the main language and use the Italic weight for the line dedicated to translation (see Britten’s example above). It may very well happen, though, that the syllabication of the second language required a different rhythm. If this is the case, write the secondary rhythm in smaller notes, like this:

To do this in Sibelius, first write the music as if the secondary rhythm didn’t exist. Then, select the first note, engage note input (N), change voice (Option/Alt and a number between 2 and 4, since Sibelius supports up to four voices per stave), and input the secondary rhythm. Now, select the entire bar by clicking in an empty spot of it, then filter for the voice in which you wrote the secondary rhythm (Cmd/Ctrl-Option/Alt-Shift and the number of the chosen voice). Go to the second layout of the keypad and press Enter on the numpad (or select the bottom-right button with the mouse). This will reduce the size of the selection to “cue size” (a percentage of the full size as established in Engraving Rules > Notes and Tremolos.). It will most likely be necessary to adjust the horizontal position of some notes through the Inspector to avoid unwanted collisions.
Center syllables under the note. When there is one syllable for multiple notes, left-align the syllable to the first note of the group. This should already be set by default in the Lyrics Text style.
General conventions
All technical instructions should go above the stave, to avoid colliding with lyrics, use “Technique Text” for that. For dynamics, use hairpins (H or Shift-H) for gradual dynamics to avoid cluttering the line of an instrument that is already focused on text with yet more text.
Note articulations should go above the stave only if they affect the distance of the lyrics line from the stave, otherwise notehead-side (as usual) is fine. If you believe that it would be better to always have them above the stave, proceed as follows:
- Select a bar in the vocal instrument of choice
- Go to Home > Instruments > Edit Instruments (the SE pointing arrow). In the dialogue that opens, you should have the desired instrument already selected.
- Tap on Edit Instrument… in the bottom-right part of the dialogue
- Tap on Edit Staff Type… in the bottom-left section of the new dialogue that opens
- Select the Notes and Rests tab of the segmented control at the top.
- Check the “Articulations always above the staff” box in the Note Properties section.

Tuplets and their brackets should always go above, and the bracket should be forced to be horizontal (something that in Sibelius has to be done manually). Slurs should break at rests, even if you want very long phrases and, as with articulations, follow normal conventions (above/below), unless they impact text distance from stave, or they are very long.
Bottom Line
That’s it for today!
In the next episode, we will look at how to build the final book and what are the priorities for the front matter.
If you enjoy what I do, please consider liking this article, sharing it with your peers and colleagues, and subscribing to this blog to be notified of upcoming articles. If you use an iPad and would like to improve your Sibelius experience, please give a look at my profile for MetaGrid Pro here.
I also have a newsletter that follows my publishing journey, check it out if you are interested in cello (and more) and would like to receive special gifts. You can also browse my online catalogue here.
Thank you for your time and continuous support.
See you in the next episode!
Michele

One thought on “How to engrave an Opera (in Sibelius) – Ep. 8”