
Inputting Chords
This article is an expanded, paraphrased and enriched transcription of the excellent video by Anthony Hughes. Go watch it, then come back for a recap, or follow along while watching.
This lesson covers an apparently simple but tricky area, that is, inputting chords. It is simple because you activate it with a single keypress, but it is tricky because it is incredibly easy to forget to deactivate it, causing potential slowdowns. If you have the possibility, and the space on your desk, to use a MIDI keyboard, please do so since, in that case, you don’t have to remember to activate/deactivate the mode.
Without further ado, let’s begin.
How to input chords
If you have followed the previous lessons, you will have noticed how the caret advances while inputting notes, the quantity of forward movement being determined by the duration of the note itself. This comes with the clear advantage of allowing you to go back to a previous point with the arrow keys and correct mistakes. Single-note input mode, in fact, overwrites what follows by the selected duration, meaning that if you go back to an earlier rhythmic position and inserts a longer duration, the remaining portion will be eaten by the new note.

To begin inputting chords, you can either use the dedicated button in the Notes toolbox or press the Q key on your keyboard.

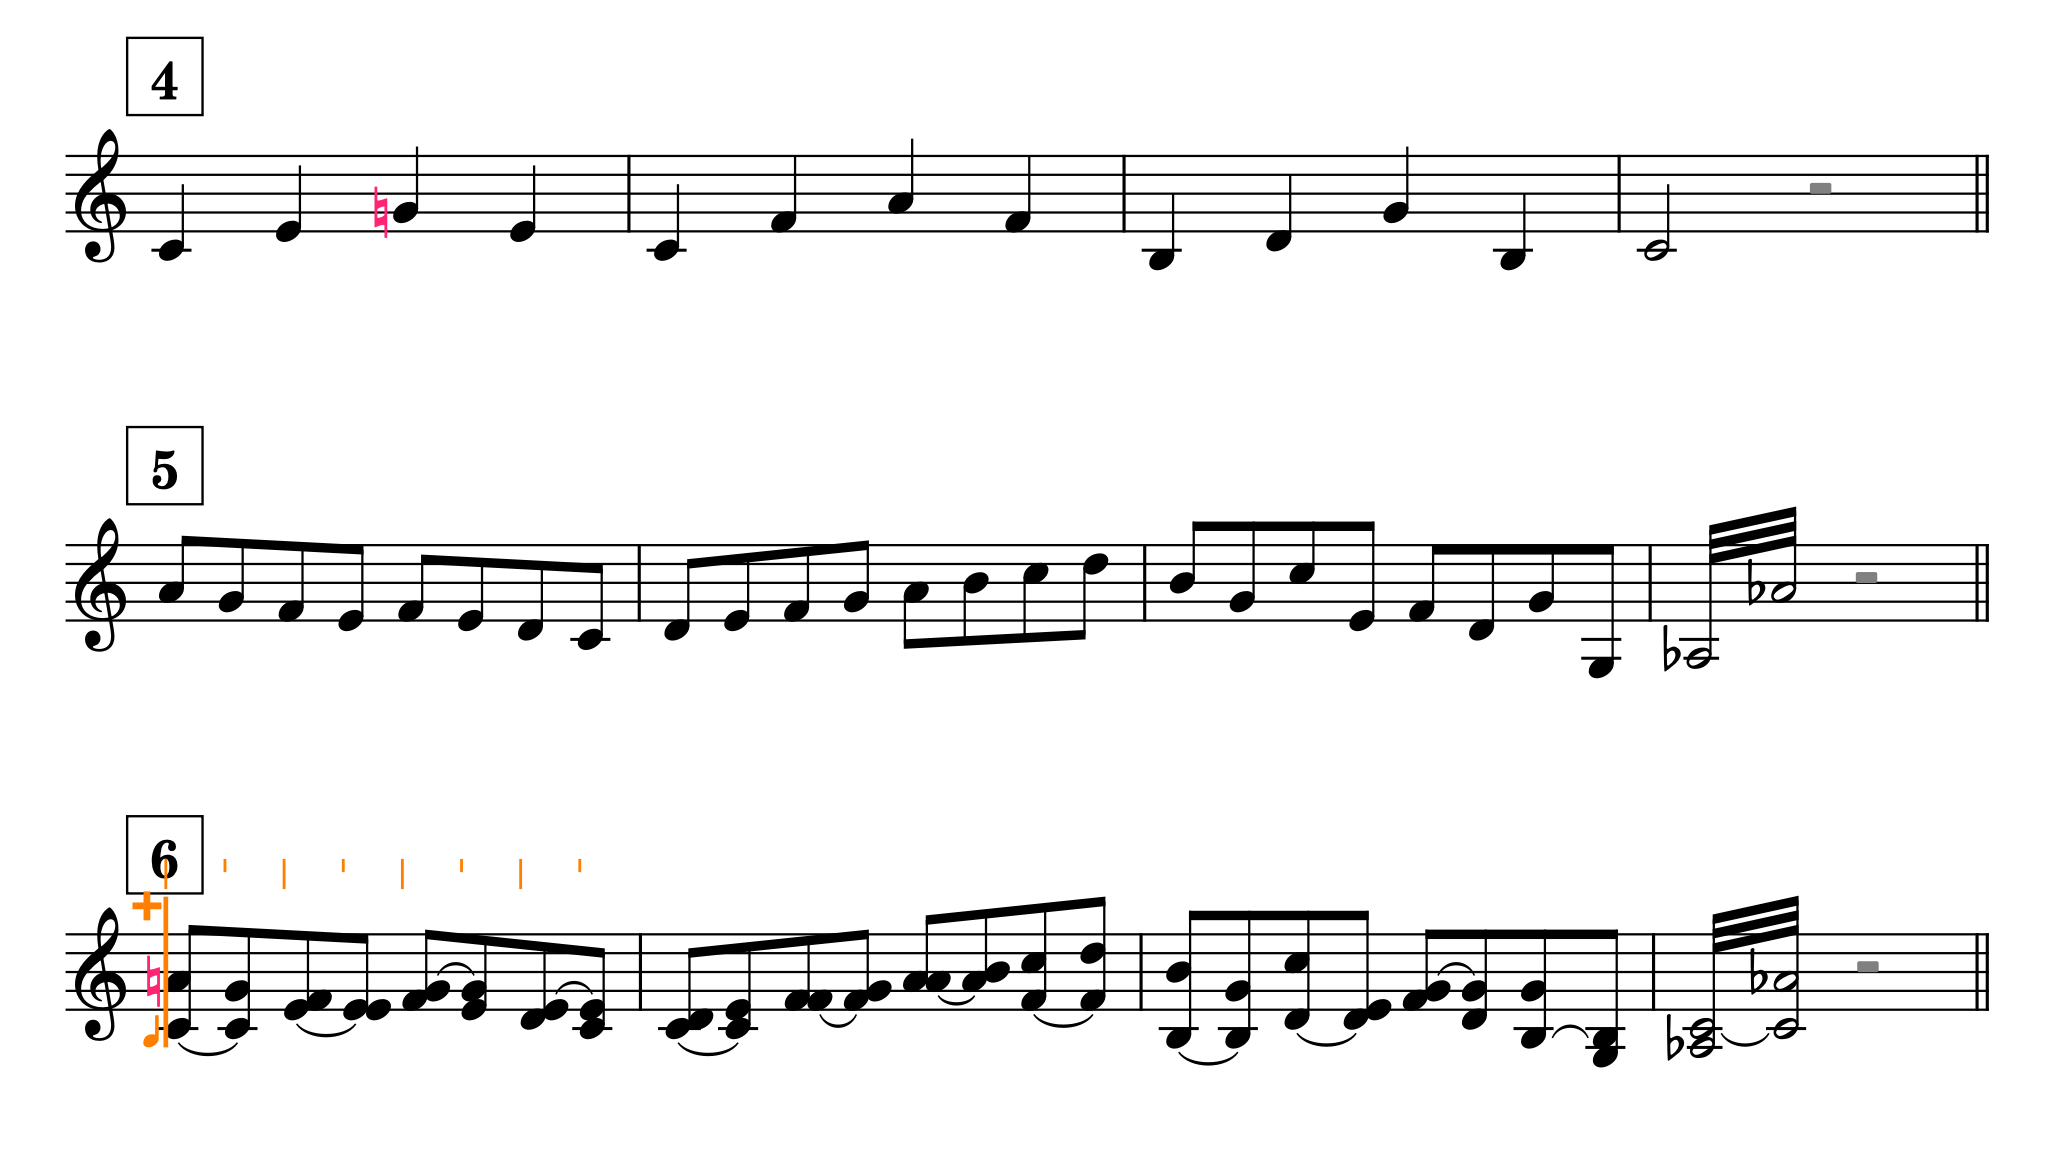
If you are used to Sibelius, you may prefer to switch the key command with the pitch-before-duration input method (K). The telltale sign that Chord Mode is active is the plus (+) symbol at the top of the caret:

Unlike with the standard Note Input Mode, inserting notes will not cause the caret to automatically advance, nor to overwrite existing music. Instead, a new note will be added above the current one. Should you want the note below, press the Ctrl key on Mac (that’s Ctrl-Alt on Windows) to get the desired result. You can add as many notes as you want; then, when you feel ready—and deeply satisfied by the harmonic result:

… press the Spacebar to advance the caret to the next rhythmic position.
As mentioned before, remember to disengage Chord Mode before moving forward. It is good practice, if you are copying from an existing source, to scan forward a few notes and see if you would need to input further chords down the line. If so, stay in Chord mode and press spacebar after each single note you enter; it will be much more efficient than pressing Q again and again.
Since one is never cautious enough, here is what happens if you copy a region and then paste it over another region hoping to replace the second with the first without deactivating Chord mode first:
Other uses of Chord mode
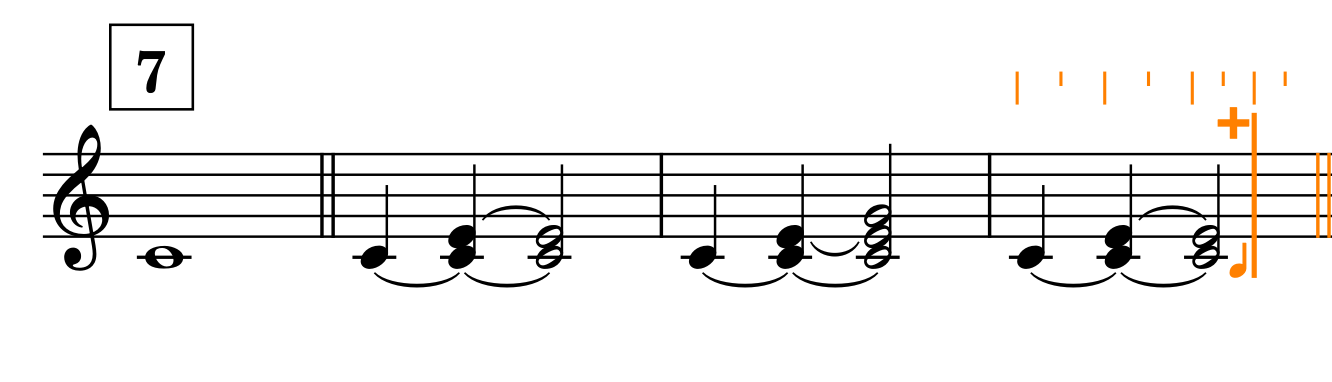
A feature not often used because it is not so apparent at first sight, is that you can position the caret wherever you like and input notes using Chord mode to achieve a chord-building effect like this:
Finally, Chord mode works also outside of note input, for example to extend the duration of a previous note so that it overlaps the following ones:
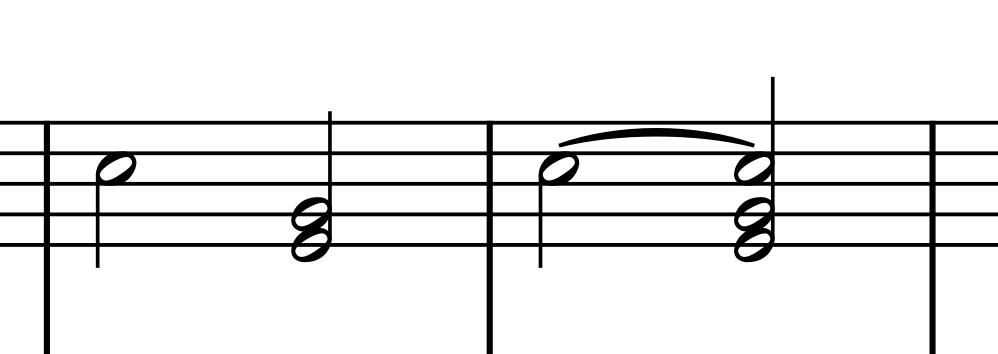
Here, after inputting the first bar, exit note input, engage Chord mode, select the first note and extend its duration with Option-Shift-Right arrow (that’s Alt-Shift-Right on Windows). Without chord mode, extending the C would have eroded the following dyad’s duration.
Using a MIDI keyboard
As mentioned before, inputting music using a MIDI keyboard doesn’t require Chord mode active to actually input chords. You also do not need to press the Spacebar to advance the caret. As someone who doesn’t have space on the desk for a MIDI keyboard but is acutely aware of the advantages of having one, I wholeheartedly suggest you to get one, even the smallest one.
iPad check!
Time to check if everything is working as expected on the iPad. As with standard note input, Chord mode is activated by either the Q shortcut or by tapping on the corresponding button in the user interface. Using Dorico with touch only is quite impractical for now, so you should consider it to be an extension of your desktop experience, not as a full replacement. It is still possible to move the caret with the buttons at the top left, and to use the onscreen piano keyboard to input notes, if you don’t have an external keyboard. After all, one can get used to everything with enough practice!
Everything described above works well on the iPad; simply replace the Spacebar with the buttons at the top left of the UI or use the dedicated Advance Caret button in the piano keyboard panel:

Bottom Line
That’s it for today!
If you enjoyed it, please leave a like to this article, subscribe to get notified of upcoming articles, and don’t forget to do the same for Anthony’s video and for the Dorico YouTube channel.
Should you be interested in my other activities, please visit my website and consider joining my mailing list, where you will be able to follow my journey through music notation and independent music publishing!
Thank you for your time, and see you here in the next episode!
