
System Settings — Part 12
Welcome back!
Last time we completed our deep dive into the Motor section of the Accessibility Page of System Settings. Today, we face the Speech section. Brace up!
Accessibility Page — Part 6
Speech
The Speech section is made up of three pages: Live Speech, Personal Voice, and Vocal Shortcuts.
Let’s go in order.
Live Speech
This feature allows the user to type into a text field and have the Mac speak aloud or directly into audio-receiving applications, such as FaceTime. This is a marvellous feature for those who are unable to speak or have lost their speech over time:
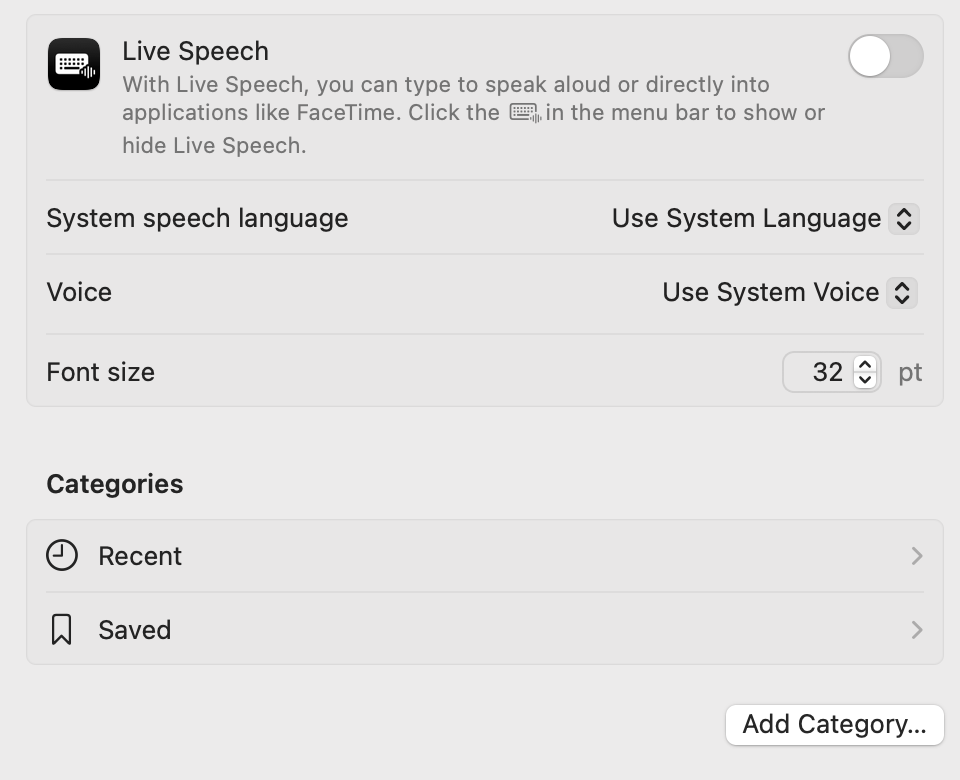
As soon as you turn the switch ON, a floating text field appears in the middle top of the screen, with a placeholder text “Type to Speak…”, a button with the last used Category, a play button, and a bookmark button.

You can resize the width of this field by dragging left or right and reposition it anywhere on the screen by dragging somewhere in the lower-right corner. Clicking on the category button lets you choose between the two default categories (Recent and Saved) while tapping on the bookmark button expands a list of the phrases that belong to that category. A button shaped like a keyboard with a waveform on its bottom right will be added to your menu bar. Tap/click on it to activate/deactivate Live Speech.
Under the System speech language dropdown, you can select among a plethora of available voices (not all languages are supported). It is quite funny to select a language such as Italian and then type a few words in English and hear how accurate the Italian accent is when speaking English. They must have trained it really well! Once you have selected the language, you can pick a specific voice (again, English will have the most generous choice). By tapping on the dropdown menu, and then on Manage Voices…

You will gain access to all available voices, most of which needs to be downloaded from Apple’s servers. Notice how there are standard, Advanced, and Premium voices.

Just below you can change the Font size, which defaults at a nice 32 points.
In the Categories section, you can see Recent and Saved, plus any other you will add through the Add Category… button. The Recent category lets you choose how many phrases to keep in memory (default: 10), then a list of those you have used last. Pick one and press the minus button to remove it from the list. The Saved category, instead, doesn’t let you decide how many phrases to keep, rather manually add and remove phrases that will always stay there available to you.
The Add Category… button allows you to create your personal categories, with an interface similar to the new Reminders app.
Personal Voice
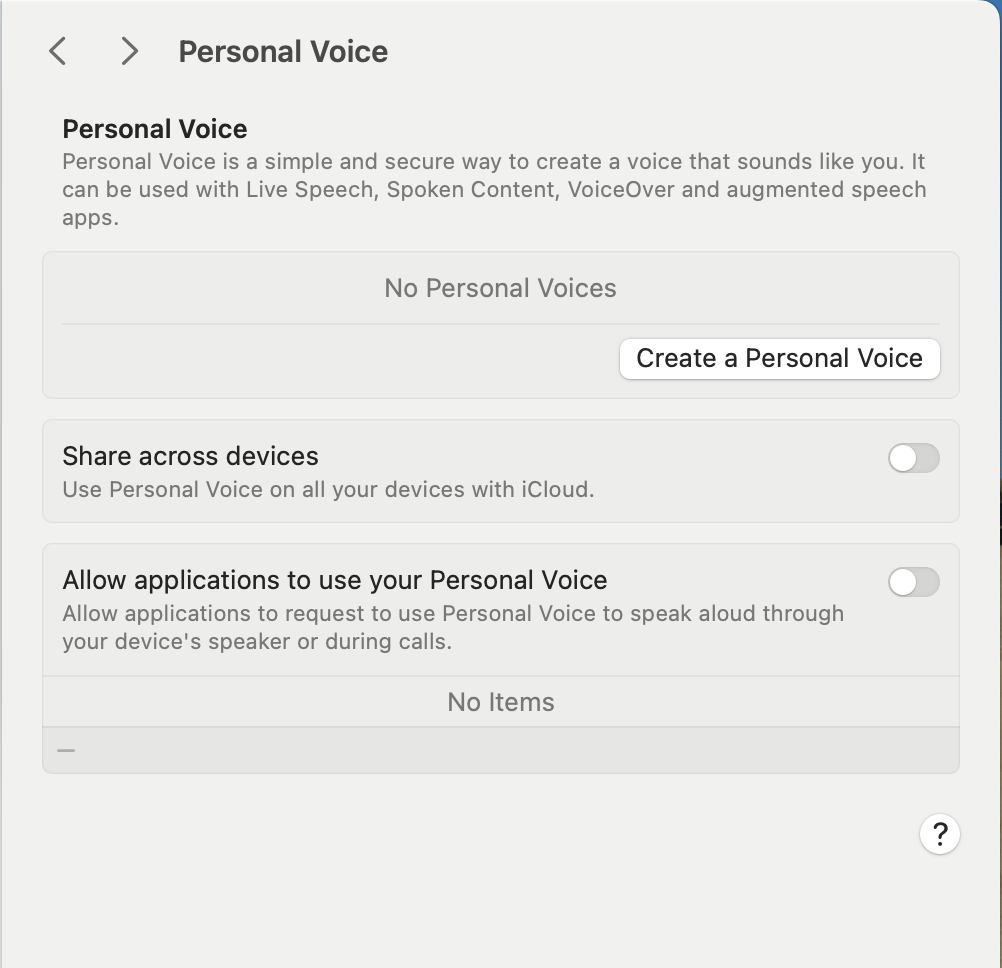
Personal Voice is a straightforward and bulletproof way to synthesise a voice that replicates your own so that, then, you can use it in Live Speech (see above), in any Spoken Content on your Mac, for VoiceOver, and much more. Third-party apps that support this need to be of the Augmentative and Alternative Communication (AAC) kind. We are allowed to use Personal Voice only to create a voice that sounds like us on our device, using our voice and for our personal, non-commercial use. This is crucial in an age when deep-faking is ever more abundant.
Pressing the Create a Personal Voice button will prompt biometric user authentication (or through your login password) to get started. The next screen will explain what is going on:
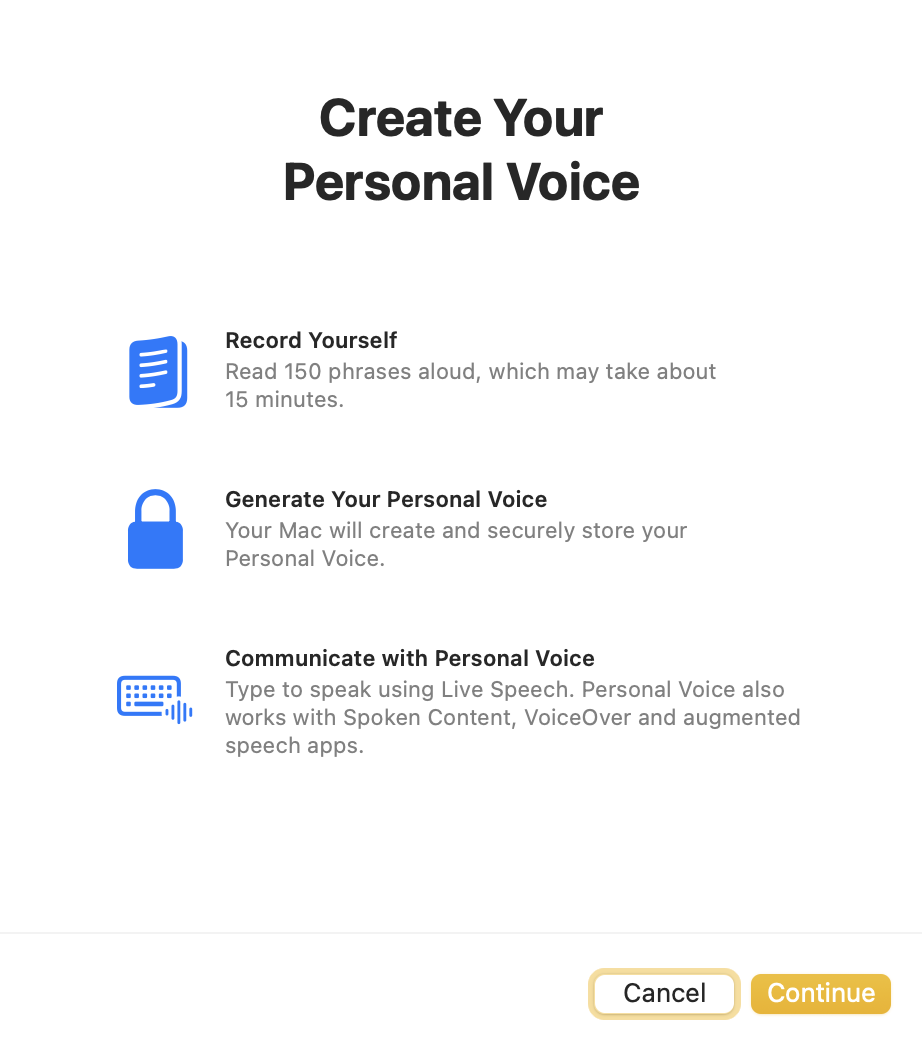
You will need to find a quiet-enough place and fifteen straight minutes of your time to perform the required reading of 150 phrases. Subsequently, the Mac will generate a voice that sounds like you and securely store it on your Mac. When that is done, you will be able to use your voice across supported and authorised apps.
The two sections below allow you to share your Personal Voice on all your devices through iCloud (be mindful that the voice-generation files may take up a considerable amount of space), and to authorise specific applications to use your Personal Voice.
Vocal Shortcuts
This feature allows you to train your Mac to recognise a custom phrase you can then say to perform an action quickly. macOS is careful to specify that any audio used is processed on-device.

Upon clicking the Set Up button, you will be prompted to choose an action and record a phrase your Mac will recognise. Tap Continue. A table view appears, divided into three categories: Siri Requests, Shortcuts (from the Shortcuts app), and Accessibility. Upon seeing this I realised how much Spring cleaning my shortcuts need. Most have been created by third-party apps and I rarely use them anyway. I should delve deeper into that aspect of macOS in the future.
Upon selecting the desired action, you will be prompted to “Enter command name”, that is the unique phrase the Mac will have to recognise to trigger the command. Then, follow the onscreen instructions to repeat the phrase out loud three times, so your Mac can recognise it, then click Done. You will then be asked to help Apple improve assistive voice features. At a first glance, this window doesn’t offer a “No, thank you” option. It appears that you cannot refuse at this stage, but need to go to System Settings > Privacy & Security > Analytics & Improvements and turn off Improve Assistive Voice Features.
A new Actions section will appear with all your shortcuts. On my tests, pressing the Info button to the far right and deleting a single action also deleted all other actions. I am not sure if this is a temporary glitch.
The good thing is that it recognised my voice and performed the requested action. The downside is that the Mac will listen to your voice at all times, which is why I am turning this OFF for now. A great feature, nonetheless.
General
The final category of the Accessibility page is the General one, including all categories that do not belong to a specific subject. At the moment of writing, in macOS 15.3.2, there are only two of them: Siri and Shortcut (singular!).
Siri
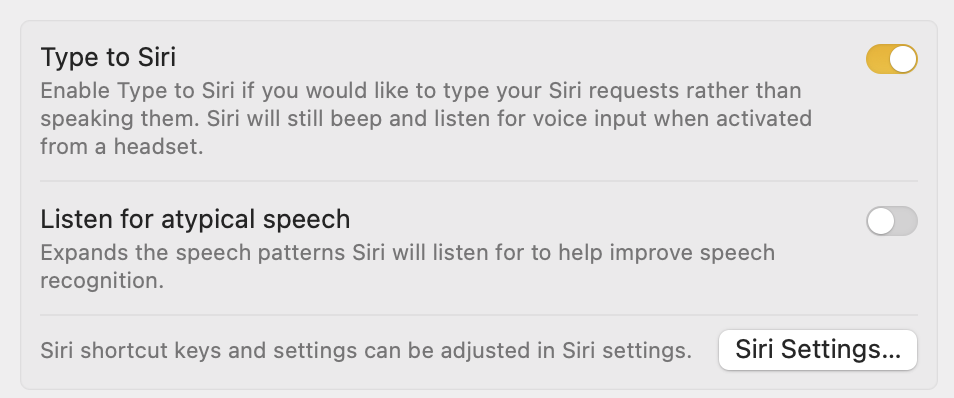
The Siri page enables you to Type to Siri, something that I keep active on all my Macs because I would rather not have the different device kinds to all react to “Hey Siri”. It will still listen to requests activated vocally when wearing a headset.
The second option, Listen for atypical speech, is not what one may think first, and I will use Apple’s words from the macOS Tips app:
Have Siri recognise a wider range of speech patterns. This may be helpful if you have an acquired or progressive condition that affects speech, such as cerebral palsy, motor neurone disease (MND) or a stroke.
I keep believing that these are the things that make the Mac such a fundamental technological breakthrough.
The Siri Settings… button brings you two pages down the System Settings list into the Apple Intelligence & Siri page, which we will look at in greater detail in due course.
Shortcut
The Shortcut page lists accessibility features that are currently available on your Mac and that you will be able to turn ON. Upon pressing the Touch ID button three times in quick succession or the key sequence Cmd-Option-F5, you will be greeted by this screen:

…and by a voice saying:
Accessibility Shortcuts
Use the Tab key to navigate, and press the Space key to toggle an option.
Bottom Line
There you have it for the Accessibility page! It took us six episodes to go through it, but I deeply believe this will prove to be a great reference for anyone wanting to learn more about such a fundamental feature! Please let me know what you think of this and if you believe I have missed anything.
In the next episode, we will tackle the Appearance page of System Settings.
If you are interested in music notation and editorial design, please consider joining my mailing list here, or browse my website to see what I do in general. I would deeply appreciate it.
I hope you found it useful. If you did, please leave a like, share it, subscribe to be notified of upcoming articles! Please share your experience setting up your Mac down in the comments, and have a great day!
