Welcome back to the second episode on the improvements introduced by Dorico 6 to the chord symbols feature. Today, we delve deep into more technical aspects. If you have not yet watched Anthony’s excellent video, please go watch it as it is packed with gems:
Now, if you have lost the first episode where we introduced the topic, you can find it here.
Chord symbol improvements — Part 2
Library ▶︎ Chord Symbols
Editing default chord symbol components
Accessing the Library ▶︎ Chord Symbols dialog presents us with a blank canvas:
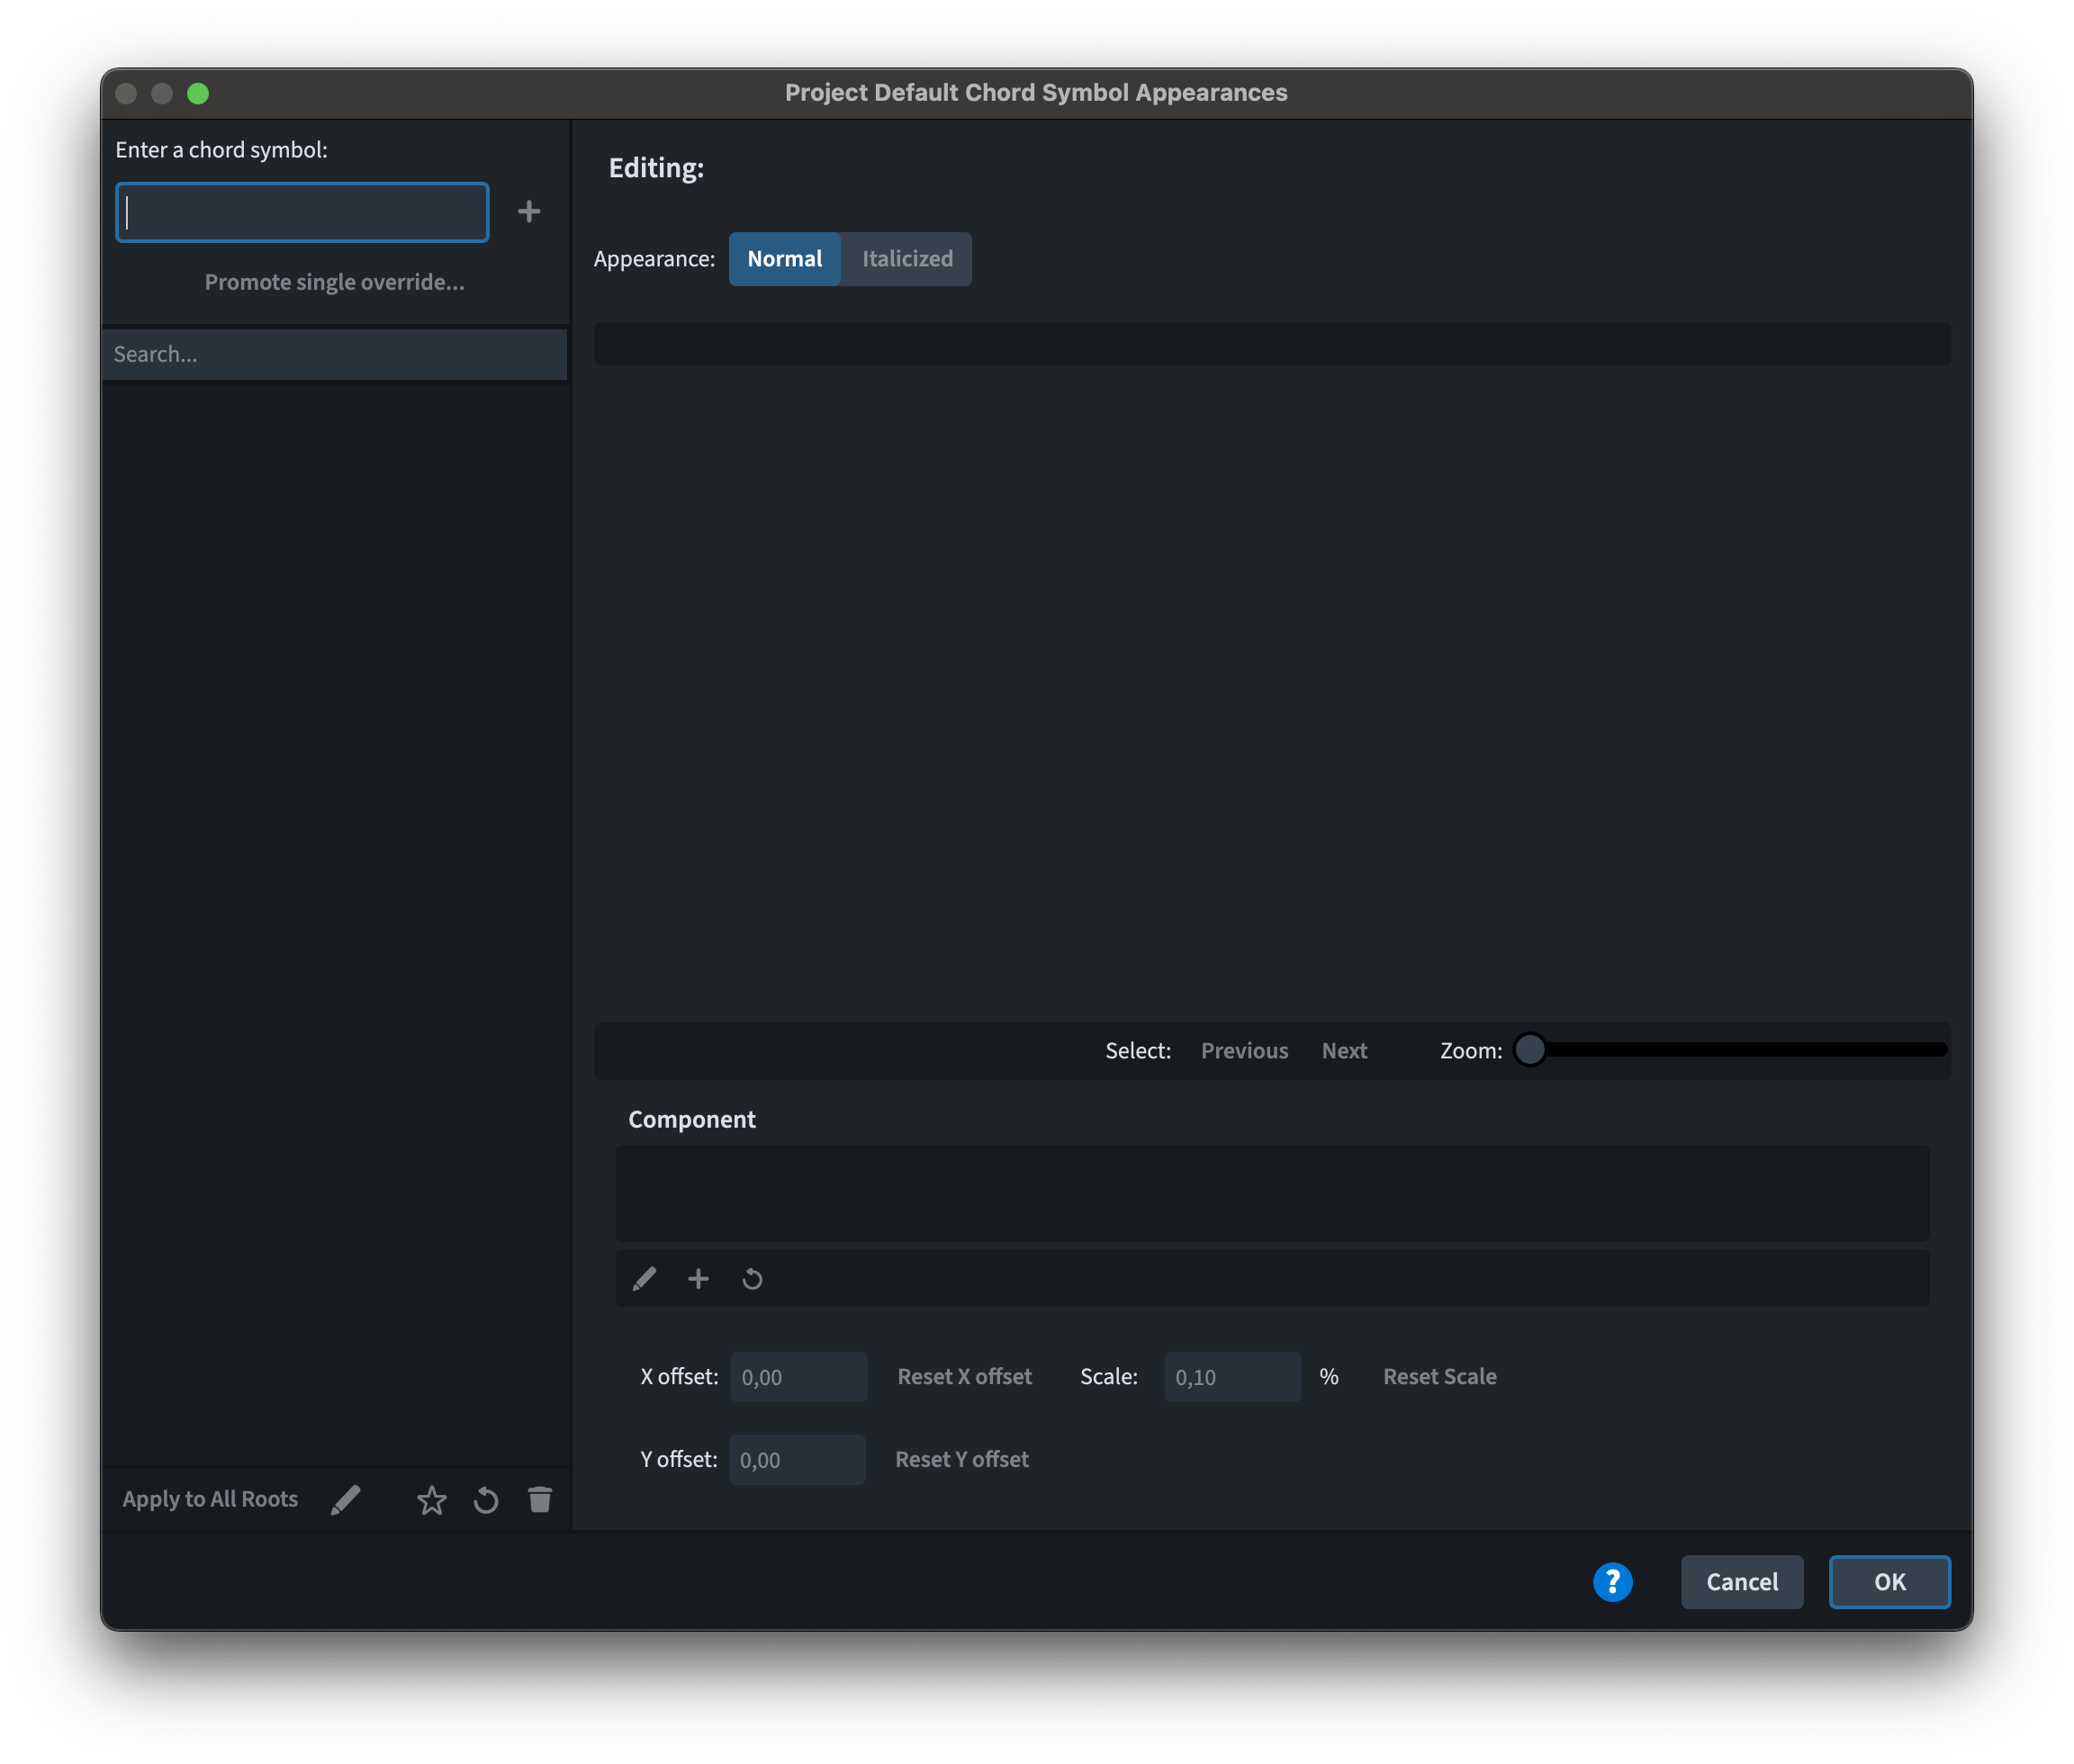
Here, we can interact with the appearance of individual components within chord symbols or with entire chord symbols. A component is defined as a single element of a symbol, such as the root note or the chord quality.
To get started, type a chord symbol that contains the component you would like to modify in the field at the top left, or pick from the list to the left. To test this out, I typed “Cb7#4”, that is Cb—Eb-F-Gb-Bbb1, and pressed the + button. If you now press OK and then access the dialog again, that chord is gone. That’s because internal cleaning is performed to be sure there are no unnecessary objects left lingering behind.
In any case the chord appears in the middle of the dialog:
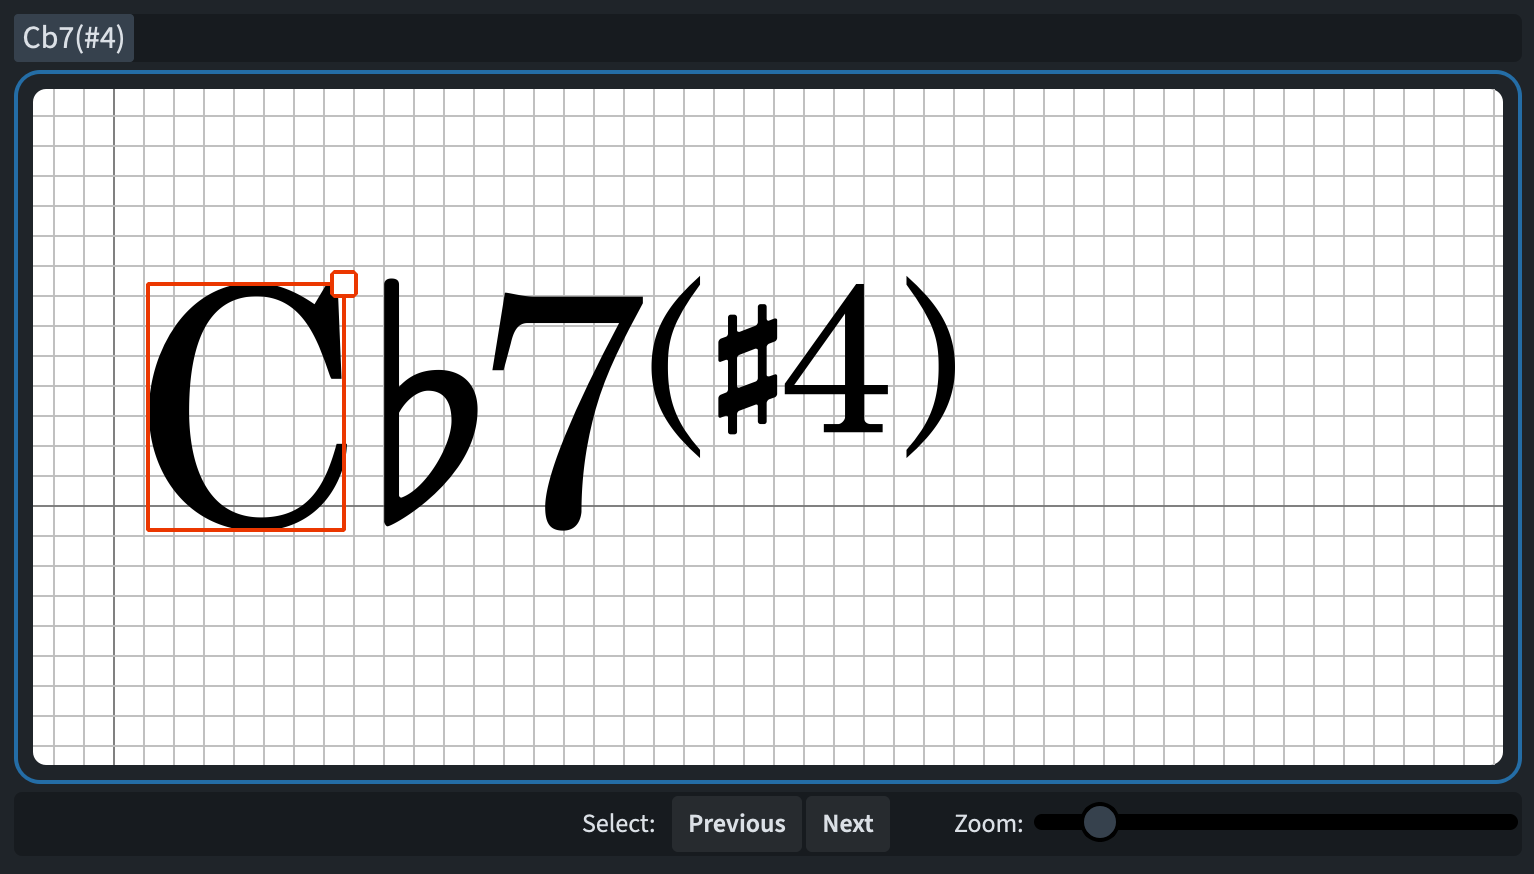
If I now select any of the components (C, b, 7, (#4)), it will become highlighted in the graph-paper area and in the row of compatible components below (here’s with C selected):

Tapping on the Edit component button (shaped as a pencil) opens the symbol editor—similar to what would open in Library ▶︎ Music Symbols. Beware that any change performed here will be applied to all chord symbols where such component is used. Let’s say that you want to edit this component without affecting existing chord symbols: you should press the + button instead (Add Component). This action will save the new component in the project’s library but will not make any chord symbol use it by default. Don’t forget to tap on OK when you are done.
Editing default chord symbol appearances
If in the previous section we decided what components to use, now we decide how to use them.
The action of editing the appearance of an entire chord symbol is twofold: first, one should choose which components to use; second, one should decide how each component should be scaled and positioned relative to each other. In the same dialog as before, we can select each component and edit their relative position and scale either through the pointer or through the dedicated controls at the bottom:

If you have edited the root of a chord symbol—and are finally happy and feeling complete—you have the option to set this root as default by tapping on the Apply to All Roots button at the bottom left of the dialog. The Version History tells me that I should be warned that this operation cannot be undone. The warning, in my case, did not show. Nevertheless, this operation enables two new buttons at the top, Prev root and Next root, that allow you to cycle through all root notes, checking that your changes are satisfying.
It is possible to disconnect the normal from the italicised appearance by unchecking the Synchronise with normal appearance checkbox.
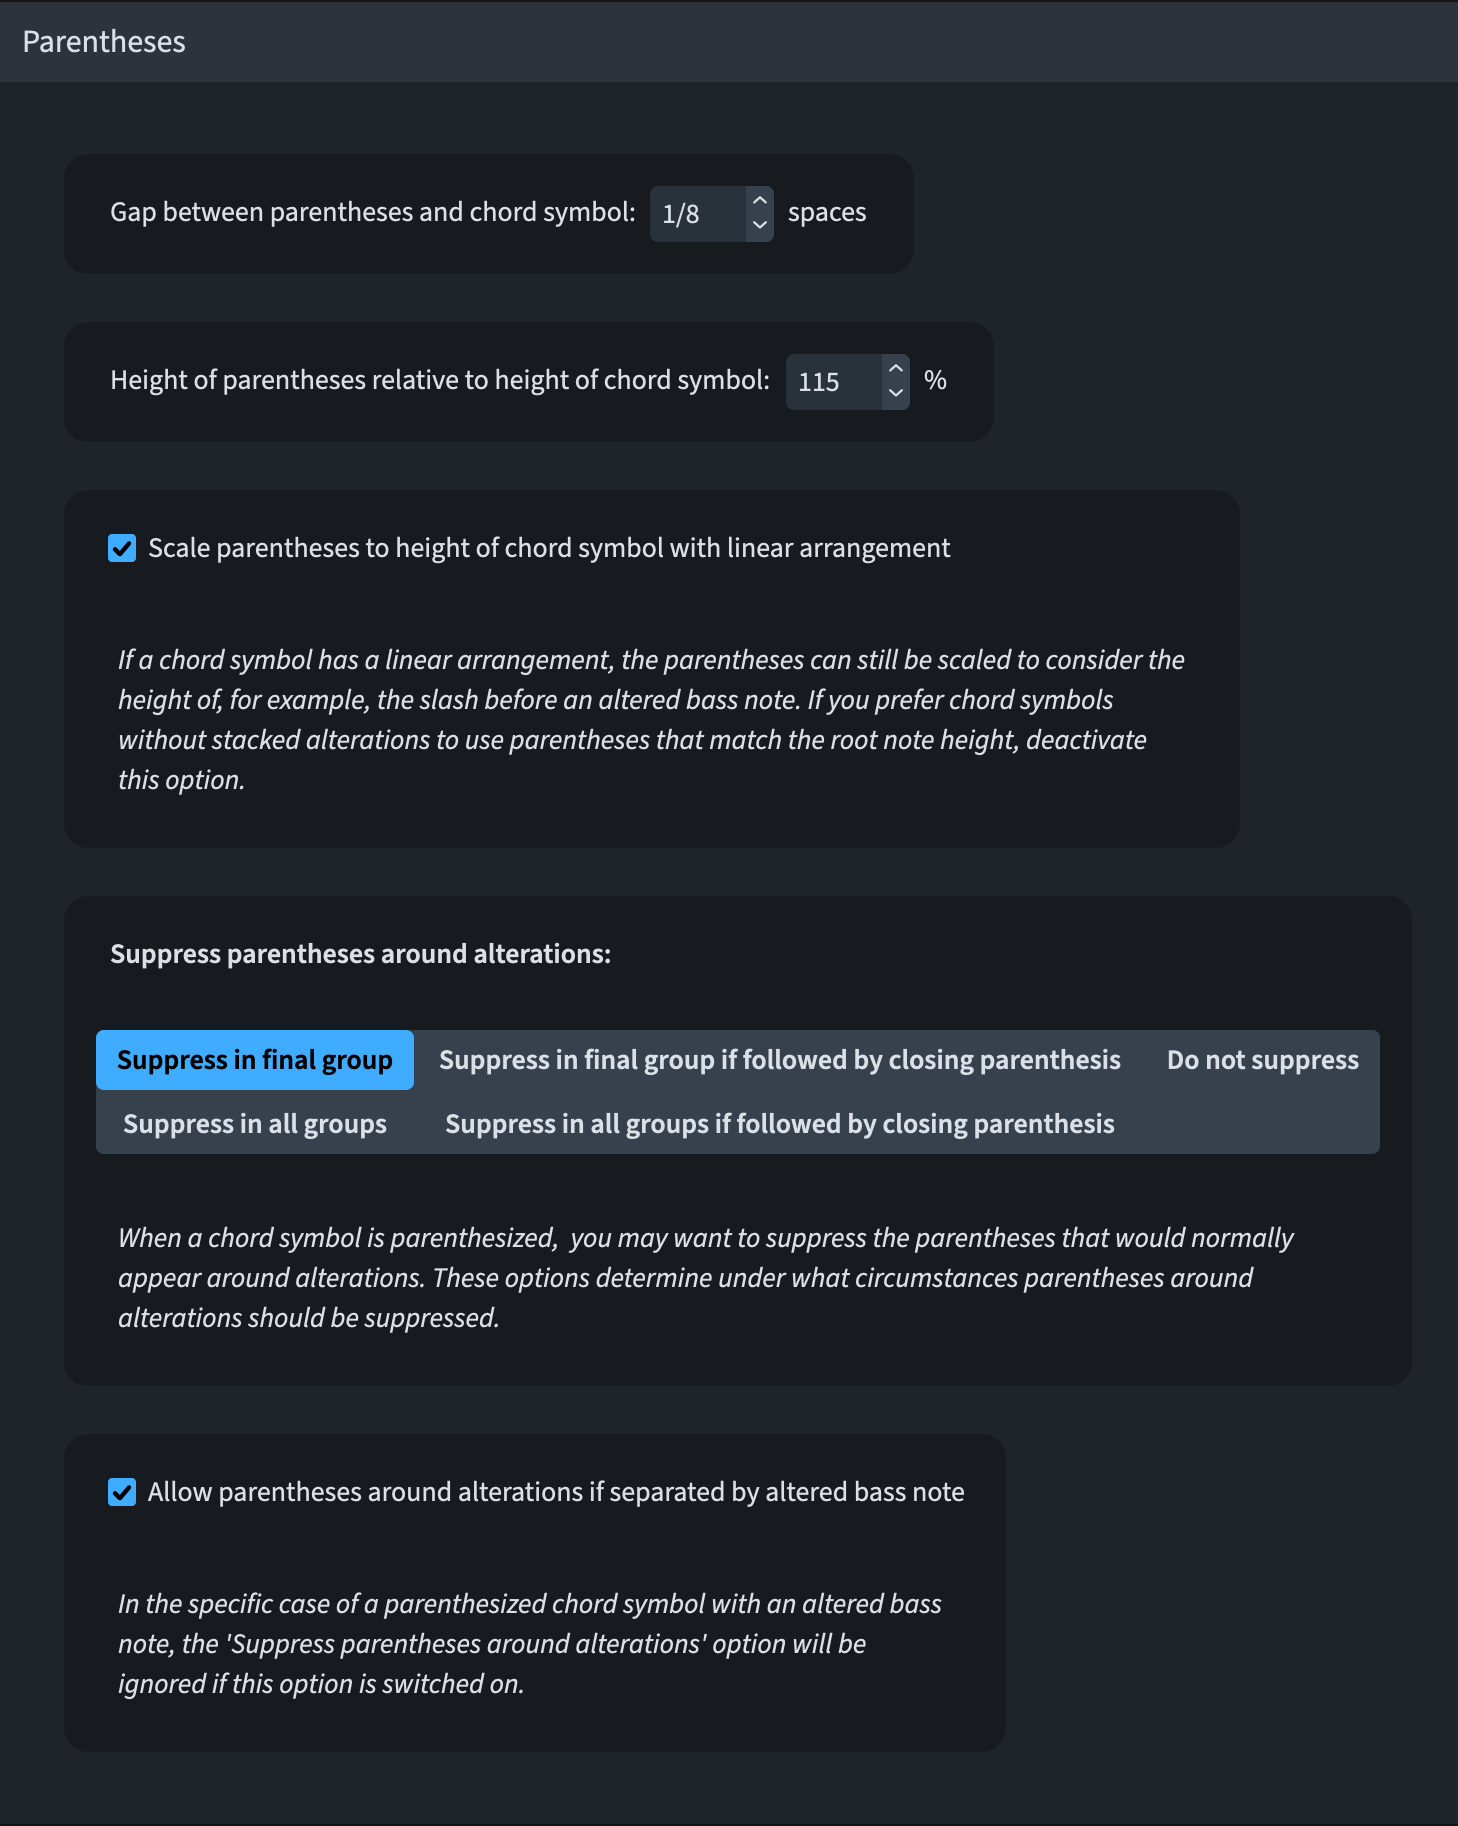
Chord symbols may be now shown in italic typeface if you have set your Engraving Options for Capo chord symbol appearance to In italics. Likewise, Engraving Options are the right (and only) place to edit the position of parentheses relative to chord symbols.
Custom Chord Symbols
Dorico’s semantic approach to every aspect of music notation is a double-edged sword: it is a blessing when it allows graphical elements to “magically” play back, and it is a nuisance when it doesn’t allow you to edit specific aspects of those same elements.
For chord symbols, the same dialog we explored so far has a hidden power: if you type a chord symbol that doesn’t exist in Dorico’s library, you will be prompted to create a new symbol. Accept the invitation and welcome the new Create Custom Chord Symbol dialog:

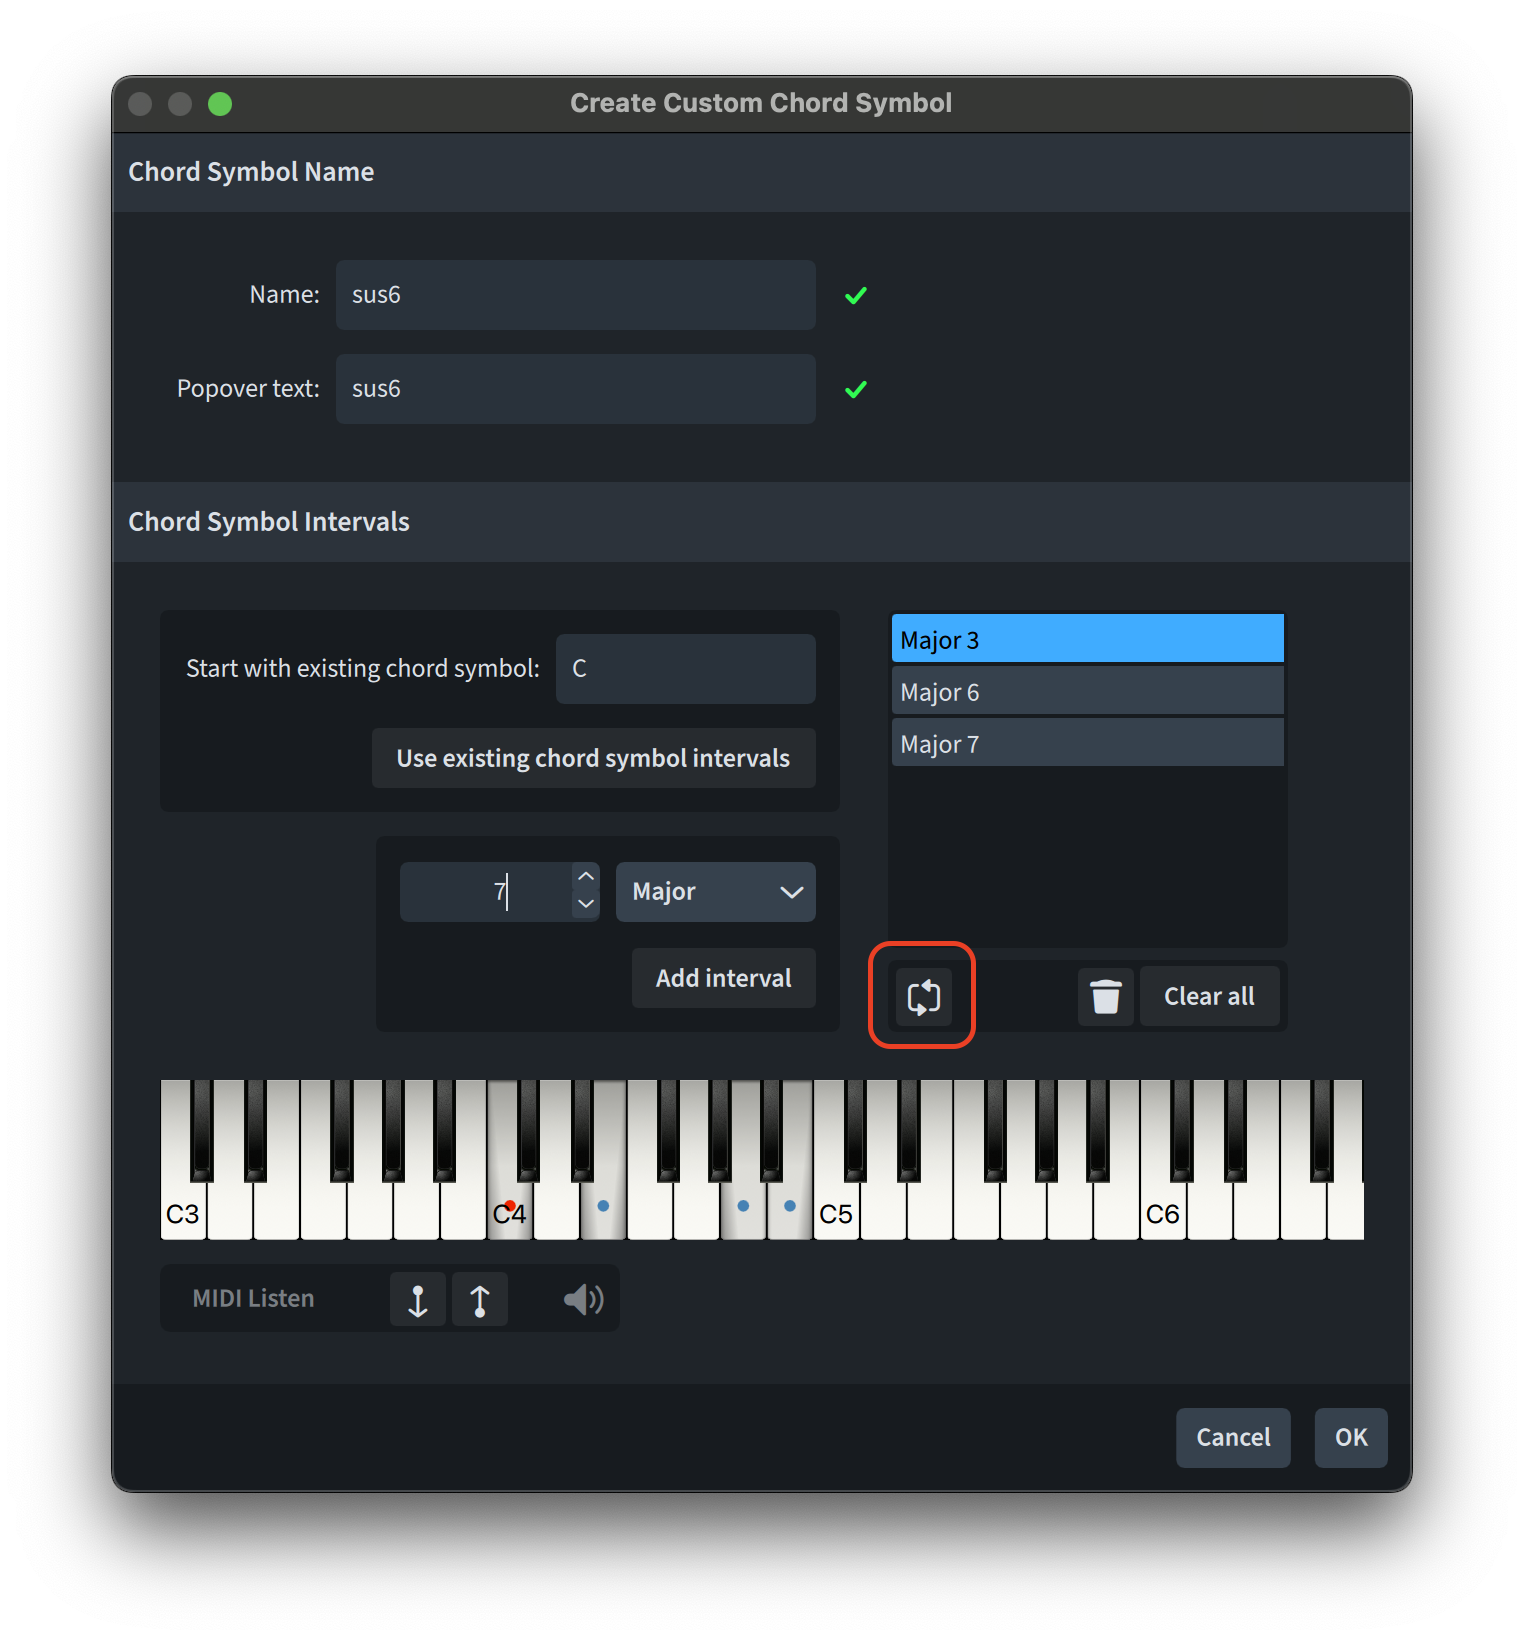
As a complete beginner in this, I will follow the example given by the Version History. In this case, we wrote “sus6” in the text field, which means “suspended 6th”. In the Name: and Popover text: fields, you will see the text you entered before pressing OK. If they are valid, a green checkmark will appear to the right. When actually inputting a real chord, you will need to input a root, e.g., C-sharp, and then add “sus6” to it.
Next is the Chord Symbol Intervals section, where we are prompted to define the intervals constituting our new chord symbol. You can start from an existing chord symbol and then edit it, or you can also start from scratch. There are three ways to do so:
- Type a number or click on the stepper buttons, then choose a type from the dropdown menu and tap on Add Interval;
- Tap on the keyboard keys once to add a note; tap it again to remove it. A blue dot (red if the note is the root) will appear on the key, showing that a note is active;
- Click the MIDI Listen button and play a chord on your MIDI keyboard.
Enharmonic alternatives can be found by clicking the cycling button under the list:
After confirming, we are now brought back to the previous dialog, where we can now edit the appearance of our new, shiny chord symbol.
Chord symbol kerning pairs
As a quick recap for the uninitiated, the act of kerning in typography is defined as the editing of the space between two individual characters to improve its legibility and visual balance. Every font that we use in our daily activities is governed by kerning pairs, which define the precise position a pair of characters should assume when next to each other.
Dorico uses kerning for chords too, but here’s the catch: the text portion of a chord symbol is expressed by the Chord Symbols Font style, while the symbol parts uses the Chord Symbols Music Text Font. Now, if you thought that kerning pairs in a single font were complicated enough, try to imagine combining two fonts together! If you use the default fonts shipping with Dorico (Academico and Bravura Text), then you are already set up; if, instead, you plan to use different fonts, the result will be suboptimal. Here, then, is where the chord symbol kerning pairs dialog comes into play.
By default, double-clicking in Engrave mode on a chord symbol will open it in the kerning pairs editor. Should you prefer such action to open the Appearance Editor instead, modify the relevant option in Preferences:

If you choose this last option, you need to go to Library ▶︎ Chord Symbol Kerning Pairs to open the dialog.

Defining a new kerning table
In the left-hand side portion of the dialog are listed the existing kerning tables, each comprising two fonts, a text font and a music text font. To create a new one, tap on the + button to choose a new pair of fonts, thus defining a new kerning table:
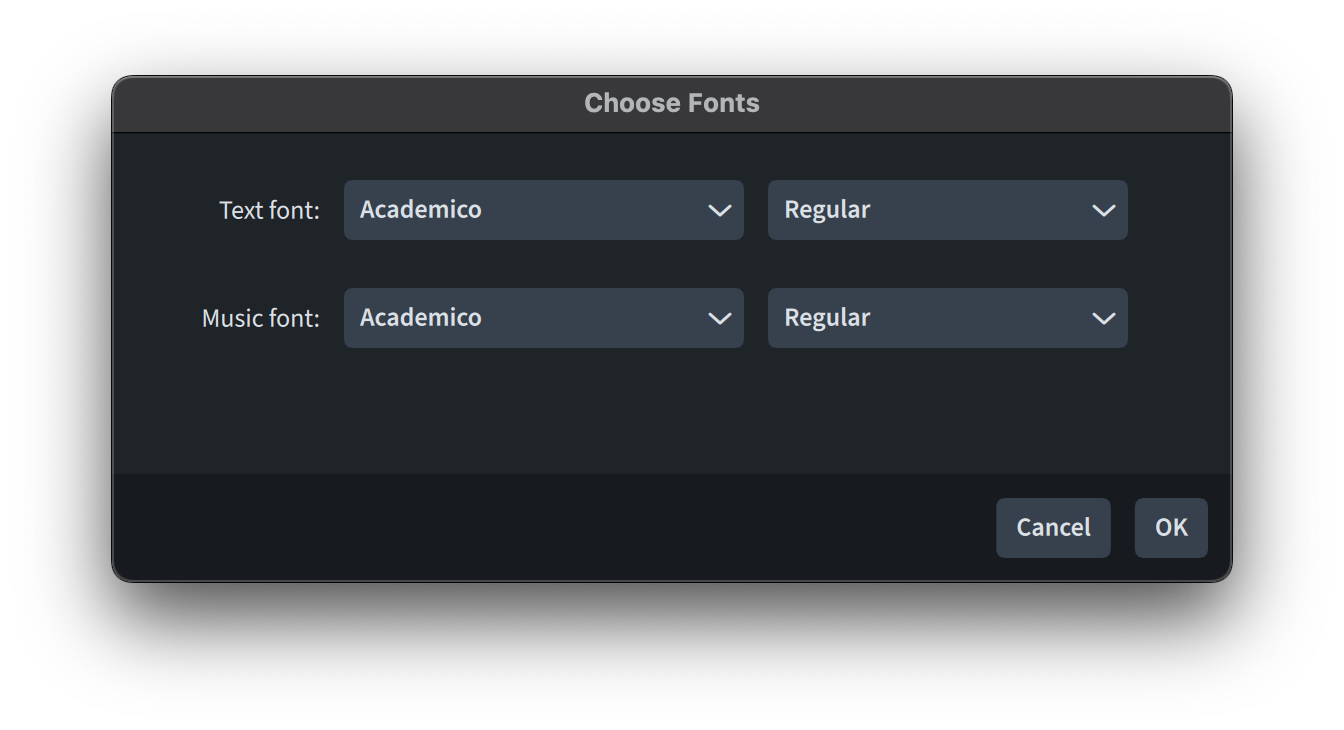
This is something quite delicate because there are not actually that many fonts that match the same Unicode character-mapping of Bravura. There are a few hacks possible to work around this but they are quite complex and out of the scope of this article. My suggestion is to use any text font you want and leave the music font to Bravura Text, unless you are 100% sure that your music font can match Bravura point-to-point.
Choosing a kerning pair to edit
To edit a kerning pair, type a full or partial chord symbol into the text field in the top centre; the chord will appear in the editing area below. The first thing you will see is that, regardless of what you select, two components will be highlighted at the same time. They will both show a light blue background, but the one to the right will also show a dark blue outline. This is the component that you will be able to move, either by dragging or by holding down Option/Alt and using the left/right arrows. It is also possible to enter a numerical value into the spin control. Finally, there is a Reset button to get back to square one.
Just below the main editing area are three small previews that allow you to see how the chord symbol will look at different sizes.

At the top right, instead, are three steppers that let you cycle through the different components of the chosen chord: the root, the quality, and the interval.
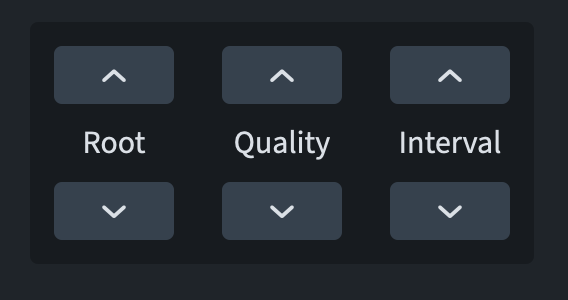
These steppers can be controlled without the pointer by simply pressing (and modifying) the up/down arrows: ↑/↓ by itself changes the root note; adding Option/Alt cycles between modes (major, minor, etc.); using Command/Ctrl instead browses the different intervals (seventh, ninth, etc.).
Editing the kerning for stacked components
In the example we are using (Gb(#5b9)), there is a stacked component. This is quite a common occurrence as soon as the chord becomes more complex. Either double-click the component or press the letter I on your keyboard to enter the editing area:
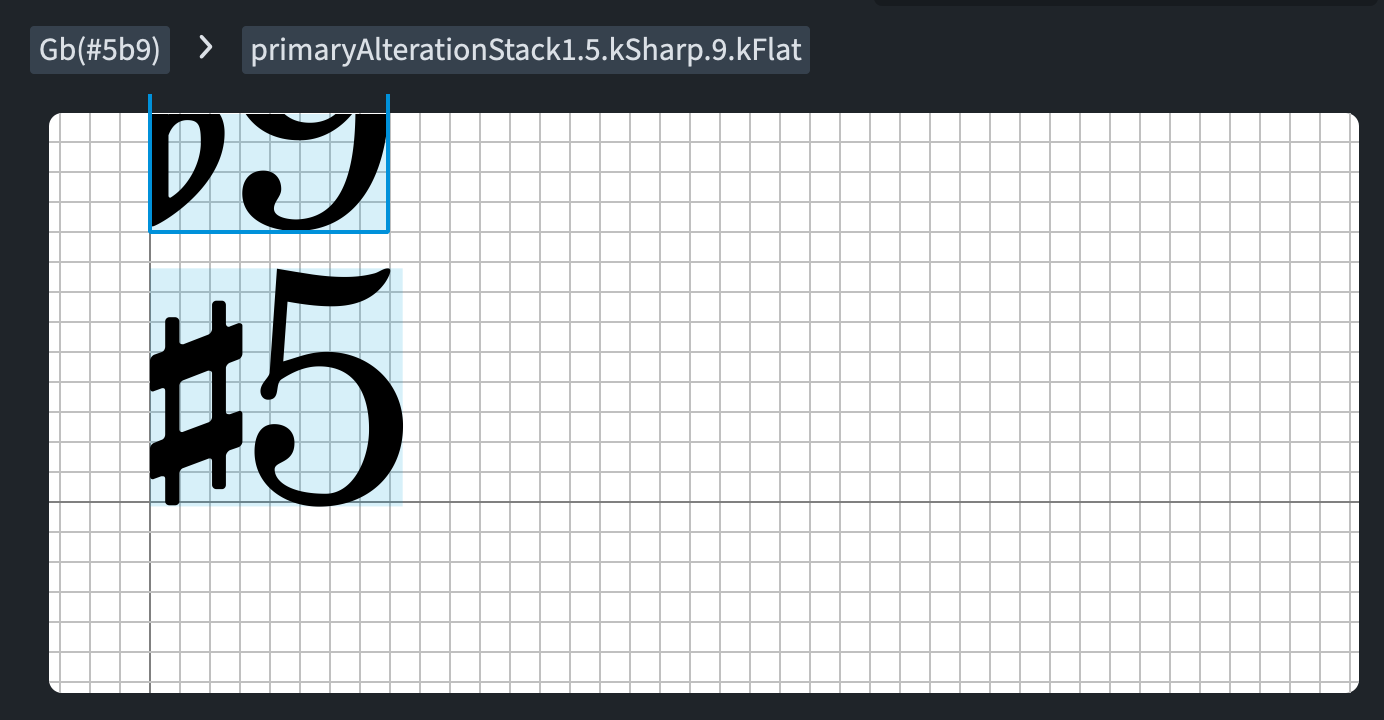
Above the editing area—which is a zoomed up version of the main one—you will see a path which will be useful to trace your way back one step at a time. To exit, hit O or click on any of the buttons in the path back home.
Conclusions
The font family and style defined for the Chord Symbol Text Font and the Chord Symbol Music Text Font define whether Dorico can find a matching chord symbol kerning pair. Should that not be found, it will fall back to the defaults: Academico and Bravura Text.
As always with this kind of dialogs, the user can save a new table as default to make it appear in future projects by tapping on the star button in the action bar.
Bottom Line
That’s it for today! We managed to get to the end of this massive new topic.
The improvements to this area are truly massive and, while I am not a great user of chords in my daily workflow, I learned a lot by just writing this article. I hope it will prove useful to many of you.
If you enjoyed this post, please leave it a like, subscribe to get notified of upcoming articles, and don’t forget to do the same for Anthony’s video and for the Dorico YouTube channel.
Should you be interested in my other activities, please visit my website and consider joining my mailing list, where you will be able to follow my journey through music notation and independent music publishing!
Thank you for your time, and see you here in the next episode.
- I had thought that adding a ‘b’ before the 7 would give me a minor 7th, but I confused this with the Figured Bass so I will now bear the consequences! ↩

One thought on “Chord symbols in Dorico 6 201 — ready for the next level?”