A review of Dorico 6’s improvements to workflow
This article is an expanded, paraphrased and enriched transcription of the excellent video by Anthony Hughes. Go watch it, then come back for a recap, or follow along while watching.
Introduction
Using a specific software for several hours a day, six days a week, let’s say fifty weeks a year means that every improvement or optimisation to its workflows will have a dramatic impact on productivity. It’s a double-edged sword, though, because any change introduces a learning curve that one may or may not have the time to face. Luckily, Dorico has never been a software that would revolutionise its existing features; rather, it would evolve them, one small bit at a time, making sure that users who wanted to keep using it as they knew were able to.
These three articles will cover all the (several!) improvements introduced by Dorico in its version 6. There is something for everyone, so sit back, relax, and enjoy the ride.
PART 1
Rulers and grids
As an engraver who has realised over one hundred scores of highly complex contemporary music, I find this new feature a real godsend. Like all professional desktop publishing, photo editing, and vector drawing programs, it is now possible to show rulers along the top and left edge of the music area. To activate them, go to Engrave mode then, from the Engrave menu, tap on Rulers. The position of the pointer is always shown on the rulers relative to the top-left corner of the page:

By default, the measurement begins anew on each page, but there is a preference to continue ruler measurement across page spreads—useful for editorial work. For this, go to Preferences ▶︎ General ▶︎ View and find the Ruler section. There, check the “Continue ruler across spreads” option.

Now, scroll back to the top of the dialogue and, next to the Language dropdown menu, find the Preferred unit of measurement one. There you can choose what unit you would like to use in general, which applies to rulers too.
As a passionate InDesign user, I love how, in there, it is possible to right-click on the rulers’ intersection to change unit of measurement on the fly. While this is not the case in Dorico 6, there is a—possibly undocumented!?—trick: double-click on the rulers’ intersection to cycle through different units:
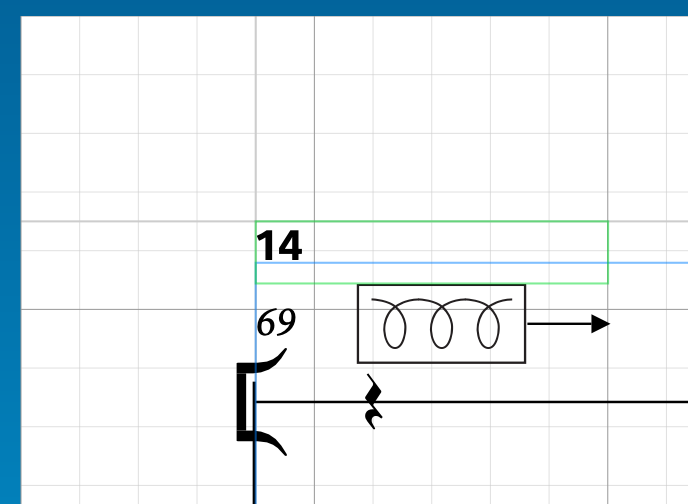
In the same Engrave menu, just below Rulers, you will find the new Grid tool, an incredibly helpful addition to help engravers align objects properly. Your mileage may vary but as soon as I turned it ON it was set to have main grid lines every 1 inch (25.4 mm) and secondary, fainter lines every 1/5 inch.
Go back to the Engrave menu and, below Grid, find the Grid Options non-modal1 dialog.
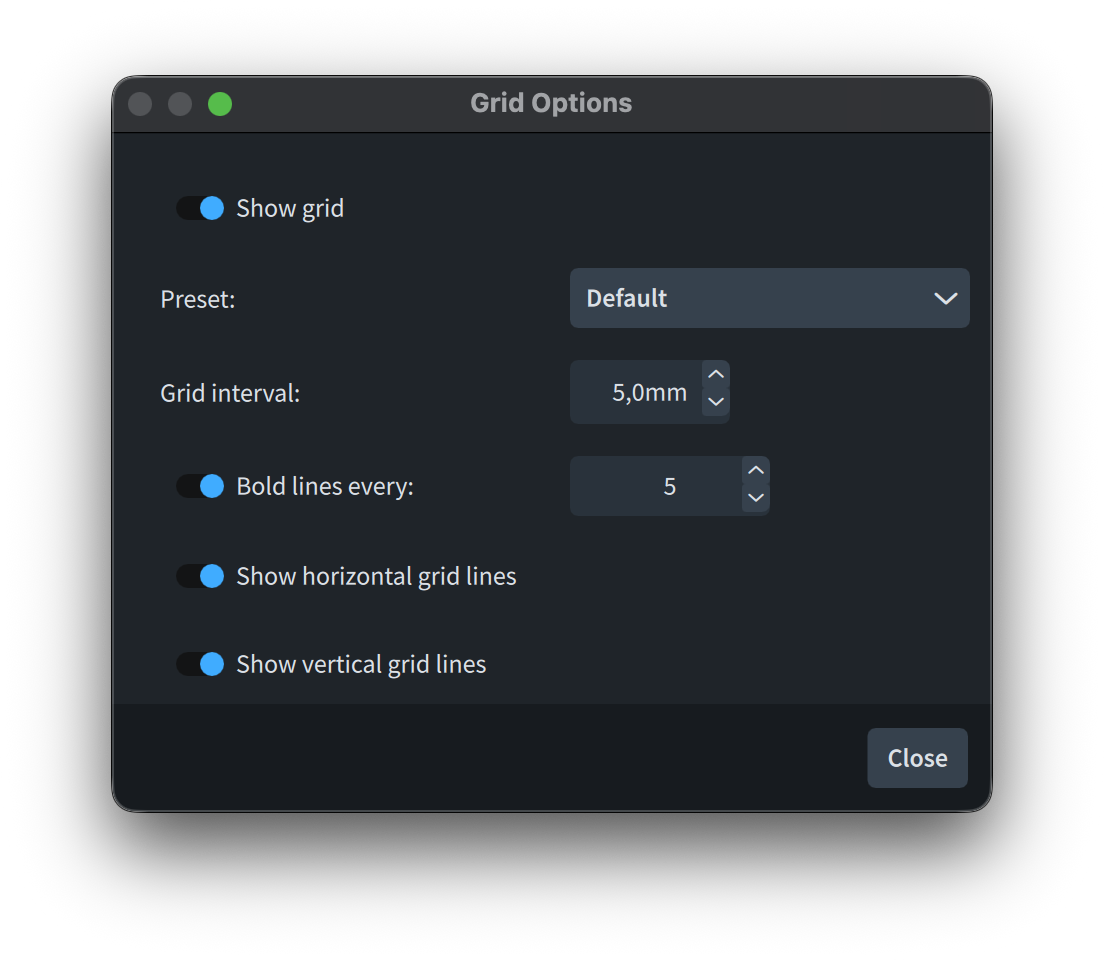
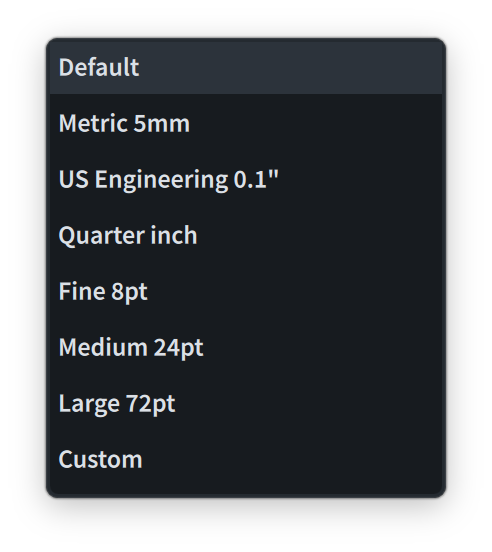
Here you can toggle ON/OFF Show grid, or choose a preset among several choices:
By changing the value shown in the Grid interval spin control, you will create a “Custom” preset, while the Bold lines every: option will let you determine the frequency of the main grid lines. You can even show horizontal or vertical grid lines only by switching OFF/ON any of the last two options.
6.0.10 update
It is now possible to double-click the label showing the unit currently used for rulers to cycle through the other available types. Additionally, the precision of the labels denoting the cursor’s position has been increased.
Jump bar
The jump bar (invoked through the J key command) has been an invaluable ally in my daily engraving quest. Being able to set “aliases” to quickly invoke commands has then considerably improved my operational speed. Now, with version 6, it is possible to both search and set most of Dorico’s options. You no longer need to open the Engraving options panel or any of its colleagues (though you still certainly can). Just typing in the jump bar for any action in version 6 will show you something different from before:
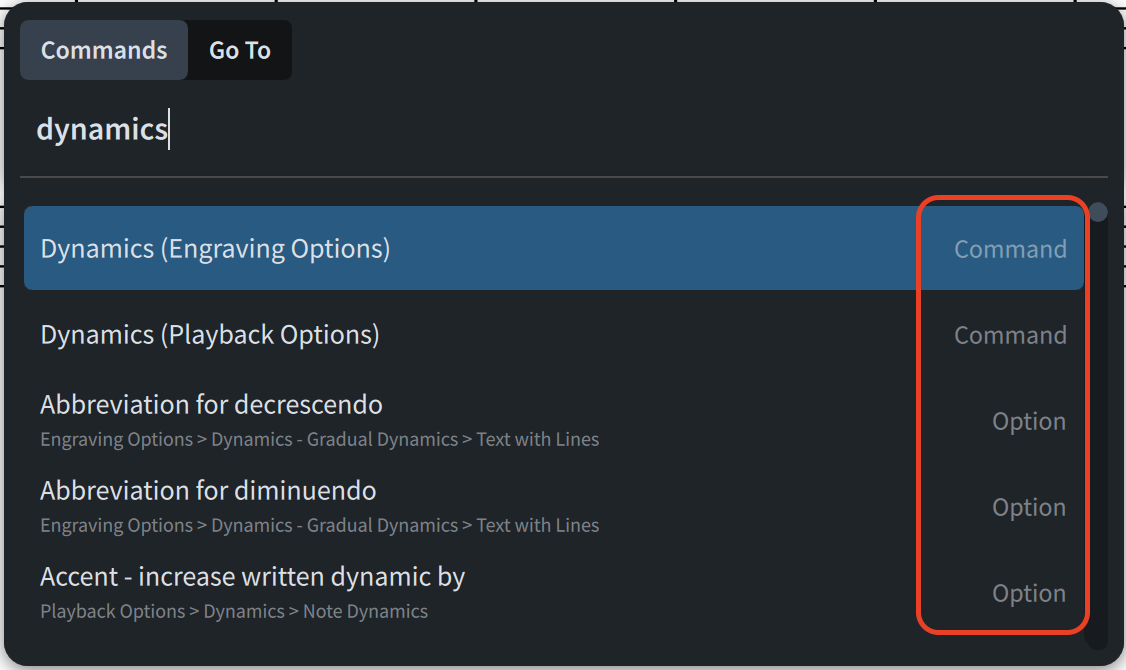
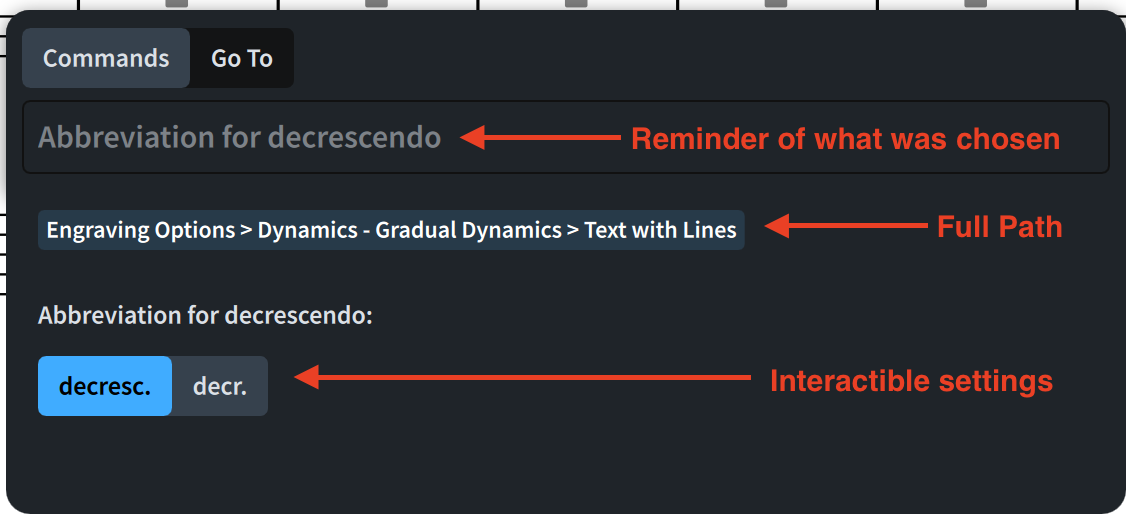
In this case, I browsed for “dynamics” and got presented with a list of possible matches. To the right, you can see that either “Command” or “Option” is shown. Using the keyboard arrows, you can still move up and down the list. Selecting a “Command” and pressing Return will automatically execute that action (for example, the selected command in the picture will open the Dynamics page in Engraving Options). Selecting an “Option”, instead, will behave differently as pressing Return will display the settings for that option (notice also the small faint text showing you the exact path to that option should you want to find it again):
Now, you can use either of the following keyboard shortcuts to make contextual choices:
- Use the ←/→ keys to toggle between grouped buttons
- Use the Spacebar to activate/deactivate a switch or to open a dropdown menu, followed by the ←/→ keys to change the selected item
- ↑/↓ arrows can be used to increase/decrease numerical values in a spin box (but you can also type in the new value directly)
Once you are happy, hit Return to confirm your choice and close the Jump bar. If you don’t like this approach, you can also use the Jump bar to search for an option, hold down Option/Alt and press Return to open the corresponding options dialog at the right point, saving you valuable searching and scrolling time.
Two current (small) limitations are that not all options can be found in the Jump bar, and that aliases cannot be set for options. The magnitude of this improvement is still considerable!
Popover improvements
Next on the menu is a most requested improvement to popover’s positioning. Popovers have been part of Dorico since its very initial inception but, until now, their vertical position was fixed at a certain amount from the stave (defined internally by the program itself). This could cause notation to be obscured by the popover, for example if it was a particularly high-pitched melody.
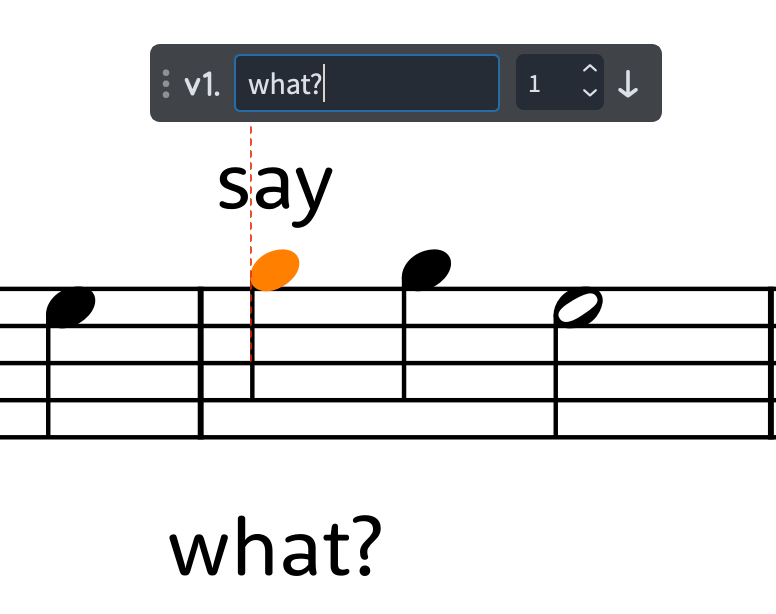
In version 6 it is now possible to drag popovers vertically to set their location. What’s more is that each popover will remember its vertical position so that you can set the fingering popover a bit higher to offset a potentially high melody and, at the same time, place the lyrics popover below the staff.
Another improvement is that now popovers show a vertical attachment line that reveals the rhythmic position to which they belong.
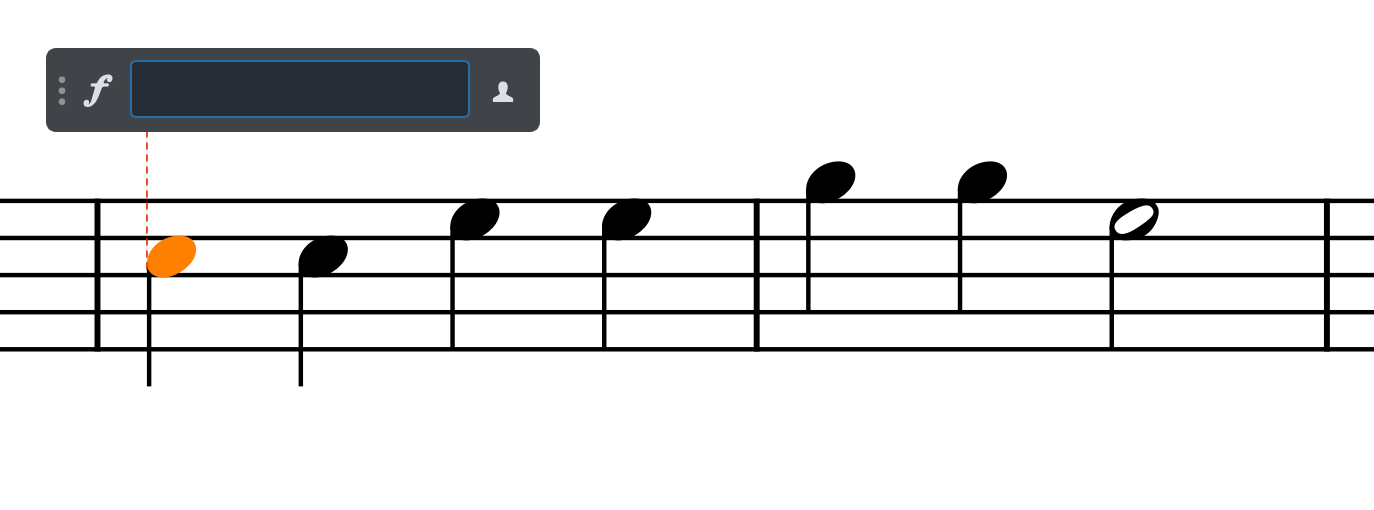
Eagle-eyed users may have noticed another novelty from this picture. That’s right, there’s a new button to the right. You may recall that, to input an item ‘locally’—that is, influencing only one stave or a single voice—, one had to press Option/Alt on the keyboard before pressing Return. While that still works, this new button allows users to select that and just press Return. There is also a nice visual warning around that button that tells you whether this feature is active or not.
Similarly, there are two improvements to the Lyrics and Chord Symbols popovers in the form of a numeric spin control which you can type into or click onto, and an arrow button to let you decide whether the created object should go above or below the staff:
Bottom Line
That’s it for today! Come back next week for the second part of this walkthrough of all improvements to workflow in Dorico 6.
If you enjoyed this post, please leave it a like, subscribe to get notified of upcoming articles, and don’t forget to do the same for Anthony’s video and for the Dorico YouTube channel.
Should you be interested in my other activities, please visit my website and consider joining my mailing list, where you will be able to follow my journey through music notation and independent music publishing.
Thank you for your time, and see you here in the next episode.
- This means the user can keep interacting with the software. ↩

3 thoughts on “An ode to Productivity!”