A review of Dorico 6’s improvements to Notation and Engraving features
This article is an expanded, paraphrased and enriched transcription of the excellent video by Anthony Hughes. Go watch it, then come back for a recap, or follow along while watching.
Introduction
The main reason I love Dorico is the sheer amount of user-accessible settings that can make a score exactly as I want it to be. It took Dorico several years to get to this point, but from version 4 it has become clear that if you are serious about your engraving, you should at least consider adding Dorico to your toolbox. This is something that even editors most faithful to the other two giants are starting to realise. One of them has now sunk into oblivion, while the other doesn’t seem to have high-level publishing as one of its main targets.
Dorico 6 gives you even more reason to switch—or to try it!—, thanks to the mind-blowing amount of notation and engraving improvements. Covered areas include page layout, playing techniques, text, lyrics, and more. It will take us two episodes to go through all of them in detail, so grab a tasty beverage, sit back, relax, and enjoy the ride.
PART 1
Page Layout improvements
Flow heading overrides
Flow headings have always been there, in Engrave mode, as a way to customise the appearance of the space at the top of each flow. It can contain information about a specific movement, the title of a song, the number of an exercise, and more. There was a limitation, though: it was possible to apply a Flow Heading Change only on a specific page. Assuming you had less than two flows per page, this had never been a problem. For projects such as this, with 90+ flows containing scales, exercises, and duets, this limitation caused several issues, forcing the user to manually override each page.
In Dorico Pro 6, now, you can finally specify a flow heading override for each flow, independently! This is crucial in projects—such as those for the music theatre—where different flows may require different directions at the beginning, or for worksheets where each question may have to be presented differently.
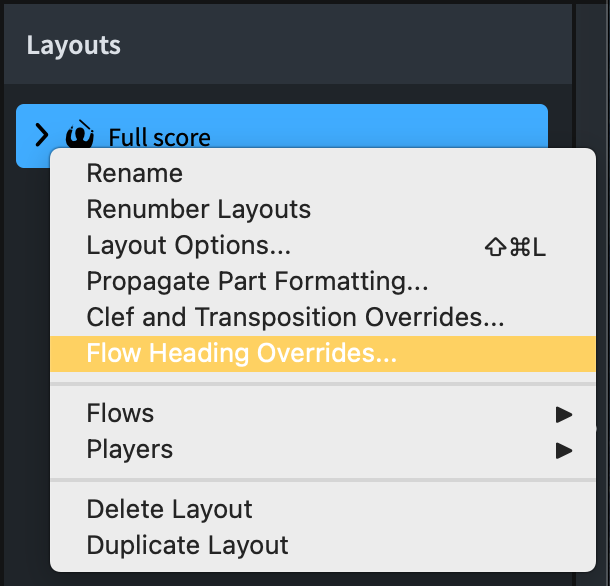
To create a flow heading override, head over to Setup mode, right-click (or Ctrl-click on Mac) on the layout you wish to edit and tap on Flow Heading Overrides… This last section is important because anything you change here will only affect the specific layout you chose, with other layouts remaining completely watertight.
The following dialog will open, initially with an empty list to the left:
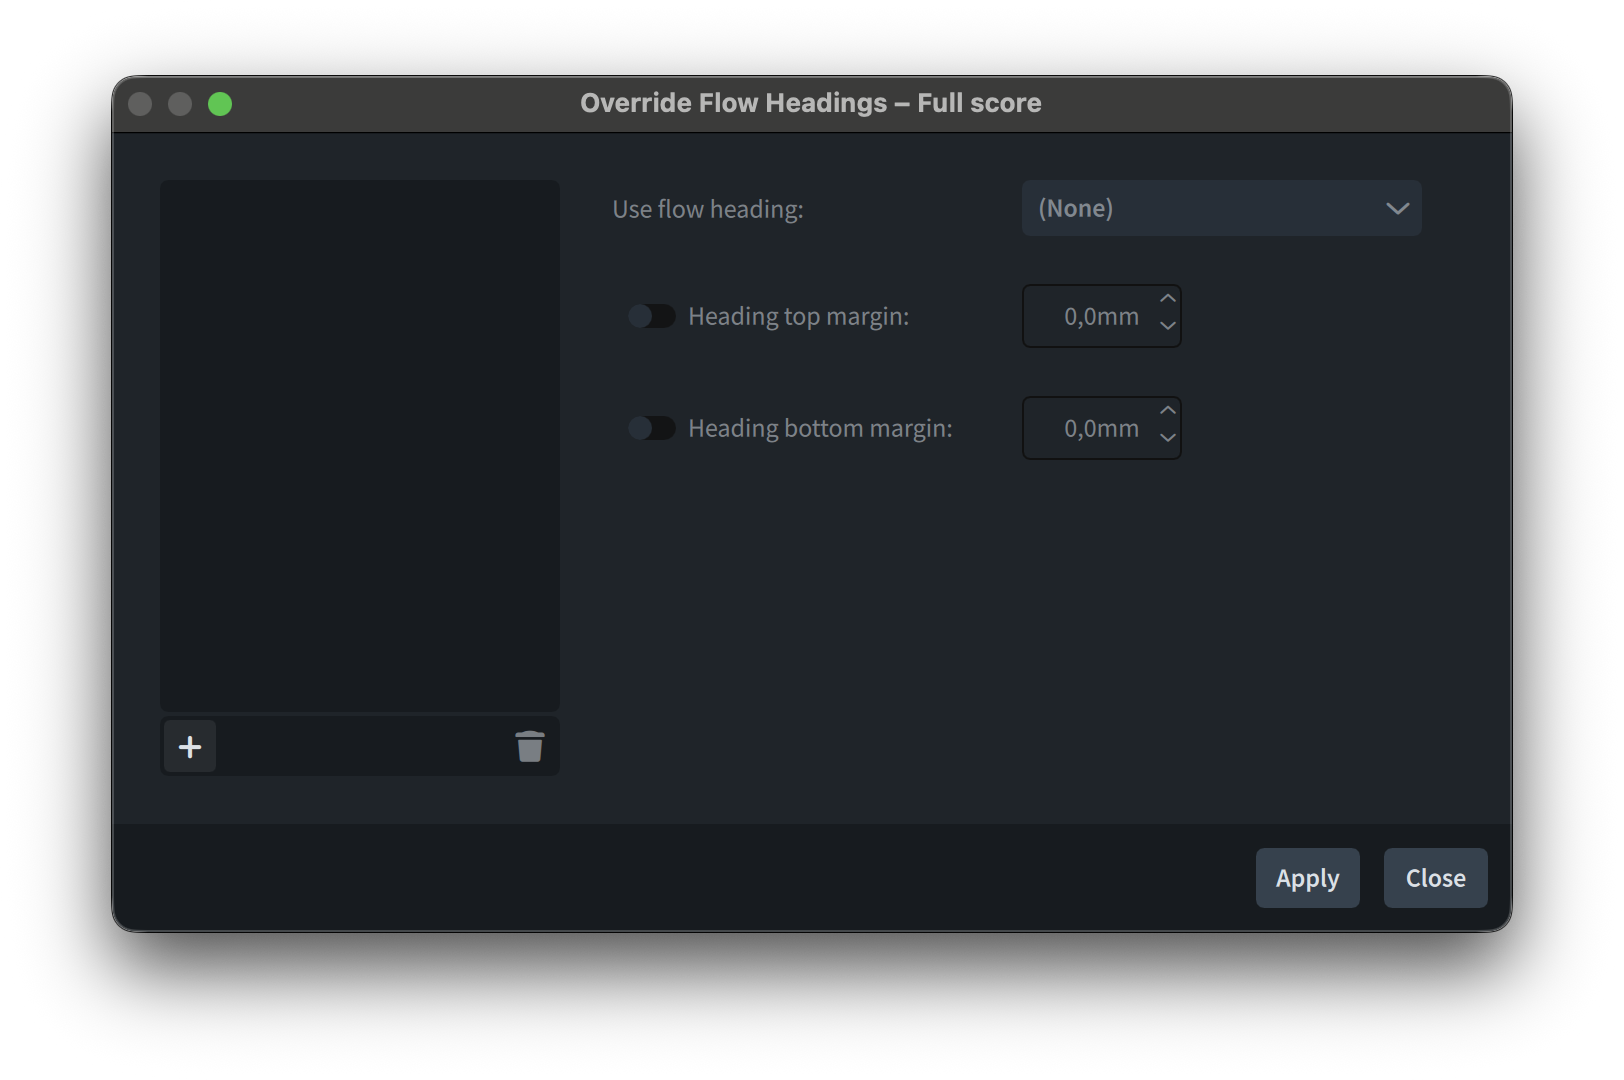
Since every flow will use the Default flow heading until instructed otherwise, you will need to add a flow to the list of “the rebel ones”. This prompts you to think carefully about the naming of your flows as, when the list becomes longer, you will not be able to remember exactly what flow contains what music otherwise. Remember, also, that Dorico will not complain if you give two different flows the same name. To continue, press the + button and pick a flow from the list. Next to the Use flow heading: label, pull down to reveal your options. If you only see “Default” and “(none)”, it means that you have not defined any custom flow heading in your project. To remedy, go to Engrave mode, press Cmd/Ctrl-9 to open the right sidebar if not already visible, scroll down to the Flow Headings section, expand it, and create a new heading. Once you are done, go back to Setup mode and apply the desired heading to your flow.
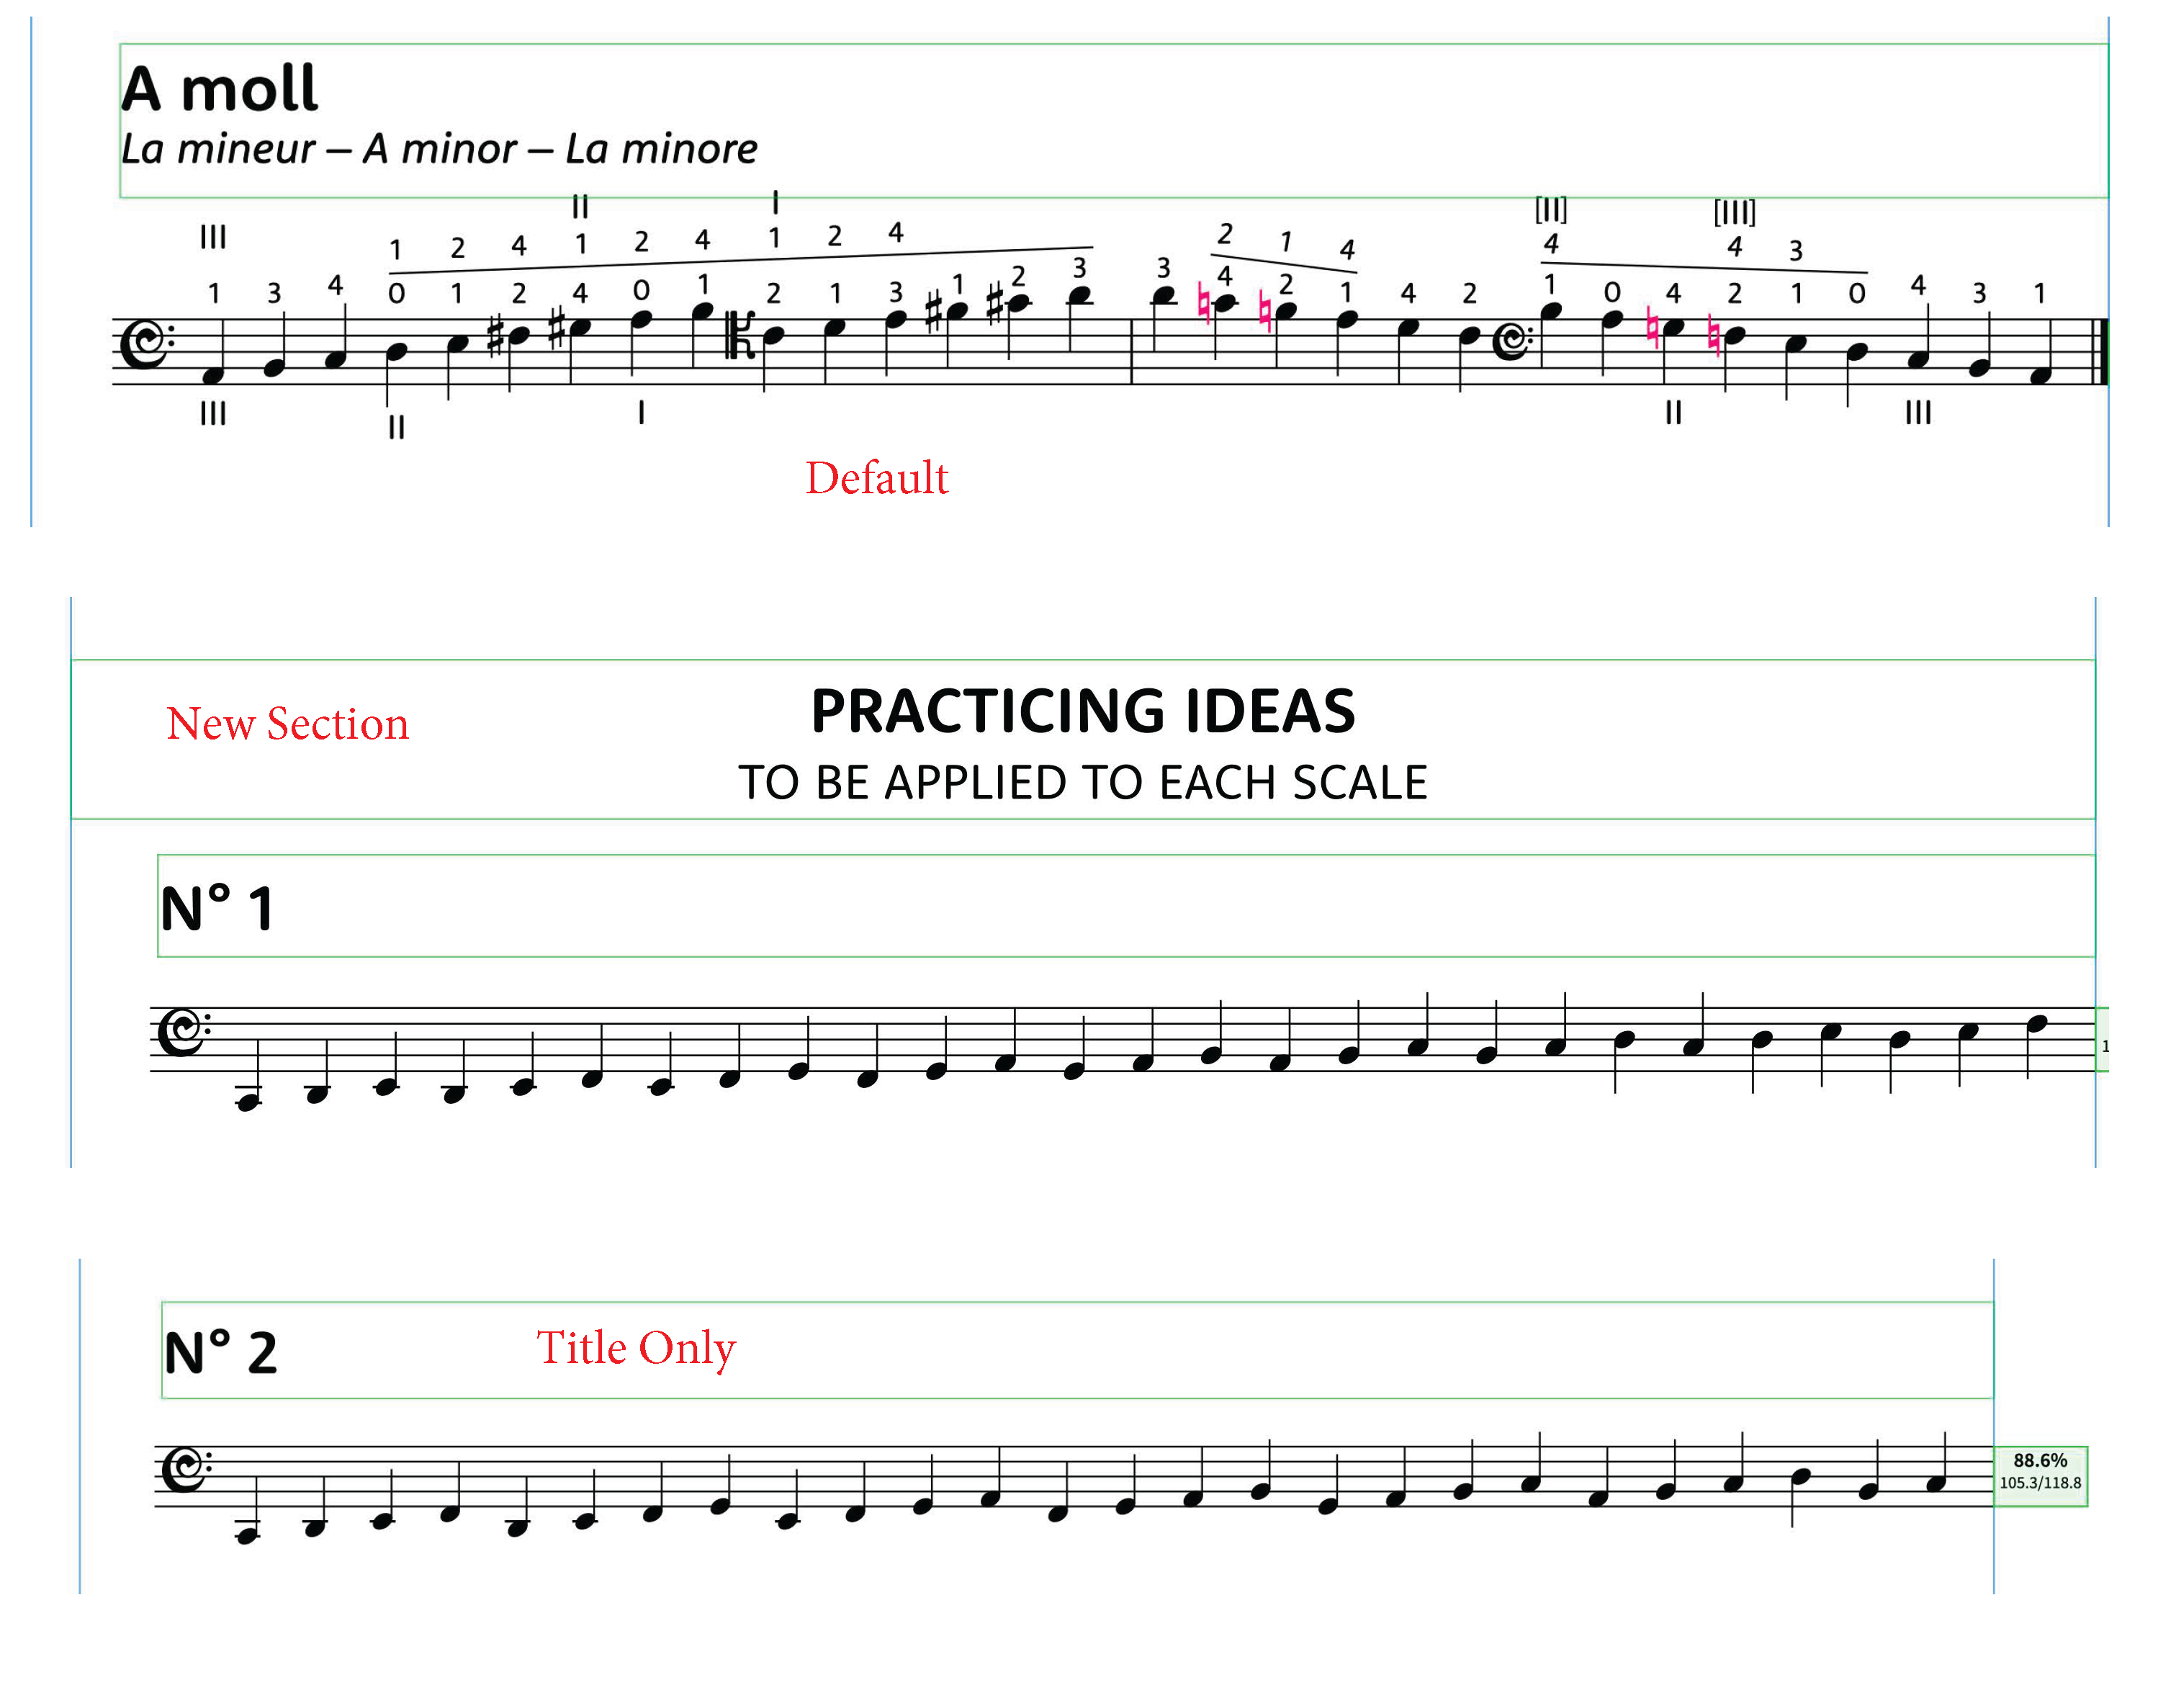
In a recent project, for example, I created a variation of the default heading (which I had set up to contain both flow title and flow subtitle, on two lines) called “Title Only” (self-explanatory) and a variation of this last one called “New Section”, including a big new centred title and then the flow title.
Staff and Player Group labels improvements
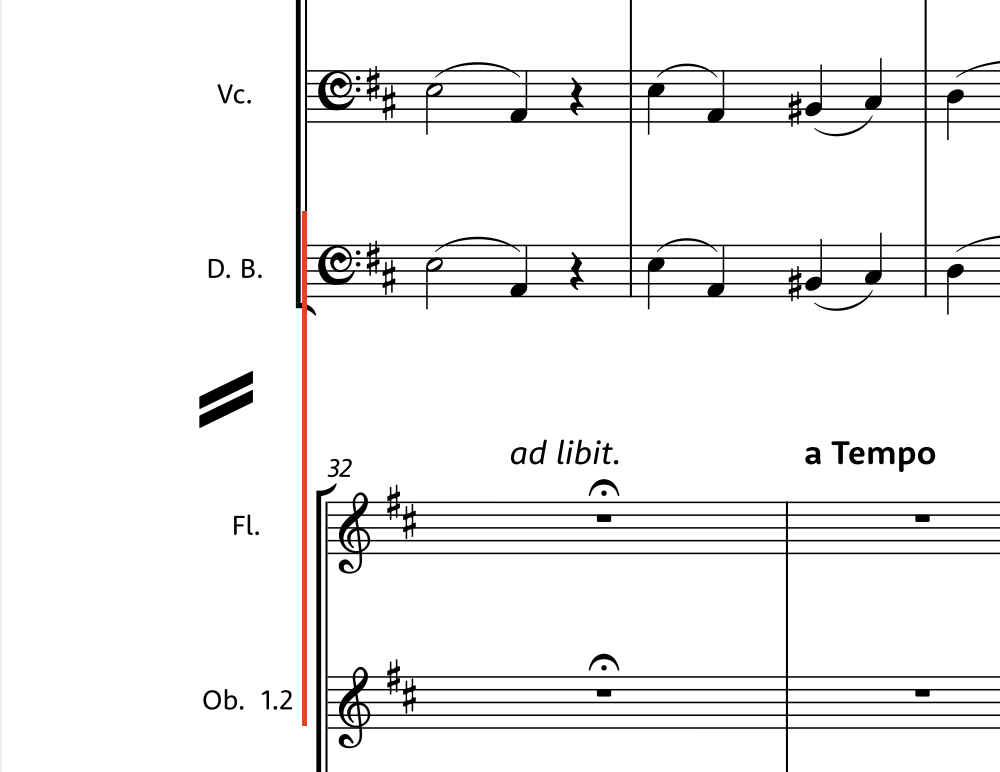
Several aspects concerning staff labels have been improved in this release. One of the significant changes revolves around the possibility of placing staff labels outside the page margins. Something that used to happen (and still happens) in another program is that almost any change to staff labels will trigger some sort of internal reset of the gap between the page margin and the systemic barline, often with disastrous results. Dorico’s approach until version 6 had been to change the distance dynamically between page margin and systemic barline according to the length of the staff label. This was (and still is!) great because it allowed users to worry exclusively about managing sensible shortened staff labels, leaving the rest to Dorico. At the same time, this had the downside of creating different distances if (a) the page contained more than one system and (b) those systems had different staff labels displayed, resulting in different widths of the music system. See this example from one of my recent editions:
Frequently, engraving house styles require equal width systems at all costs, creating the need for placing staff labels outside the page margins when necessary. This option can be activated in Layout Options ▶︎ Staves and Systems ▶︎ Staff Labels by selecting the Ouside music frame option.

After activating this option, go to your Page Templates, and make sure that they allow for enough space to prevent staff labels from overshooting beyond the page boundary—normally, you will have to reduce the width of the music frame from its leading side.
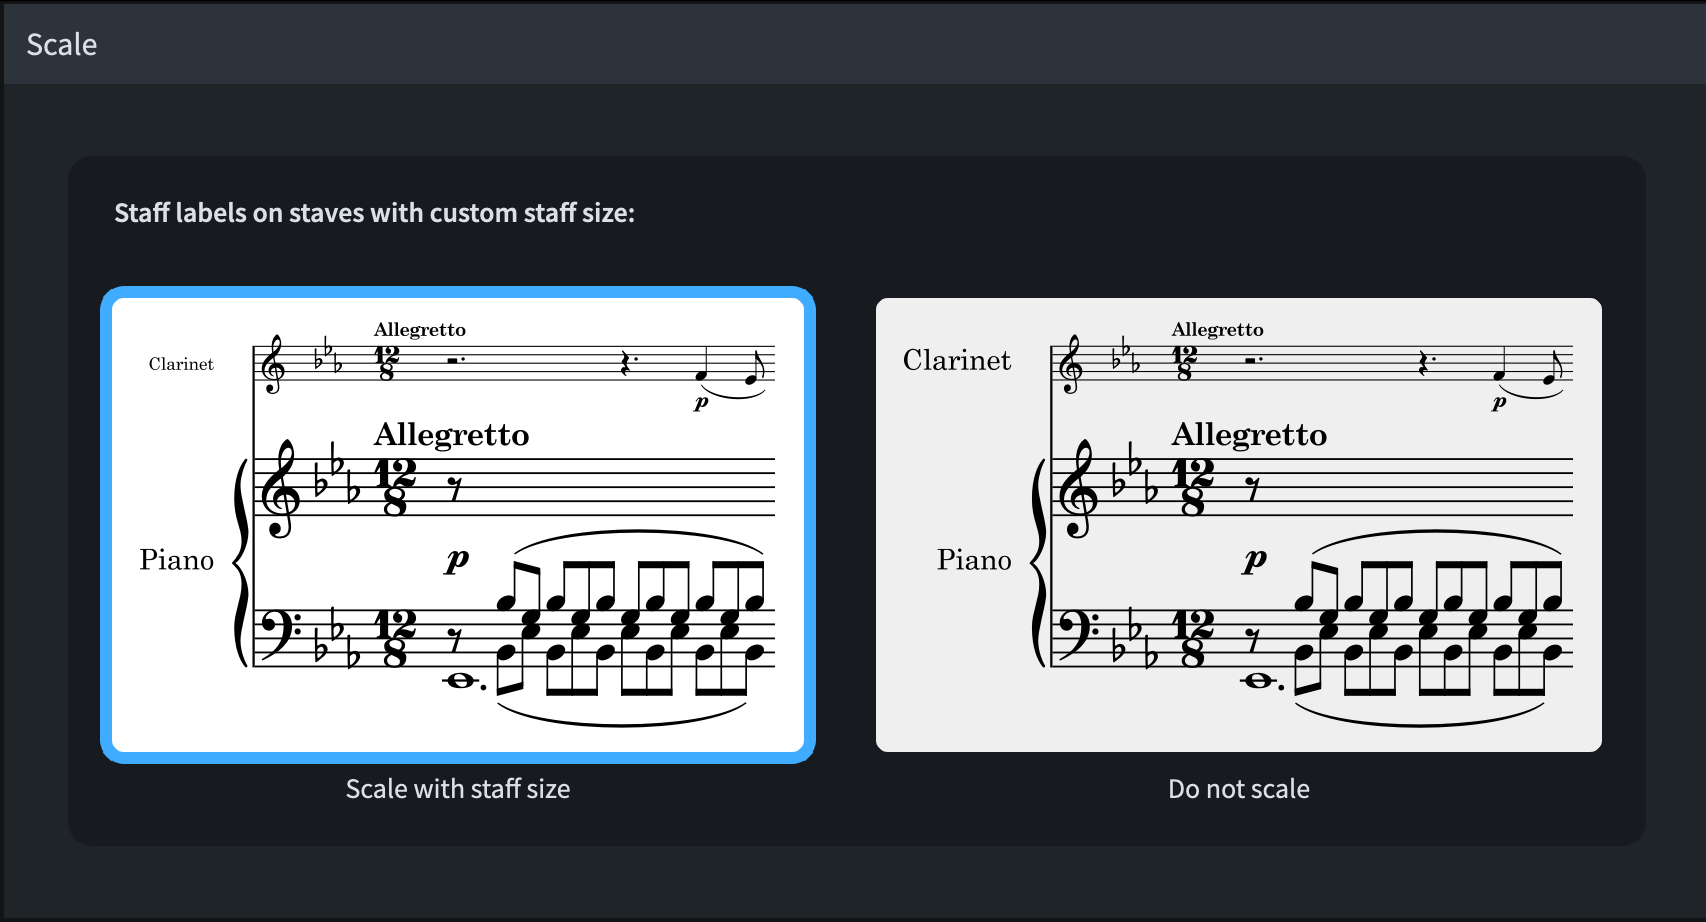
Finally, then, an option to have staff labels for staves with custom staff sizes adapt their size dynamically has been added. To activate it, go to Engraving Options ▶︎ Staff labels ▶︎ Scale and select the option to the left: “Scale with staff size”. Until now, one had to manually scale the size in the Edit Staff Label dialog.
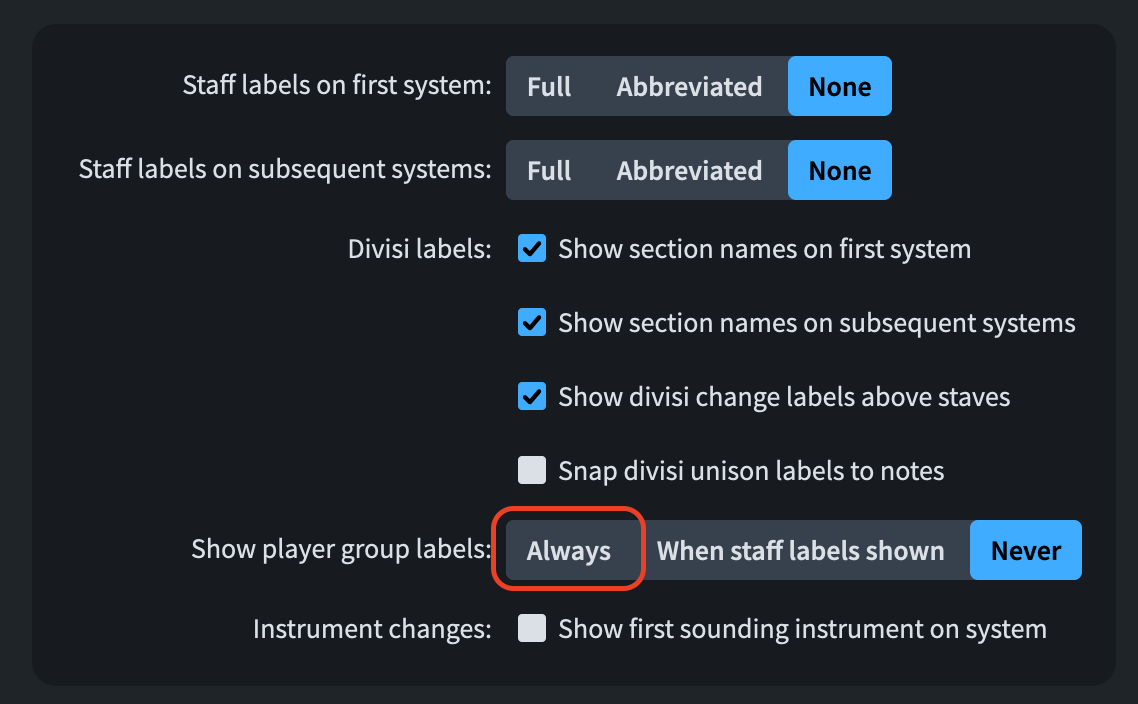
When player group labels are in use, it was previously not possible to show them if the staff labels were hidden. With version 6, now, it is instead possible to show them. Go to Layout Options ▶︎ Staff Labels, and activate this property:
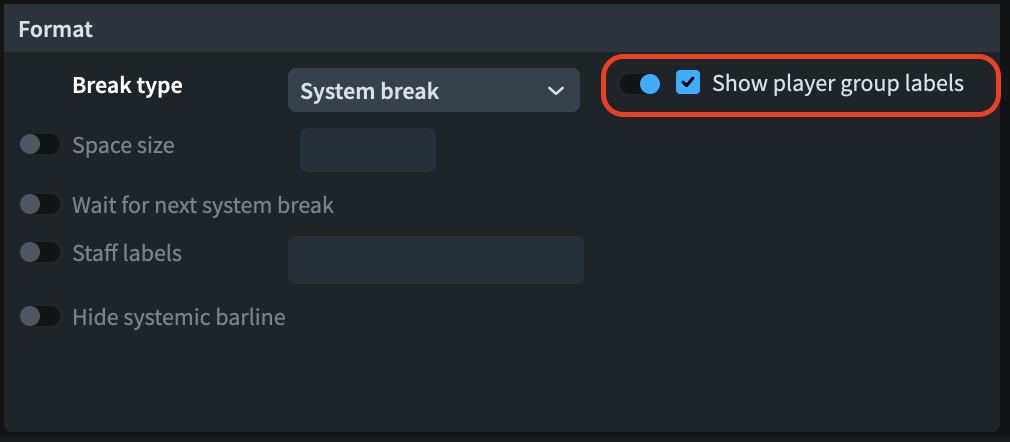
Let’s say, though, that you do not like any of the three options shown above. It is now possible to determine the visibility of player group labels at any break (system or frame) independently. Select a break and, in the lower zone (Property Panel), activate this:
Bottom Line
That’s it for today! Come back next week for the second part of this walkthrough of all improvements to notation and layout in Dorico 6.
If you enjoyed this post, please leave it a like, subscribe to get notified of upcoming articles, and don’t forget to do the same for Anthony’s video and for the Dorico YouTube channel.
Should you be interested in my other activities, please visit my website and consider joining my mailing list, where you will be able to follow my journey through music notation and independent music publishing.
Thank you for your time, and see you here in the next episode.

One thought on “A wish come true!”