
After this very short project that introduced us to the magic world of debugging we are once more faced with a challenge! I am starting to feel that I am doing more challenges than learning: after all, we have about 4-5 videos of learning, then 12 questions and 3 challenges, then repeat this 3 times, then a big challenge to write an app from scratch. This thing, in general, doesn’t make me feel on a safe and solid ground, but … what can I do? Just shut up and follow the herd.
Review
- Breakpoints pause execution of your code. Clear for everyone? Good! Let’s move on!
- Assertions must be provided with a condition to check. That’s clear! Woah! Two in a row!
- Breakpoints can have conditions attached. This is really interesting!
- The
print()function accepts any kind of value. …though, for sake of completeness, you should not mix types! - The
pcommand in LLDB is short for “print”. Still, we should get a proper explanation of what LLDB is and not through Google! - Variadic functions accept zero or more values of the same type. One of those things you forget the day after you studied them! Then you get a
func myFunc(Int...) \{ }and you are little… ehm… - If you pass a separator to
print()it will be used between each value that gets printed. Good to know! - Assertions are removed when we build our apps for the App Store. That’s called safe optimisation!
- View debugging renders your UI in 3D so you can see how views are layered. The first time you try this out it causes a bit of nausea, but then it gets better!
- Exception breakpoints automatically get triggered when some code throws an error. I am doubtful about this because until now when the code had an error, we were already brought to the place where the error was… I am sure we will get plenty of examples in the future.
- It’s a good idea to make liberal use of assertions. Please define liberal…!
print()is a variadic function. The other option (print()always adds a line break after the thing it prints is perfectly valid as if you do not override it this is the basic behaviour!
Challenges
Challenge 1: temporarily try adding an exception breakpoint to project 1, then changing the call to instantiateViewController() so that it uses the storyboard identifier “Bad” — this will fail, but your exception breakpoint should catch it.
Go to the Breakpoint navigator, click on the ‘+’ button down to the bottom left corner and leave all the settings as they are.
In the didSelectRowAt method change the identifier to “Bad” then run the app.
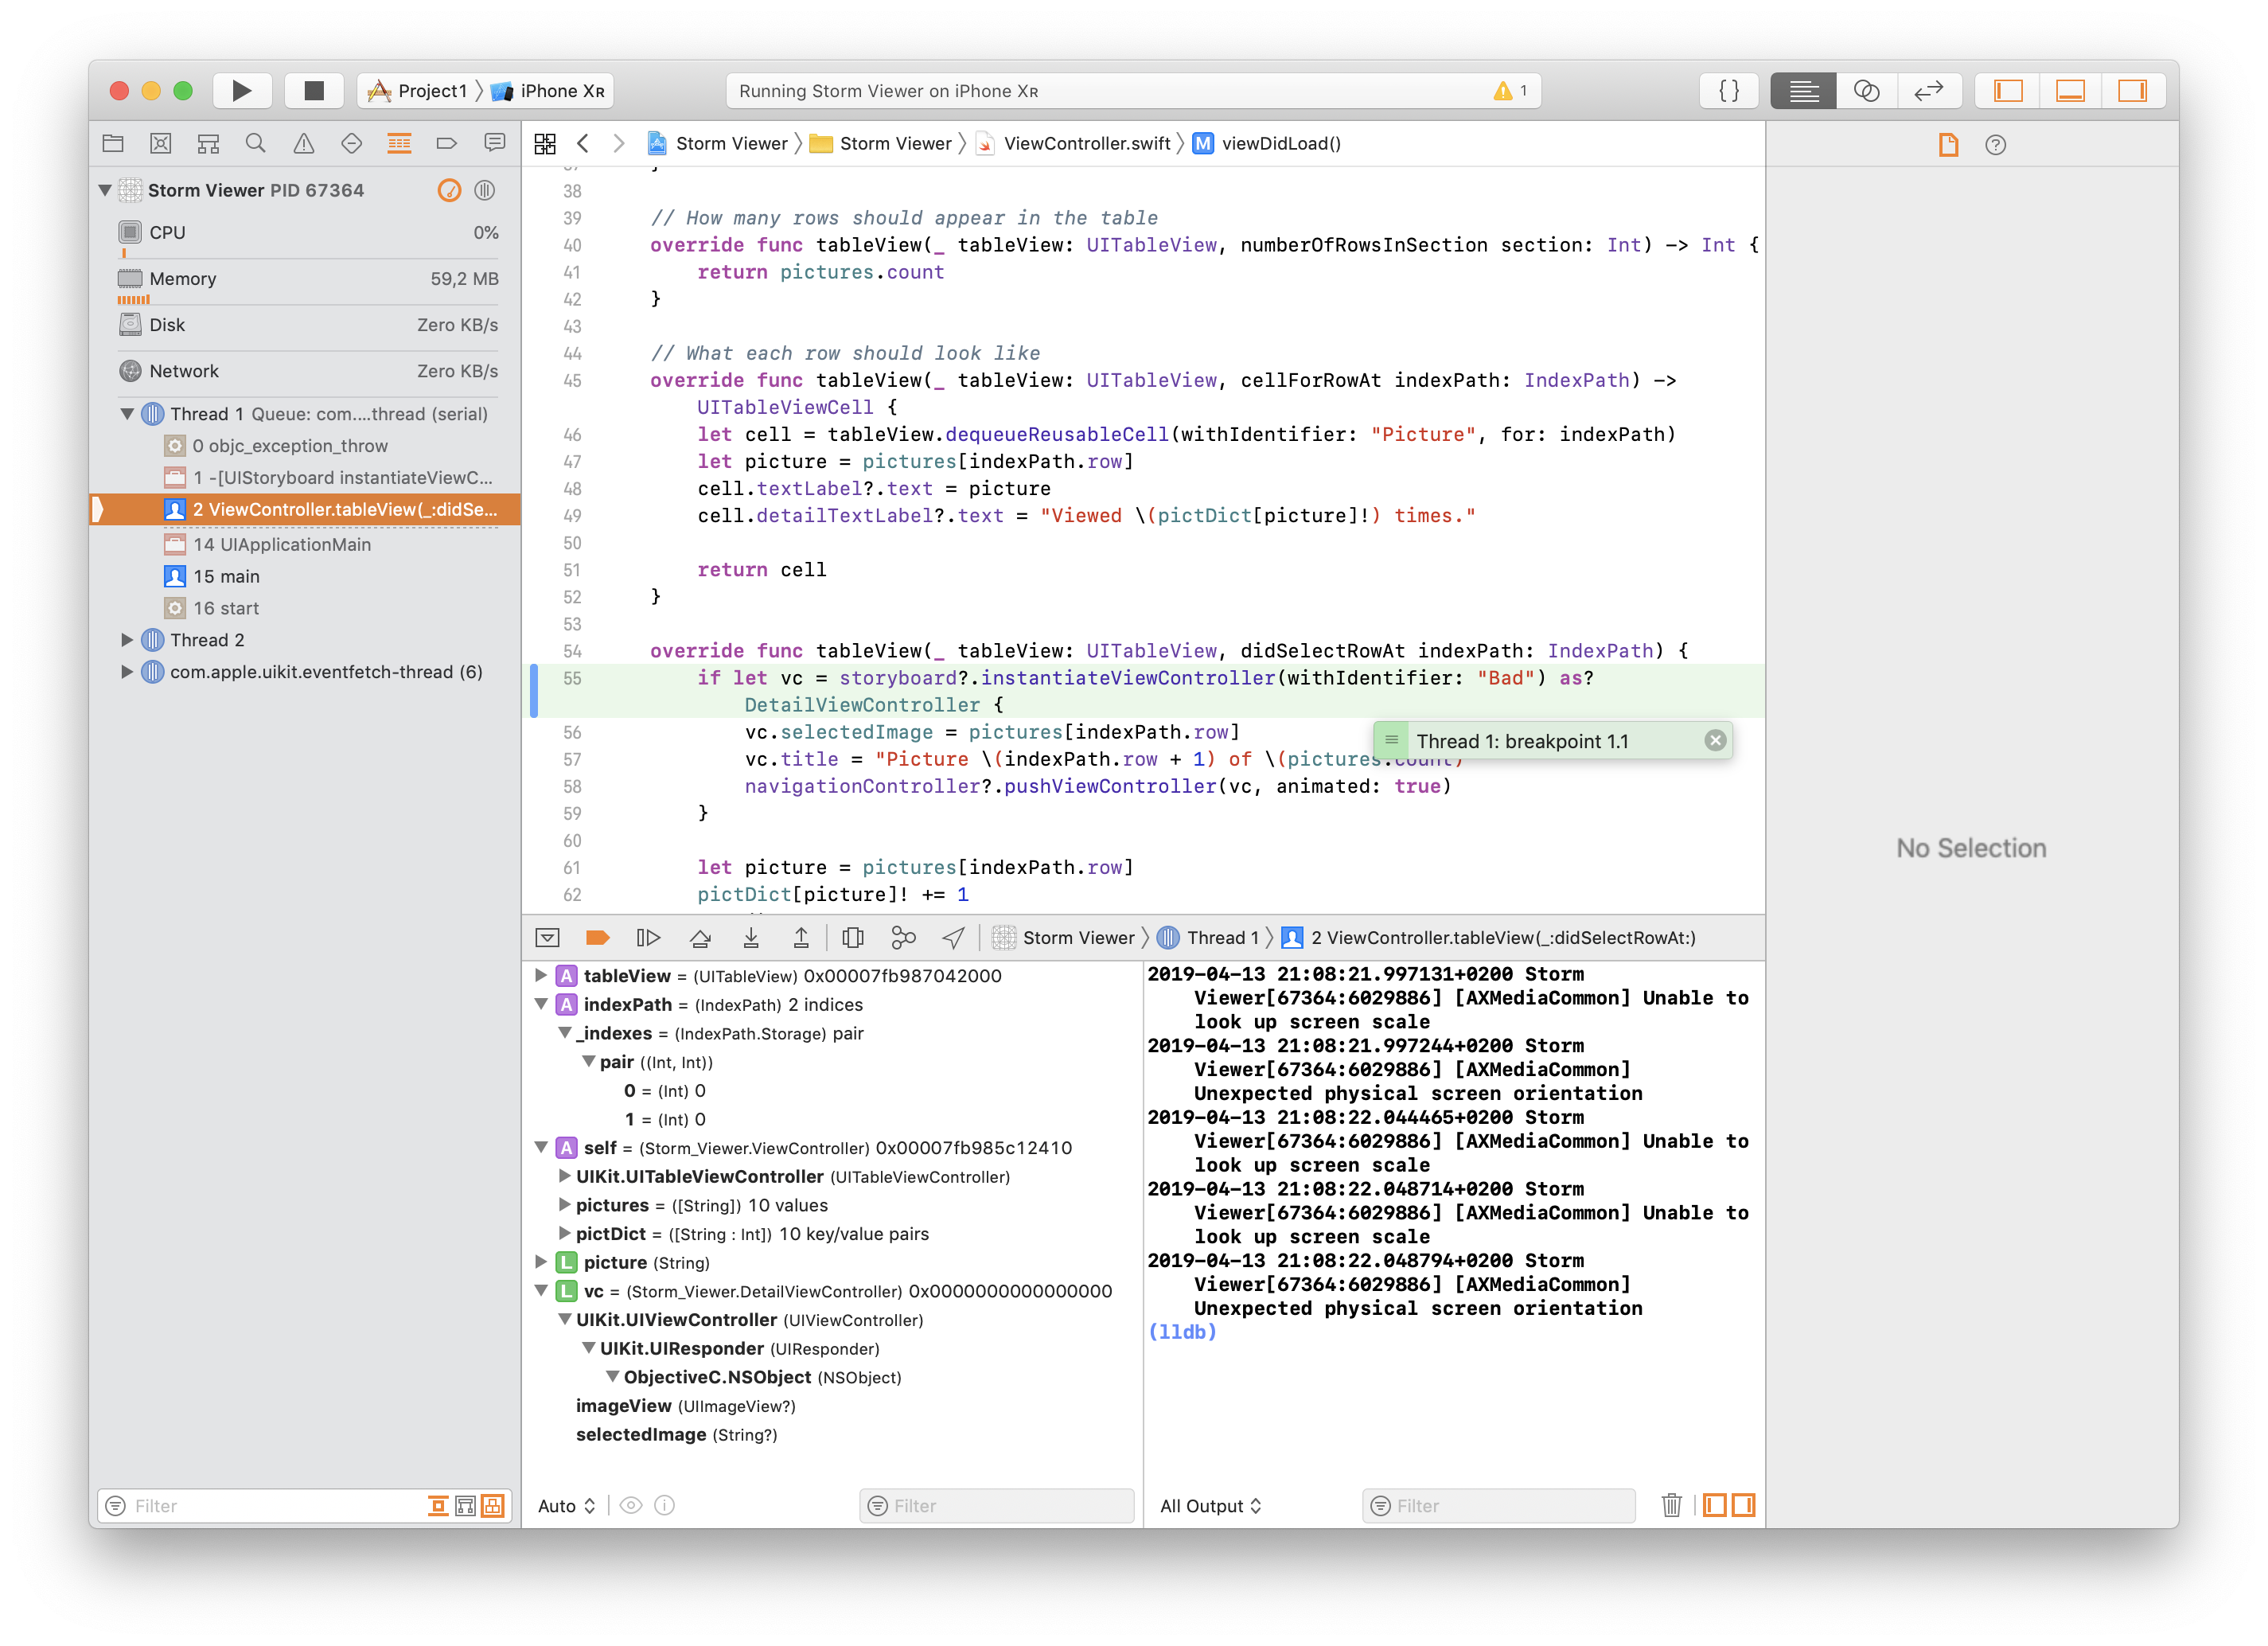
The app is correctly pausing and I am getting the image above.
I have quickly browser the results but, by now, I have not found anything really interesting that would let me know “hey you idiot, you gave your view controller the bad identifier!”. I wonder who told the machine to give these messages because, in the end, someone taught the machine to behave so…
Challenge 2: add a call to assert() in the viewDidLoad() method of DetailViewController.swift, checking that selectedImage always has a value.
I have added this line:
assert(selectedImage != nil, "selectedImage doesn't have a value")
I have no idea if this is what is needed.
I tried to remove some items from the array after appending them but in the end all the pictures were loaded and well … I get no hint at what should be happening right now so… by now… I’m happy like that.
I mean, come on, the lesson on assertion was one line of code, why should I even try to write more? Really …
I resorted to comment out line 57 vc.selectedImage = pictures[indexPath.row] in ViewController.swift and this triggered the following reaction when I pressed on any image.

Here is the repository for these two challenges, in branches challenge18-1 and challenge18-2.
Challenge 3: go back to project 5, and try adding a conditional breakpoint to the start of the submit() method that pauses only if the user submits a word with six or more letters.
I added a breakpoint to line 71 (the first line after the brace of the submit method, I guess that is what corresponds to the definition of “start”).
I then right-clicked on it and selected “Edit breakpoint” adding the condition answer.count >= 6.
Upon running the game I got “mundanes” as word and proposed “mundane” as option, which triggered the pause.
That’s it for today’s challenges!
Here is the code for this challenge, but I hardly think you will need it!
Bonus
As a bonus point we are invited to watch Paul’s conference on debugging that he delivered at Appdevcon in Amsterdam in 2018.
Here’s what I learned from it:
- Debugging is the process of finding and removing the mistakes we put there in the first place.
- There is no magic.
Basics
print()
print()is often the most direct approach.- Paul made an Xcode extension called Sharpshooter and it is here on GitHub.
assert(someCode())
if _isDebugAssertConfiguration() {
	if !_branchHint(condition(), expected: true) {
		_assertionFailure("Assertion failed", message())
	}
}
- we are encouraged to disseminate our code with assertion checks.
- we get a suggestion to count how many calls to
assert()we already have, then work to double that figure!
precondition(someCode())
- this will not be compiled out when the app ships!
- the code is not safe to ship!
- the Swift Standard Library uses 246 preconditions! Calling
removeLast()from empty arrays, calling reversed ranges:10...1, dividing by zero, reading out of array ranges. These all crash our code and this is accomplished using preconditions.
fatalError()
Definition from the Swift Standard Library:
public func fatalError(_ message: @autoclosure () -> String = String(), file: StaticString = #file, line: UInt = #line) -> Never
This function will never return so it is great to catch coding errors, for example in dequeuing cells, instantiating from storyboards, reading the app bundle.
- Sometimes crashing is better than continuing?
Reading values
(lldb) p someInt
(Int) $R0 = 10
(lldb) po someObject
<App.ExampleObj: 0x7ff4f0014260>
(lldb)
…
Use frame variable with fr v variableName
expr: change this value to something else.
po: print the debug description of the item
Breakpoints
We can break when a variable gets to a specific value.
Create an enumeration to handle your problems and then set a condition to pause the code execution only when a problem in a very precise spectrum is found:
enum BreakpointManager {
	static let firstRun = 0
	static let userCreate = 0
	static let userLogin = 0
	static let subscribe = 0
}
We can add sounds to our conditions! Woah!
Nice that we are finding the solutions to the challenges inside the talk :-)
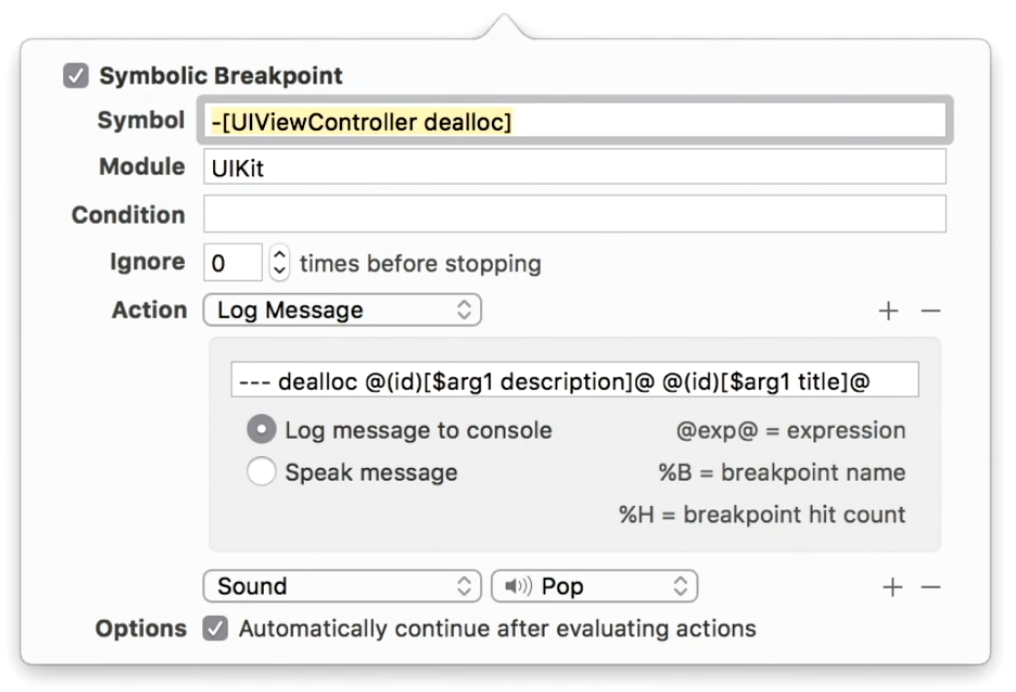
Once we got a Exception Breakpoint and a crash, we can select the Objective-C section at the top left of the list, then go down to the right where there is the (lldb) console and write po $arg1 to print exactly what happened!
We can then go to the breakpoints navigator and add this command to the breakpoint’s action! Brilliant!
We can move a breakpoint to ALL our projects or even share with our team!
Symbolic Breakpoint
Add breakpoint to code we don’t own.
Swift Error Breakpoint
Will throw an error whenever a Swift language error will be found.
Watchpoints
The ideal counterpoint to Breakpoints.
Breakpoints pause when a location is reached or when an event happens while watchpoints pause when a value is changed by any part of your code.
After you set a breakpoint you can select a property and right-click on it before selecting “Watch…”
Layouts
Surprisingly frustrating to debug.
Six ways:
- The view debugger > use the filter
- Recursive descriptions > po view.value(forKey: “recursiveDescription”)!
- Identifying constraints > Go on the web and use wtfautolayout.com.
- Exercising ambiguity >
box.exerciseAmbiguity();print(vw.hasAmbiguousLayout); - Layout feedback loops > Layout feedback loop debugger : it is disabled by default but when enabled, allows view to run layout X times, where you choose the value of X. It runs a little more to collect info, then throws an error. To activate it go to the Product menu, keep the Alt key pressed to show the “Run…” action, inside there, go to the “Arguments” tab and enter
-UIViewLayoutFeedbackLoopDebuggingThreshold 100. This call will show the entire call stack each time layout took place, which views were laid out and in which order and whether ambiguous layout was part of the problem. - Pseudolanguages > Product > Alt-Run > Options > Application Language > Double-Length Pseudolanguage.
Memory
Product > Alt-Run > Diagnostics > enable Malloc Stack and Malloc Scribble (0x55 when the memory is freed).
Summary
The Basics
print()is fine for basic work, but there are better alternatives- All codebases need more
assert()s. fatalError()makes cleaner code- Know when to use
p,po,exprandframe variable.
Breakpoints and watchpoints
- Stop adding and deleting the same breakpoints: conditions!
- Play sounds to help you track invisible operation state
- Always use exception breakpoints
- Watchpoints will save you time
Layouts
- You’re not alone: no one likes debugging layouts
- Filter the view debugger
- Always use constraint identifiers
- Exercise ambiguity!
- Make Xcode detect layout loops
Memory
- This is best done in Instruments, but Xcode can help
- The basic memory graph shows allocations and oops
- Enable Malloc Stack and Malloc Scribble to make it work harder!
That’s it!
Please don’t forget to drop a hello and a thank you to Paul for all his great work (you can find him on Twitter) and don’t forget to visit the 100 Days Of Swift initiative page.
If you like what I’m doing here please consider liking this article and sharing it with some of your peers. If you are feeling like being really awesome, please consider making a small donation to support my studies and my writing (please appreciate that I am not using advertisement on my articles).
If you are interested in my music engraving and my publications don’t forget visit my Facebook page and the pages where I publish my scores (Gumroad, SheetMusicPlus, ScoreExchange and on Apple Books).
You can also support me by buying Paul Hudson’s books from this Affiliate Link.
Anyways, thank you so much for reading!
Till the next one!
