
Welcome back for this fifth episode of my new series, where I navigate you everything you need to know about how Dorico handles tuplets. I will not make the mistake to say this will be the last episode again because, well, it is not.
Today we will be looking at one aspect that makes Dorico an incredible piece of software and, most of all, it gives back to the user some of the control it so much likes to take away. I know I mildly contradicted myself in this last sentence, but this is the dichotomy that governs Dorico: incredibly powerful, bottomlessly deep, but with a bad habit of taking most of the choices away from the user. In this episode, I will show you what power you have as a user over this seemingly untameable beast.
Project-wide engraving options for tuplets
Let’s start from the Engraving Options, one of the most interesting setting menus of the whole software. The reason we are starting from there is that we want to change all the global settings we can before going down to edit single tuplet entries. Let’s open this dialog with the keyboard shortcut Cmd-Shift-E (that’s Ctrl-Shift-E on PC) or by activating Engrave mode and then choosing Engrave > Engraving Options. You will be greeted with this window, divided into two main areas, a list of categories to the left and their expansion to the right:
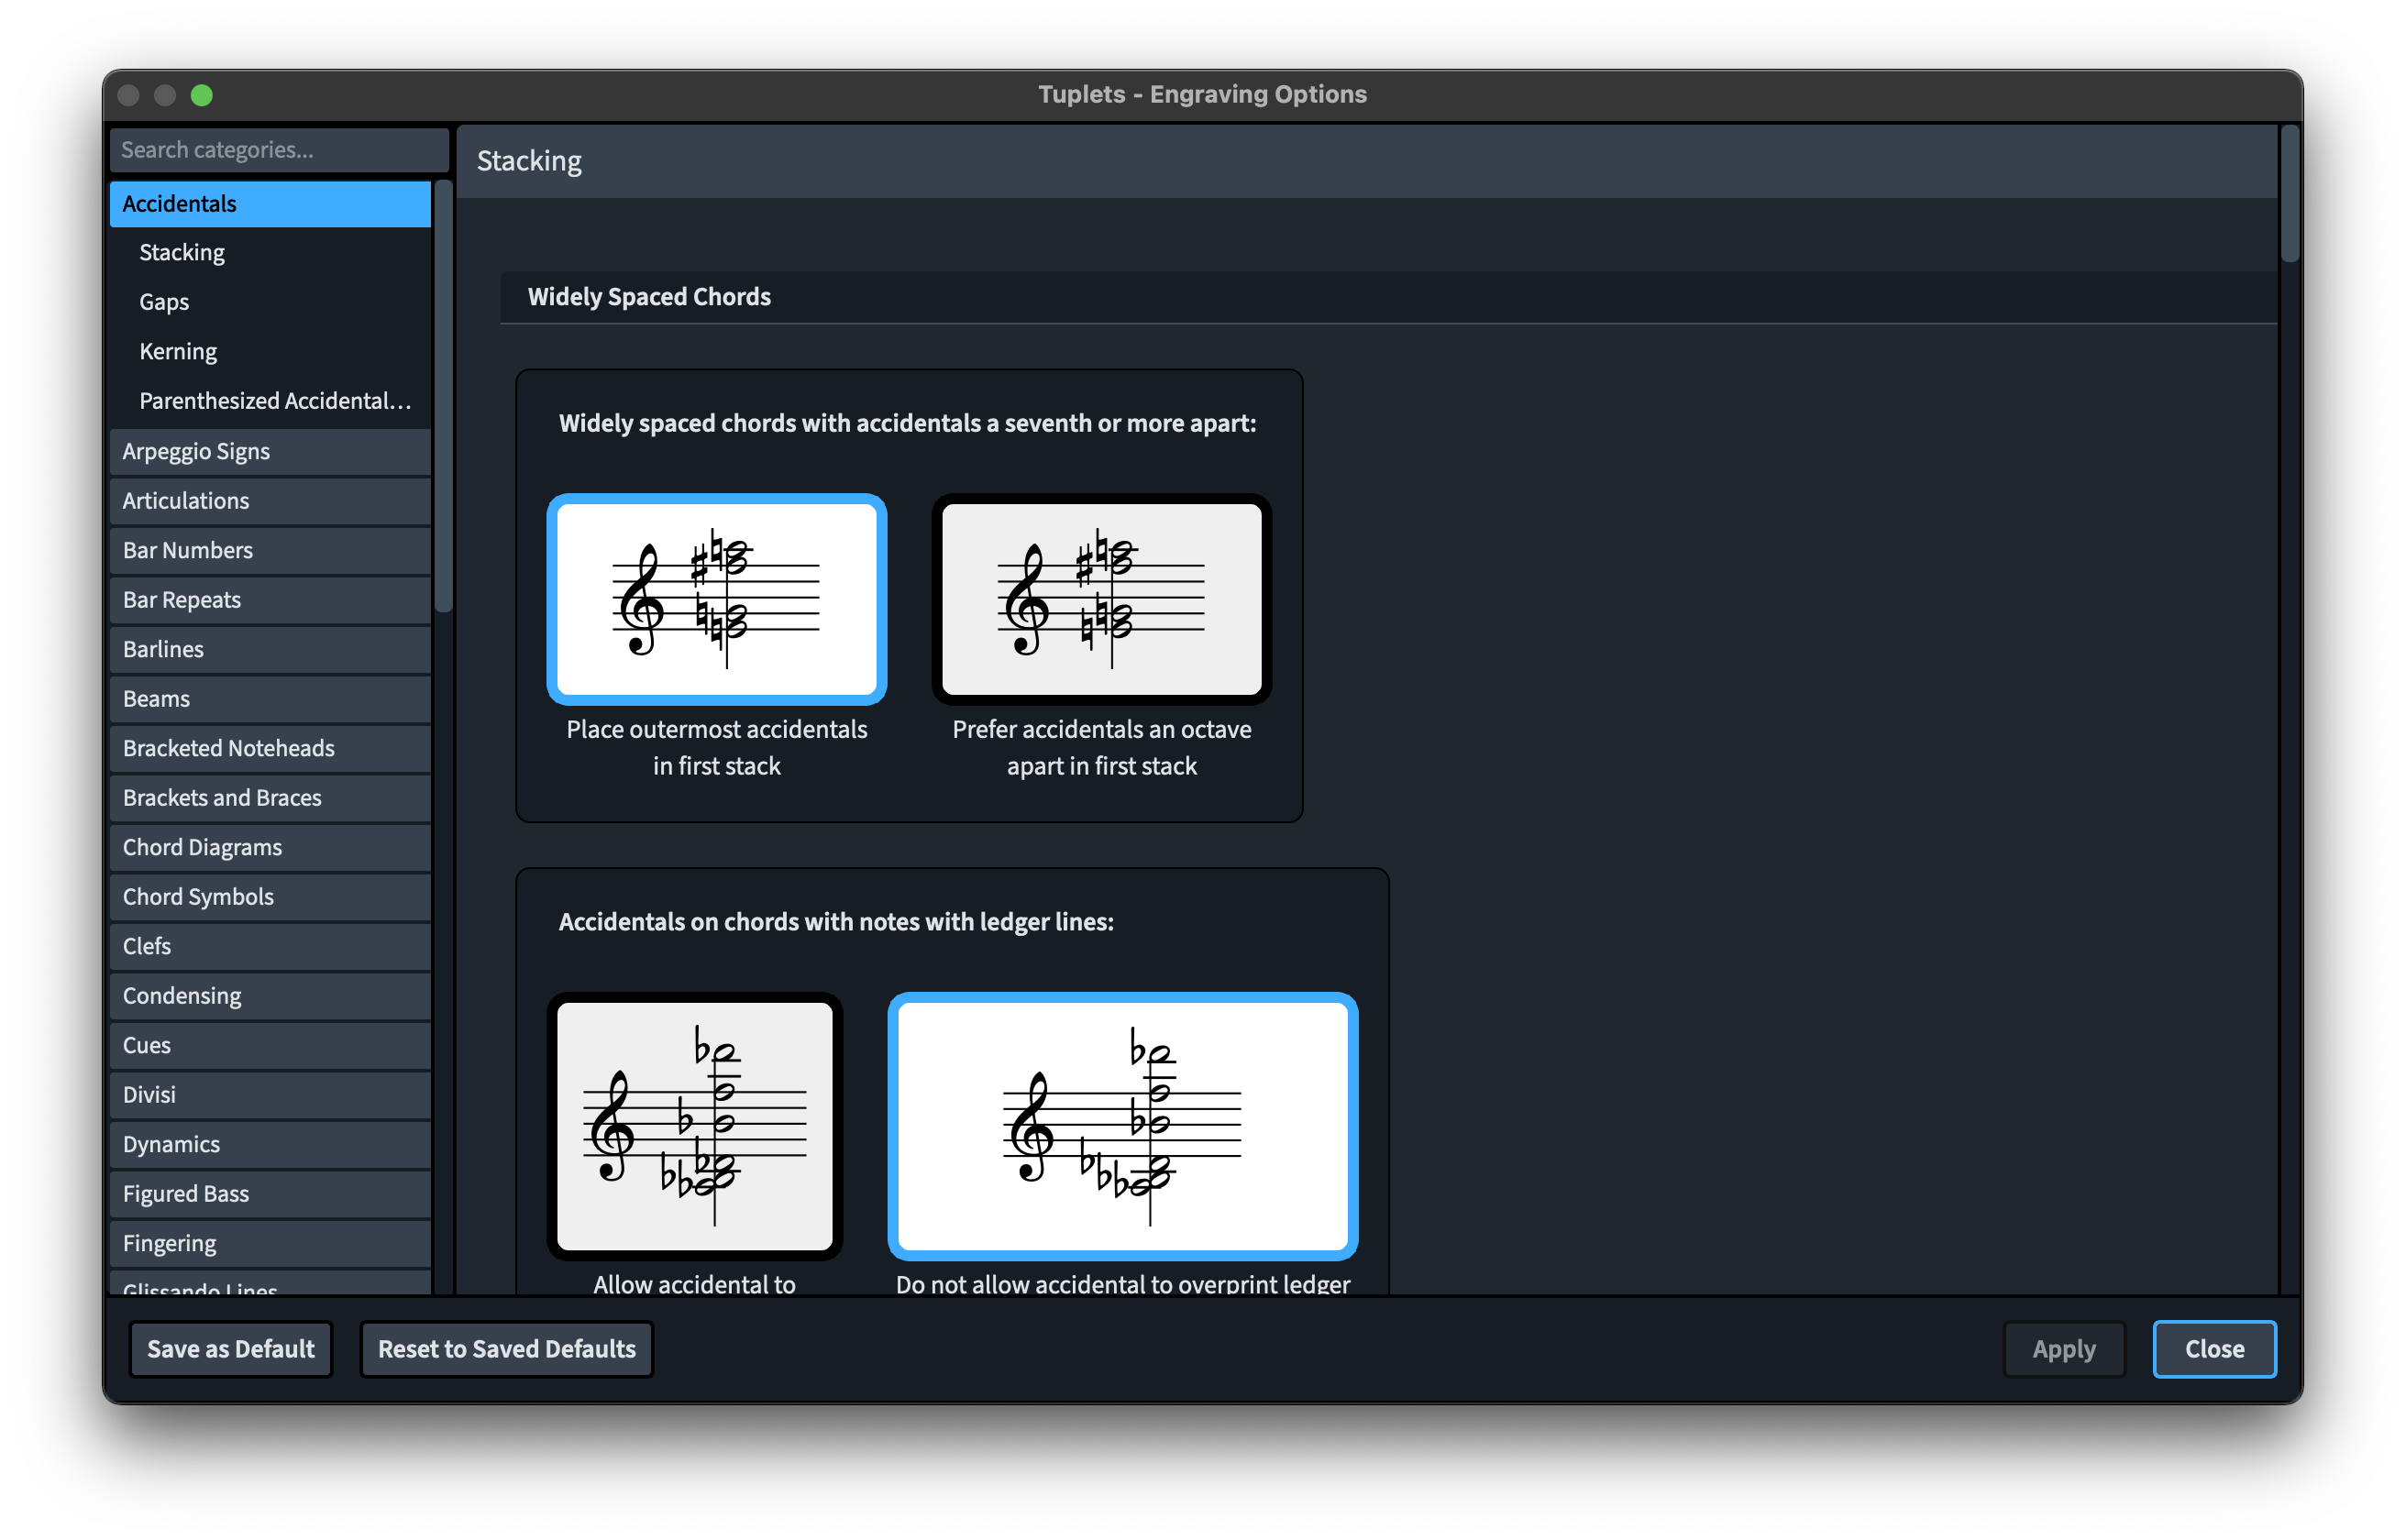
Familiarise with this window by scrolling up and down the list to the left and their expansion to the right, and adjust the size of the window to your liking. Among the categories to the left there are a few of them that may influence tuplets but, for starters, let’s start from the most obvious one, shall we? Scroll down to the bottom of the list or, in this case, simply write tuplets in the search field in the top left of the window to be brought there directly.
You will see that the category is divided into seven sub-categories, which we will analyse one at a time.

Number and Ratio
This category is in itself divided into several subjects, with informative pictures that show the user exactly what is going on. We begin with choosing what we want to display on a bracket should it be needed, be it a number (the default choice), a ratio, a ratio with the note duration or nothing at all.
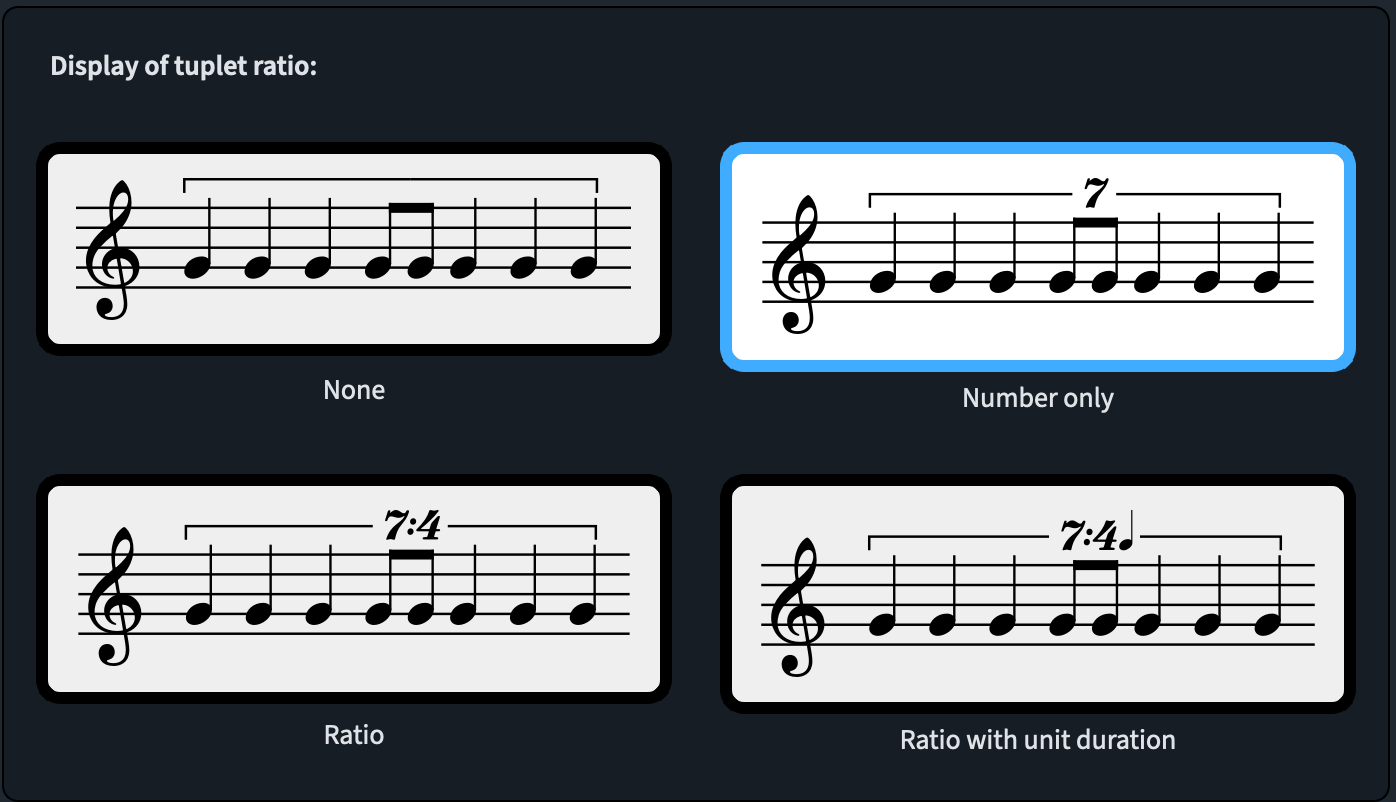
Should you want to change any of these options, be sure to first click on Apply before hitting Close, or your edits will not be saved.
Next, you can choose whether you would like the number/ratio to be positioned at the optical center or at the rhythmic center of the tuplet. What does this mean? In classical notation note spacing can vary a lot according to the written rhythms, so it is normal that the default choice should be “optical center”, and Dorico ships with this selected. The optical center is obtained by calculating the geometrical length of the tuplet and then finding the middle of that segment, and then placing the number exactly there.
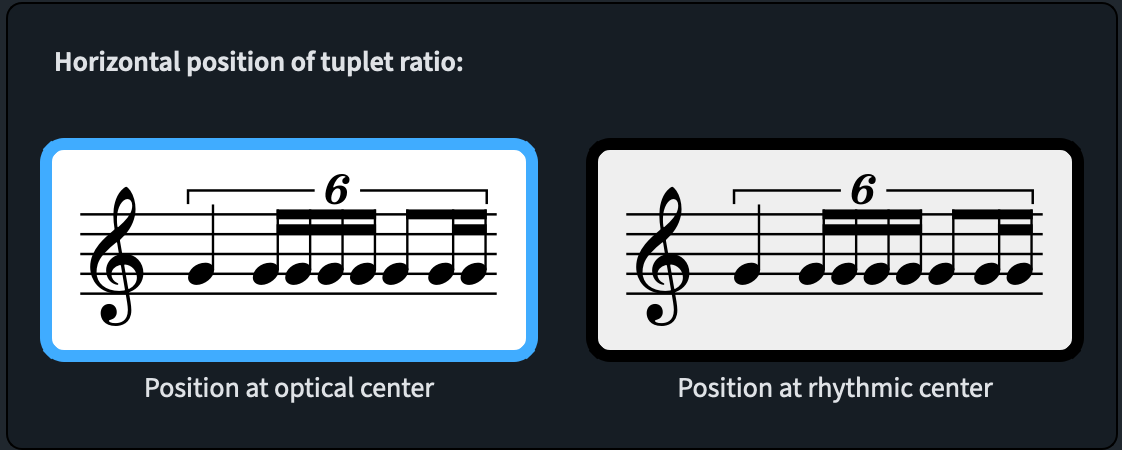
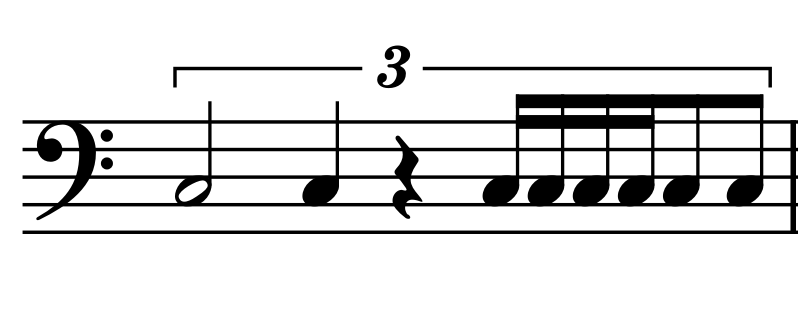
The alternative, instead, positions the number/ratio over the note (or subdivision thereof) that corresponds to the rhythmic center of the group. In the shown example, not exactly brilliant because the difference is so subtle, we can see that, to the left, the 6 is over the third 16th-note, while, to the right, it is slightly after the second 16th note. This would be much more evident in something like this:

Against this:
Unless you are working in contemporary music where rhythmical spacing is paramount, you should keep the default selected here.
The next option lets us choose the style of the tuplet digit, whether we want it bold, regular of in some sort of plain font which looks more modern and that can be found in some scores by composers like Isang Yun published by Bote & Bock, a division of Boosey & Hawkes. I advise you to keep the bold weight unless really necessary, as there would be other things I would change before this one.

To close this category, we have a trio of fine-tuning options you can adjust: the gap between the tuplet ratio and the bracket, the scale factor fo digits in tuplet ratio and the scale factor in notes in tuplet ratio. Let’s use this same example as starting point because occasionally, it appears that the graphical examples employed in these menus have not been entirely created using the software engine.

The gap between tuplet ratio and bracket is set to defaults at 1/2 spaces. Think it is perfect by itself, but it could be slightly less for me, especially to the left of the first digit. Here it is how it changes if we increase this to 1 space:

The scale factor determines how big the tuplet ratio element will be and while we can change the font point size, we can edit this here before. Be careful that even a small edit will produce dramatic results. I have personally always found the size of tuplet ratios to be too big so, in my projects, I am setting this to either 7/8 or even 8/9. The difference is definitely subtle, but I find it less of a punch in the eye like that.

The last option controls the scale of the note, in case we wanted to use the note value next to the ratio. The interesting thing is what these values mean: in the case of the tuplet ratio, I suppose it means what scale of the font point size, but in this case, the default of 1/2 seems to mean that this note is exactly one half of the original size of the note in that staff. I also change this in my projects to anything a bit smaller, like 4/9.
Brackets
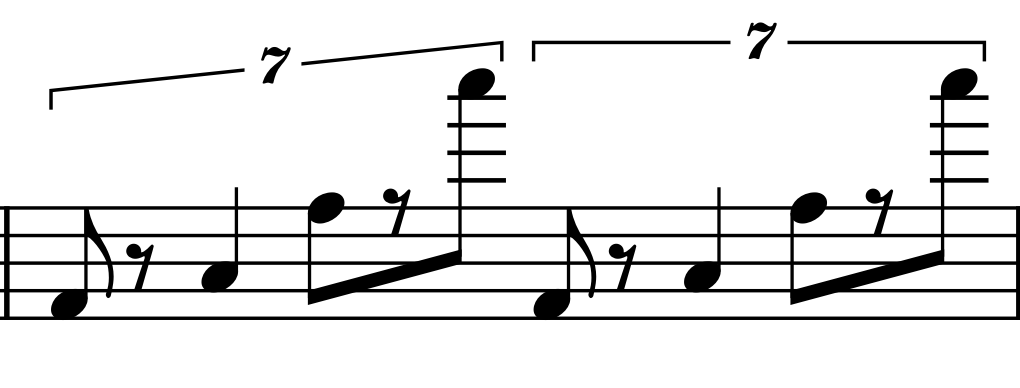
The second category tackles brackets and all what we can do about them. First, we are given the choice of either showing them only when necessary (please leave this selected!) or always showing them. I stress that this second option is there just because we never know how deep the rabbit hole can be, but still, I strongly advise against taking this route as it will make your score look much heavier:

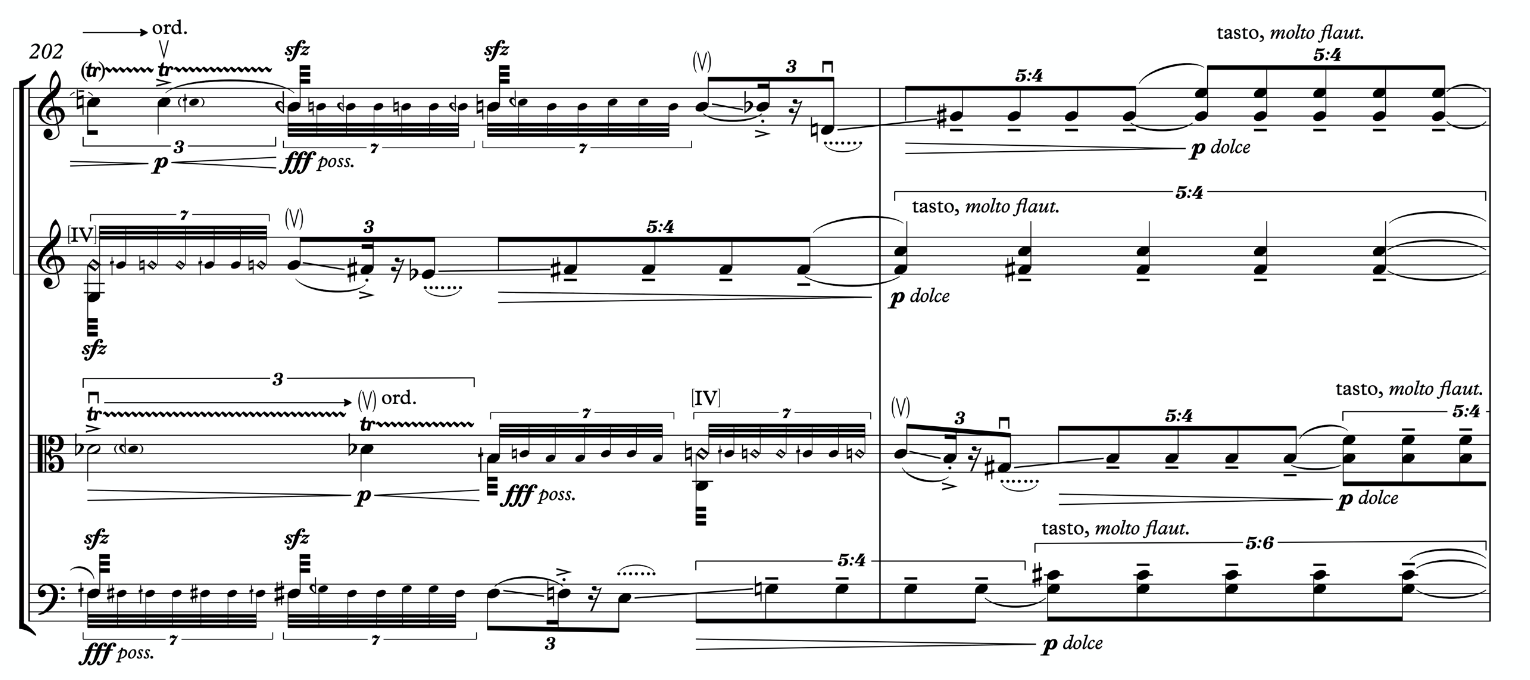
Then, we can choose whether we want to allow angled brackets or not. Angled brackets follow the direction of the pitches they encompass and, in general, I agree with it. When there are many other notational elements between the note and the bracket, though, as it happened to me in this string quartet by William Blank1, the tuplet should be placed external to other notation and horizontal.
In any case, here are the two options Dorico gives us:

The last options let us define the maximum height for angled tuplet brackets, and it is set to 1 3/4 spaces (1.75). Let’s reproduce this example in practice and see what can happen.
The second example has been manually edited so that the left end of the bracket has a Y-offset of one space and three quarters, showing us that this is the limit beyond which Dorico will not go. I would not change this default, as there are so many cases where we may want to intervene manually that we may just have to come back countless times to edit the default value.
Design
The next category gives us two choices, one of which I mentioned in a previous article. The line width of the bracket is set to 1/8 of a space, that is 0.125 spaces, and I find it quite nice. What I do not find pleasant is the hook length. For those of you who have any experience with Sibelius, you will know that Sibelius’s tuplet brackets have a hook length that default at 1.25 spaces, while Dorico proposes 0.75 or 3/4 spaces. Given how big the notation of the tuplet ratio is in Dorico I find it far too little, and I alway increase it to 1.00 spaces in my projects (exactly as I diminish it to the same amount in Sibelius). If you find it too aggressive, also 7/8 of a space is enough.
Horizontal Position
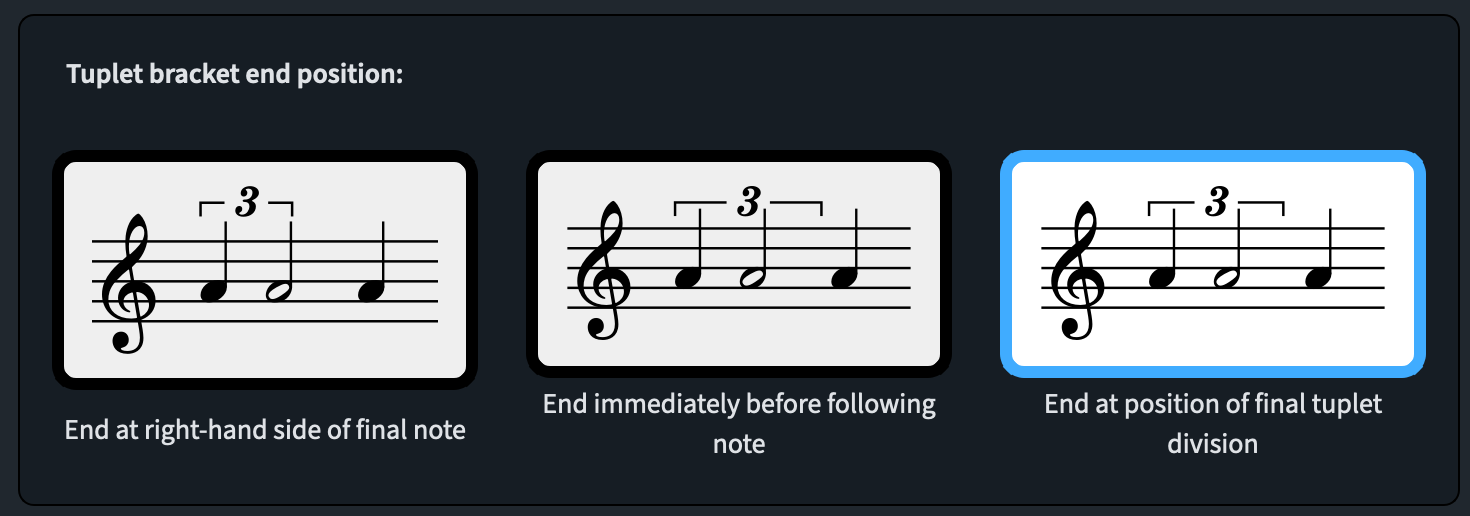
This option lets us decide whether we want the bracket to end just after (or in correspondence to) the last note of the tuplet, immediately before the following note or at the position of the last subdivision of the tuplet. The pictures shown in Engraving Options are not terribly clear, so let me provide you with a clear example, even using their same musical material.
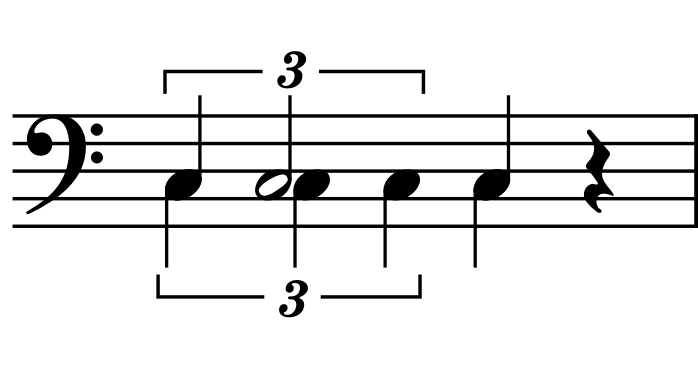
Here is Dorico’s default, that is “End at position of final tuplet division”, and I have created another triplet in a second voice to show this more clearly.
This is what would have happened if we chose the first option, that is “End at right-hand side of final note”:

And this, if we chose the second option, “End immediately before following note”, which is something I would choose quite often in contemporary music, but I just cannot stand how close the bracket comes to the stems.

Another box allows the user to edit the distance between the end of the tuplet bracket and the following chord. It actually says “chord” even if it could only be a note or even a rest, most surely a typo. This distance is set to 1/2 of a space, and there is a note on a dark background saying that “this value is only used when tuplet brackets are set to end immediately before the following chord”. Again, chord …
The next set of options is for when we do not choose this option, but we go for either the first or the third one among these:
Here we see something interesting in engraving: when a note is stem-up, the left end of the tuplet bracket should align perfectly with the left end of the first notehead or rest, while when a note is stem-down, the right end of the tuplet bracket should align with the right end of the last notehead or rest. For this reason, Dorico gives us control over any additional offset we may want for the start of bracket on stem-down tuplets or for the end of bracket on stem-up tuplets. Both these values default to 1/4 of a space, and they generally work well.

In this following case, though, you can see how the bracket ends before the horizontal end of the ledger lines, which is not nice. Increasing the default, though, is not such a good idea and I advise you to resort to Engrave mode for this kind of edits.

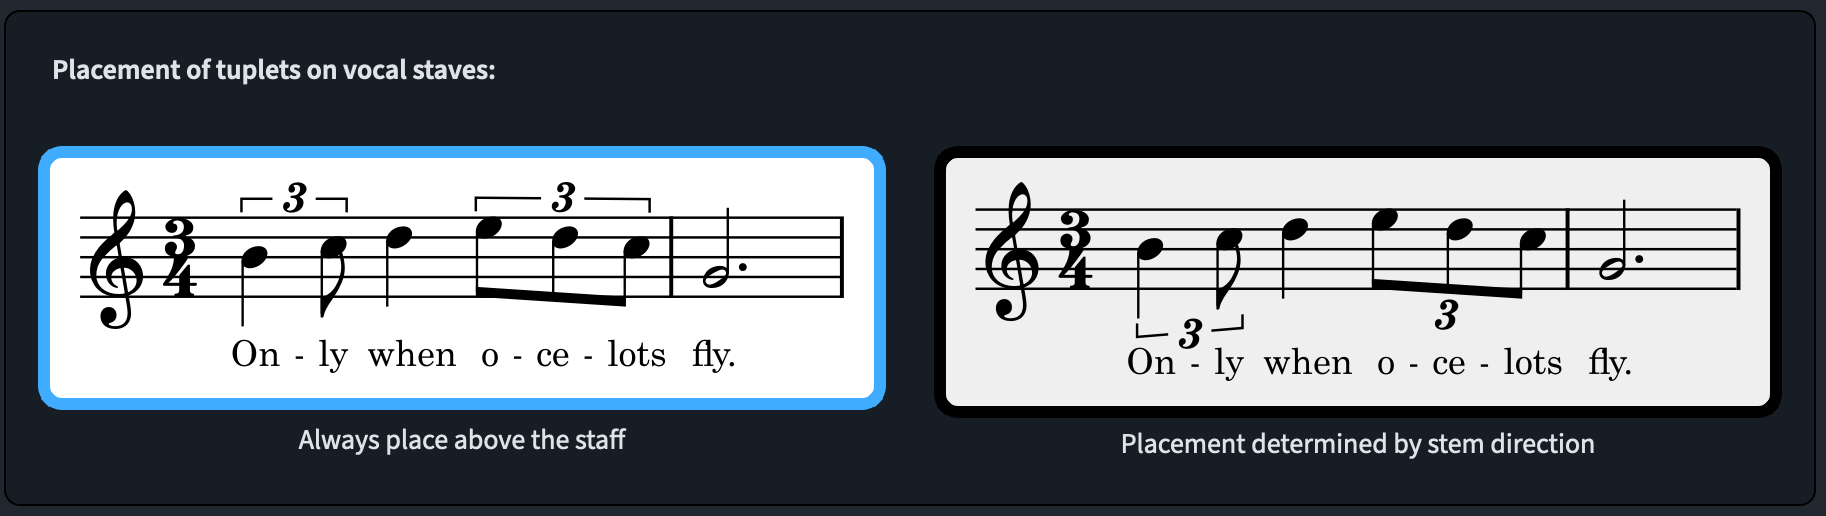
Placement
This very short category simply allows you to choose whether tuplets should always be placed above the staff on vocal staves, or if the stem direction should determine this. I advise you to leave the default like it is.
Vertical position
This category has only one editable field, titled “Minimum distance inside tuplets” and I am happy they included it. It defaults to 1/4 of a space, but as we saw, sometimes this is not enough.

Here is what would happen if we increased the value to 1/2, nice, right?

WRONG! Now the lower tuplet is too far and the upper one still isn’t far enough. So, once more, this will have to be solved in Engrave mode, I’m sorry.
Repeated Tuplets
This last category is fascinating, but I am having a hard time understanding why they did choose to keep the first option the default, as I cannot find a single time when I have had to keep all the ratios visible if they were repeating so much (think of all those studies that are written in 2/4 meter but have only triplets).

In my scores, I choose “Hide ratio and bracket” and hit Apply. Just below, we have a stepper asking us how many of these tuplets should be visible before Dorico hides them. It defaults to 3, but I always turn this down to 2 and then, if I need more, I just adjust it in the Properties panel (Cmd/Ctrl-8). There is a note explaining what this does, but the language is a bit wordy, and it says nothing more than what I have just told you in the last sentence.
The very last option is, instead, critical, and you should absolutely leave this as it is. In short, it asks you whether you would like to keep hiding the tuplets after a rhythmic gap, such as a rest. This would be terrible, so please do not do it.

Bottom Line
And that’s it! Thank you for following this fifth episode in the series.
If you have any question or suggestion, please leave a comment below or contact me using the dedicated contact form. Assuming you do not already do so, please subscribe to my newsletter on Gumroad, to receive exclusive discounts and free products.
If you are looking to greatly enhance your Sibelius experience, please take a moment to consider my viewset for Metagrid that I have published back in February.
I hope you found this article helpful, if you did, please like it and share it with your friends and peers. Don’t forget to follow me on this blog and to let me know what you think.
If you are interested in my music engraving services and publications don’t forget to visit my Facebook page and the pages where I publish my scores (Gumroad, SheetMusicPlus, ScoreExchange and on Apple Books).
You can also support me by buying Paul Hudson’s Swift programming books from this Affiliate Link.
Thank you so much for reading!
Until the next one, this is Michele, the Music Designer.
- realised in Sibelius, let me know if you are interested in why I couldn’t do it in Dorico ↩
