I have just recovered my MacBook Pro from the Apple Store where they replaced keyboard and battery. I was able to practice a bit of SwiftUI this week but not too much as I have also received a huge work to complete in a very short timeframe.
My day count got, yesterday, to 215 days of Learning Swift and to the 28th day of the 100 Days of SwiftUI curriculum. A pity that some things need to have upgraded to Catalina (CreateML), but never mind, I will proceed regardless.
100 Days of SwiftUI – Day 29 : Project 5 WORD SCRAMBLE
Here we begin project 5 which, as Paul says, will be the last easy project we face. We will work on List and on Strings.
To get started, create a new Single View App called “WordScramble”.
Introducing List, your best friend
List is the equivalent of UIKit’s UITableView and it provides a table of data that is scrollable. It is the same as Form, just it is not requesting user input, it is presenting data to the user.
Writing this:
List {
    Text("Hello World")
    Text("Hello World")
    Text("Hello World")
}
…we get this:

While writing this:
ForEach(0 ..< 5) {
    Text("Dynamic row \($0)")
}
…will return 5 rows with written the numbers from 0 to 4 instead of “$0”. Notice how, by now, it is important to use the ..< operator to get the best results. If we want to use the closed range operator we need to add , id: \.self in the parentheses plus other uncomfortable things (I say uncomfortable because even if they explain them to me I keep not understanding why they are even there).
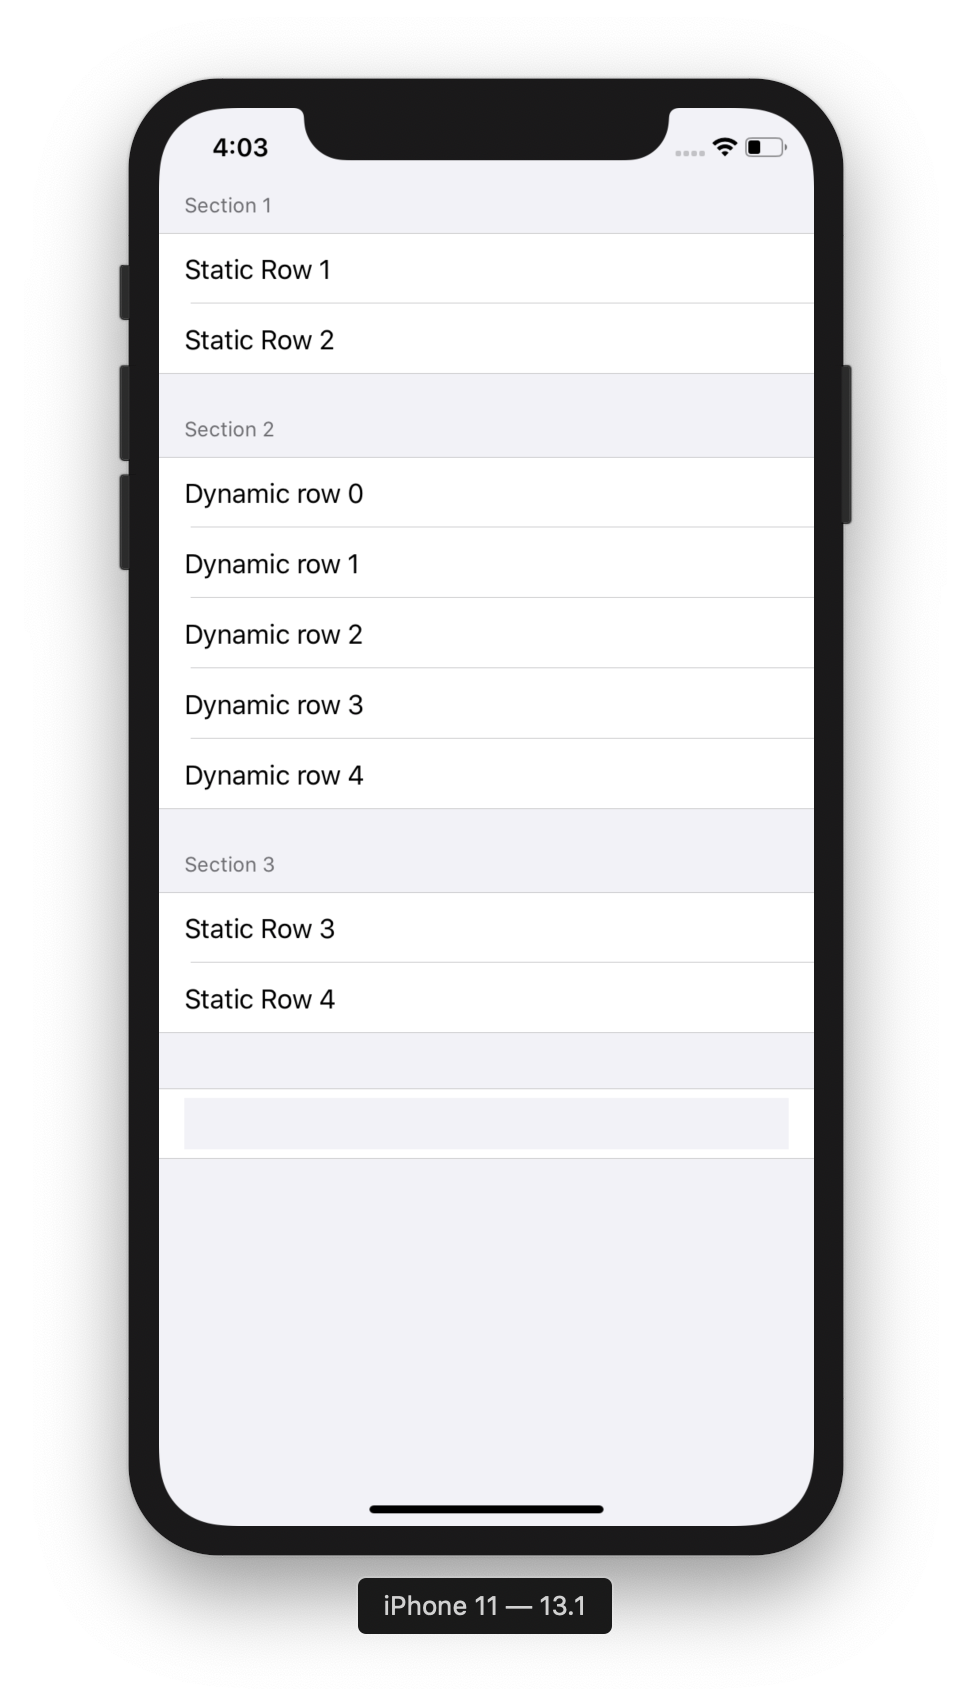
We can also mix dynamic and static rows together and use sections to make the list easier to read.
By applying the listStyle() modifier we can pass between plain and grouped style for our table-view (sorry, I will keep calling it like that!). The only issue is that the Documentation is not showing what the alternatives are and, of course, auto-completion is not helping much more than that. Paul says that the default value, which is unknown to us, gives the plain style while passing as argument GroupedListStyle() will give it the grouped style. Very nice, but how can people know?
One upgrade List has that Form doesn’t is the possibility to generate its rows entirely from a simple range instead of using a ForEach. This requires us to have only dynamic rows. Interestingly enough, you can put a List inside another list, have Xcode compile that and get this result (the inner list is at the bottom)…
When we need to work with arrays of data we need to pass the name of the array as first argument to our List closure, then add the id: \.self parameter as second argument. At this point we will be able to call $0 without string interpolation.
Loading resources from your app bundle
The first concept to grasp here is that when Xcode builds an app, for any Apple platform, it creates a new entity called Bundle! In a “bundle” are stored all the artwork, extra files, binary code and more, all in a single place.
The second concept is the one of a URL, Uniform Resource Locator, which allows us to identify the exact location of a file.
To read the URL for a file we need this code:
if let fileURL = Bundle.main.url(forResource: "some-file", withExtension: "txt") {
	// we found the file in our bundle!
}
Once we have this special address, we can load its content into a string, like this:
if let fileContents = try? String(contentsOf: fileURL) {
	// we loaded the file into a string!
}
Be careful that this code, just placed there in a class or wherever else alone, will not compile, for reasons that are quite obscure to me but that I hope will be clarified pretty soon. In UIKit we would put this into the viewDidLoad() method but here?
Working with strings
In this lesson we are going to meet some of the ways we can work with strings.
This will create an array of three elements:
let input = "a b c"
let letters = input.components(separatedBy: " ")
Once we have this array we can read one of its elements by calling letters.randomElement().
Another nice method is the trimmingCharacters(in:) one, which is so described:
Returns a new string made by removing from both ends of the String characters contained in a given character set.
The in: parameter accepts many arguments, the most interesting of which is .whitespacesAndNewlines, which does exactly what its name says: it removes any whitespace and any newline character from each end of a string.
The last thing covered here is the spell checking feature. It requires four steps in total:
- Create a word to check and an instance of
UIChecker
This is so described:
Summary
An object you use to check a string (usually the text of a document) for misspelled words.
Declaration
Discussion
UITextCheckerspell-checks using a lexicon for a given language. You can tell it to ignore specific words when spell-checking a particular document and you can have it learn words, which adds those words to the lexicon. You generally use one instance ofUITextCheckerper document, although you can use a single instance to spell-check related pieces of text if you want to share ignored words and other state.You may also use a text checker to obtain completions for partially entered words, as well as possible replacements for misspelled words, which you then can present to users.
- Tell the checker how much of our string we want to check, using
NSRange(let range = NSRange(location: 0, length: word.utf16.count)). The UTF-16 is a character encoding, used to bridge between Objective-C and Swift. - Ask the checker to … well… check, using the word, range, start position and whether it should wrap around when it finishes, along with the dictionary to use.
That’s it for today! Come back tomorrow for the rest of the project!
Thank you for reading!
If you like what I’m doing here please consider liking this article and sharing it with some of your peers. If you are feeling like being really awesome, please consider making a small donation to support my studies and my writing (please appreciate that I am not using advertisement on my articles).
If you are interested in my music engraving and my publications don’t forget visit my Facebook page and the pages where I publish my scores (Gumroad, SheetMusicPlus e ScoreExchange).
You can also support me by buying Paul Hudson’s book from this Affiliate Link.
Anyways, thank you so much for reading!
Till the next one!
